


6
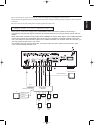
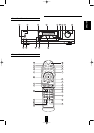
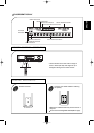
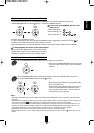
1. Connecting AUDIO OUTs
Connect these jacks to the AUDIO INs of DVD(, AUX, CD,
etc.) of your amplifier or receiver.
Note :
• While playing a multi channel (5.1 channel) program source
recorded in Dolby Digital, DTS, etc., the 5 discrete
channels(front L/R, center and surround L/R) are mixed
down to these front and headphone channels. In this case,
you can hear sound from the front speakers and
headphones.
2. Connecting VIDEO OUTs
The COMPONENT VIDEO OUTs of this unit are capable of
outputting either conventional interlacing video signal or
progressively scanned video signal(that can reproduce high-
density pictures with less flicker).
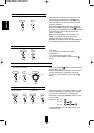
• According to VIDEO OUTs, the excellence in picture quality
is as follows:
Progressive “COMPONENT” > Interlaced “COMPONENT” >
“S-VIDEO” > “COMPOSITE”
• When making COMPONENT VIDEO connections, connect
“Y/PY” to “Y”, “Cb/Pb” to “Cb”(, “Pb”, “B-Y”), “Cr/Pr” to “Cr”(,
“Pr”, “R-Y”).
• Depending on the type of the COMPONENT VIDEO INs of
TV, be sure to set the COMPONENT OUT to the
corresponding setting.(Refer to “When selecting the
COMPONENT OUT” on page 33 or “CHANGING THE
COMPONENT VIDEO OUTPUT SIGNAL” on page 26.)
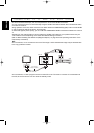
• If there are both VIDEO INs and (MONITOR) VIDEO OUTs
on your amplifier or receiver, connect these jacks to the
corresponding VIDEO IN jacks of your amplifier or receiver
and (MONITOR) VIDEO OUT jacks of that to the
corresponding VIDEO IN jacks of the TV respectively.
• If there are no VIDEO jacks, connect these jacks to the TV
directly. (Refer to “CONNECTING TO TV WITH AUDIO AND
VIDEO INS” on the next page.)
• You can connect the COMPOSITE VIDEO 2 jack to an
additional monitor TV.
Notes:
• When the COMPONENT OUT is set to PROGRESSIVE, the
S-VIDEO and COMPOSITE VIDEO OUTs can not output the
normal video signals. Therefore, it causes the picture to
break up and shake.
• When the progressive video signals are input into the non-
progressive COMPONENT VIDEO INs of your TV, the
picture may not be shown normally, too.
Therefore, when the progressive COMPONENT VIDEO INs
of TV are not connected to, you should set the
COMPONENT OUT to INTERLACED.
• Do not connect the unit to the TV through a VCR. Otherwise
the picture may be disturbed due to the copy protection
function.
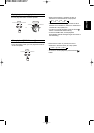
3. Connecting DIGITAL OUTs
You can enhance the sound quality by connecting these
COAXIAL and OPTICAL DIGITAL OUTs to the corresponding
DIGITAL INs of an amplifier, MD recorder, etc.
The digital audio signal from a disc is directly transferred. If
you connect to a DTS, Dolby Digital or MPEG-II decoder or an
amplifier with built-in decoder, you can enjoy theater-quality
audio in your home.
Notes :
• When you connect the audio equipment with a digital input,
before using, set the AUDIO SETUP correctly according to the
connected audio equipment with a digital input.
When the AUDIO SETUP is not set correctly, loud noise or
no sound may be heard from the speakers, and it may be
harmful to your ears and damages the speakers.(Refer to
“SETTING THE AUDIO SETUP” on page 35.)
• When you connect the MD or CD recorder with a digital input
for digital recording, the LPCM SELECT should be set to
LPCM 48K. If not, the digital recording do not perform
properly. (Refer to “SETTING THE AUDIO SETUP” on page
35.)
• When making the COAXIAL DIGITAL connection, be sure to
use a 75 Ω COAXIAL cord, not a conventional AUDIO cord.
• All of the commercially-available optical fiber cords cannot
be used for audio equipments. If there is an optical fiber cord
which cannot be connected to your audio equipments,
consult your dealer or nearest service organization.
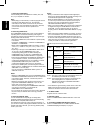
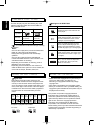
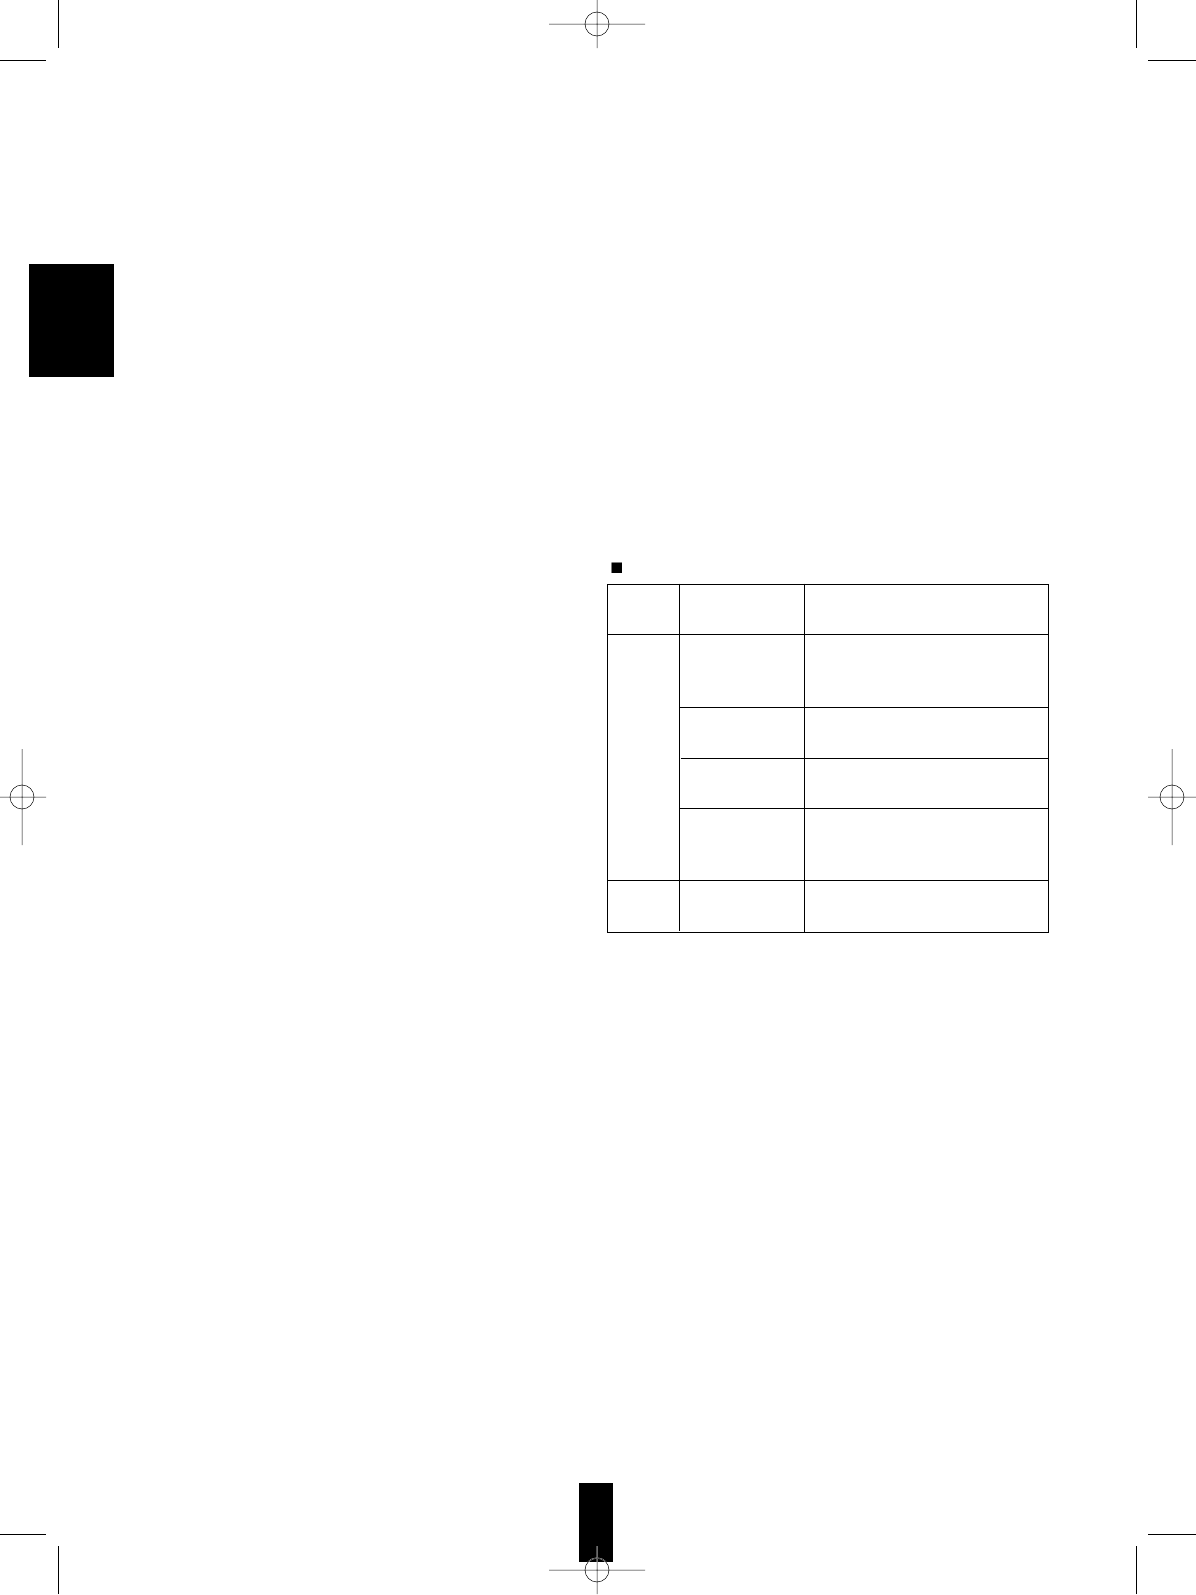
Audio output from the unit’s DIGITAL OUTs
Note 1 : The type of audio output from the DIGITAL OUTs can
be selected by the DIGITAL OUT settings.
Note 2 : Sound having 96 kHz sampling is converted into 48
kHz sampling when it is output from the unit’s
DIGITAL OUTs.(Refer to “SETTING THE AUDIO
SETUP” on page 35.)
• Linear PCM is a signal recording format used in music CDs.
While music CDs are recorded in 44.1 kHz/16 bit, DVD
Videos are recorded in 48 kHz/16 bit to 96 kHz/24 bit.
4. AC INPUT CORD
Plug this cord into a wall AC outlet.
5. DIGI LINK JACKs
Refer to “CONNECTING SYSTEM CONTROL” on the next
page.
6. A/V SCART CONNECTORs (Regional Option)
Refer to “CONNECTING TO TV AND VCR WITH SCART
CONNECTORS(Regional Option)” on page 8.
Disc
Audio recording
format
Audio output
DVD
Video
Dolby Digital
Dolby Digital bitstream
(2~5.1ch) or PCM(48 kHz/16bit)
(2ch) (Note 1)
DTS
DTS bitstream or PCM(48 kHz/
16 bit) (2ch) (Note 1)
Linear PCM
(48/96 kHz,
16/20/24bit)
Linear PCM (48 kHz/16bit)
(2ch) (Note 2) or original signal
MPEG-II
MPEG bitstream or
PCM(48 kHz/
16 bit) (2ch) (Note 1)
Linear PCM
CD/
MP3 disc
Linear PCM (44.1 kHz)
ENGLISH