


— 17 —
KV-27S40 / 27S45 / 27S65 / 29SL40 / 29SL40A / 29SL40C/
29SL45 / 29SL65 / 29SL65C/ 29XL40M / 29XL40P / 29XT11A
22
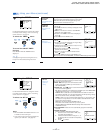
DAYLIGHT
SAVING
Automatically adjusts
the time.
CURRENT
TIME SET
Necessary for the
TIMER.
ON/OFF TIMER
Wake up or
scheduled viewing.
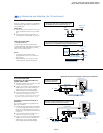
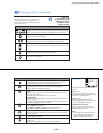
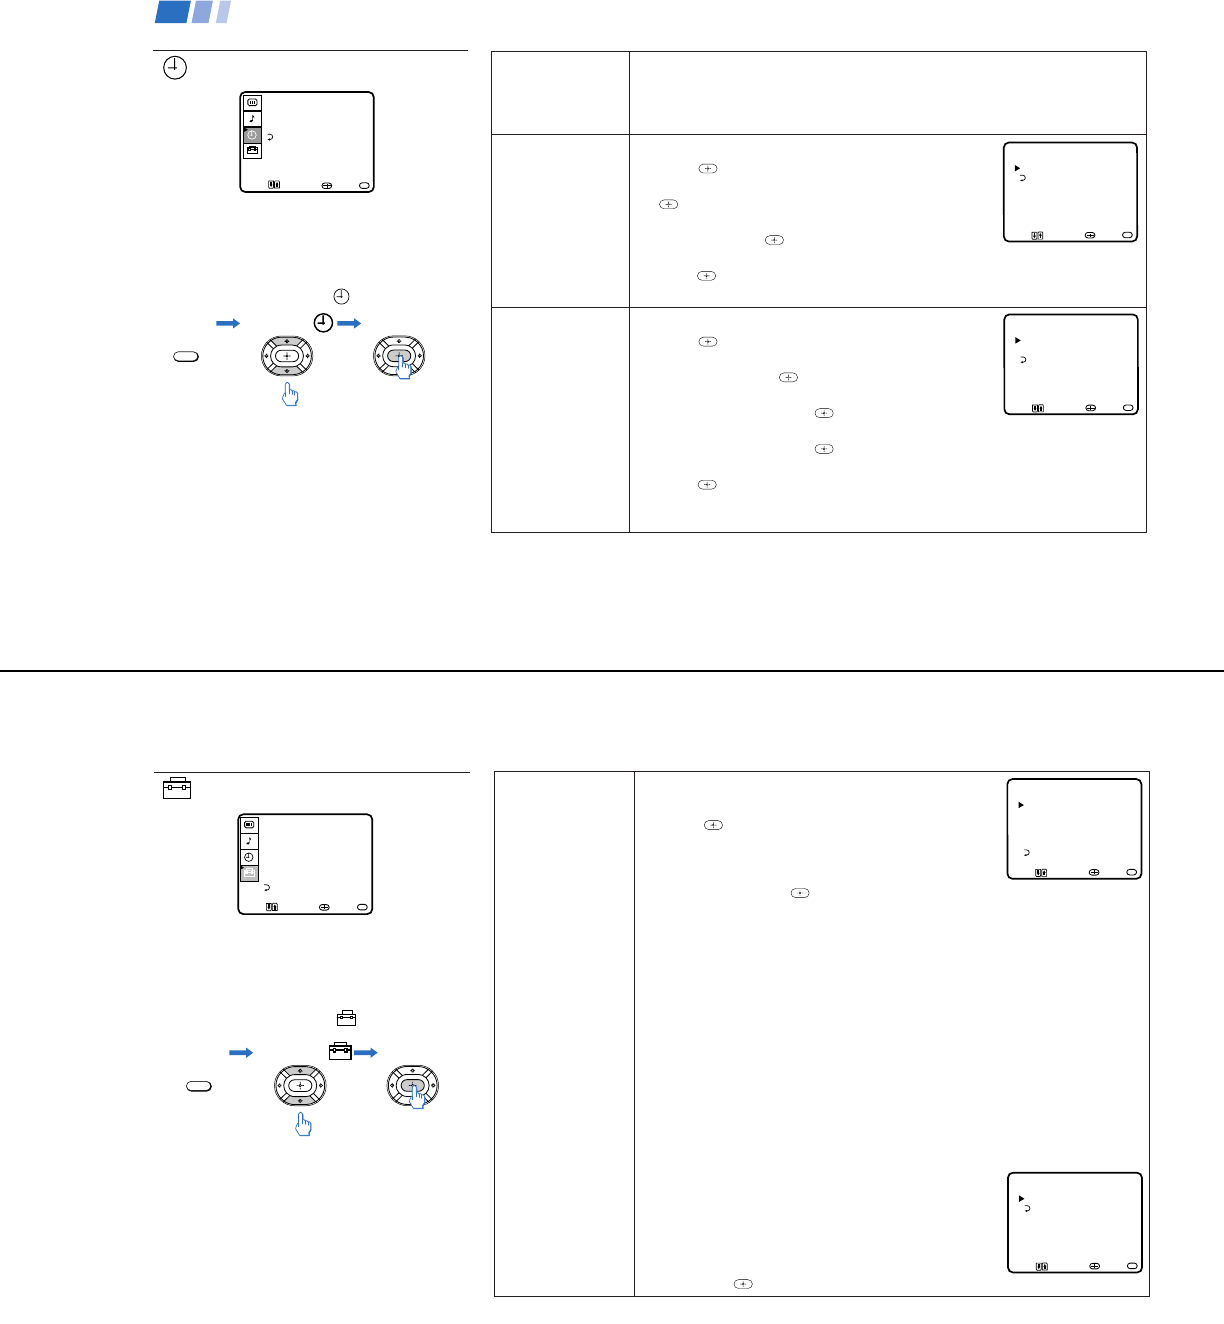
Using the TIMER menu
For detailed information on using the remote
to modify menu settings, refer to “Learning
menu selection” on page 18.
To select the TIMER menu:
MENU
Display Highlight Select
Tip
z
Set daylight saving time before setting the clock. Any
loss of power will cause these settings to be erased.
TIMERŁ
DAYLIGHT
SAVING:
YES
CURRENT TIME SET Ł
ON/OFF TIMER
MENU
MENU
Move Select Exit
Spring: Select YES to compensate for Daylight Saving Time.
The current time automatically moves one hour ahead.
Fall: Select NO at the end of Daylight Saving Time.
The current time moves back one hour.
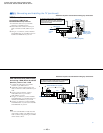
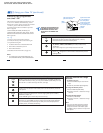
CURRENT TIME SET menu will appear.
1 Press
.
2 Press V or v until the current day is displayed. Press
to select.
3 Press V or v until the current hour and AM/PM is
displayed. Press
to select.
4 Press V or v until the current minute is displayed,
press
.
The clock is set. Press MENU to exit.
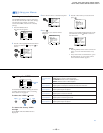
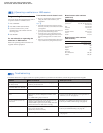
ON/OFF TIMER menu will appear.
1 Press
.
2 Press V or v until the desired day or range of days
is displayed. Press
to select.
3 Indicate the time that you want the TV to turn on by
pressing V or v and then
.
4 Set the time duration (maximum of 6 hours) by
pressing V or v and then
.
5 Press V or v until you reach the desired channel.
Press
to select.
The ON/OFF TIMER is now set. Press MENU to exit.
When you perform AUTO PROGRAM, all ON/OFF TIMER settings will be erased.
CURRENT TIME SETŁ
Ł
___--:-- AMŁ
MENU
Move Select Exit
MENU
ON/OFF TIMERŁ
Ł
___Ł
--:-- AM_h CH____Ł
MENUŁ
SUN 12:00 AM
Move Select Exit
MENU
Using your Menus (continued)
To cancel the ON/OFF TIMER
function
Press RESET while the TIMER menu is
displayed.
23
CHANNEL
SET UP
Basic set up
options for
viewing
With the CHANNEL SET UP menu open:
1 Use V or v to access the feature you want to change.
2 Press
to select the feature.
CABLE: Select ON if your TV is connected to a cable
system. (After setting CABLE, you will need to run
AUTO PROGRAM.)
CHANNEL FIX: Press and then use the V or v buttons to set the TV's input
to one of the following options:
2-6: When a cable box is connected to the VHF/UHF input. Press DBS/CABLE
(FUNCTION) and then CH +/– to change channels.
AUX 2-6: When a cable box is connected to AUX and a cable or antenna is
connected to VHF/UHF. You can alternate between the two inputs by pressing
ANT on the remote control. (KV-27S65, 27V65 only)
VIDEO 1: When you have connected video equipment (e.g. A/V receiver) and
you want the TV input fixed to it. You will be able to alternate between video
sources using the A/V receiver.
OFF: When you want to switch CHANNEL FIX off.
Press ANT on the remote control until you reach a picture.
ON/OFF TIMER and CHANNEL BLOCK settings will be erased when
CHANNEL FIX is set.
AUTO PROGRAM: Instructs the TV to automatically program all receivable
channels.
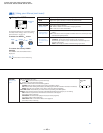
CHANNEL SKIP/ADD:
With the CHANNEL SKIP/ADD window open:
1 Place the cursor next to SKIP or ADD. (only
one option will be displayed)
2 Choose the desired channel using CH +/–, or
by selecting with the 0-9 buttons and pressing
ENTER.
3 Press
to activate.
Using the SET UP menu
For detailed information on using the remote
to modify menu settings, refer to “Learning
menu selection” on page 18.
To select the SET UP menu:
MENU
Display Highlight Select
Notes
• The FAVORITE CHANNEL feature is not
available for the AUX input.
• Your remote control can be programmed to
operate your cable box. (see page 28)
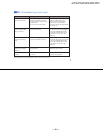
CHANNEL SET UPŁ
Ł
CABLE: ONŁ
CHANNEL FIX: OFFŁ
AUTO PROGRAM
CHANNEL SKIP/ADDŁ
CHANNEL CAPTIONŁ
MENU
Move Select Exit
MENU
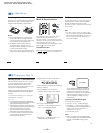
SET UP
CHANNEL SET UPŁ
FAVORITE CHANNELŁ
CHANNEL BLOCKŁ
VIDEO LABELŁ
CAPTION VISION:CC1
LANGUAGE: ENGLISH
MENU
Move Select Exit
MENU
CHANNEL SKIP/ADDŁ
33Ł
SKIPŁ
MENUŁ
use (0-9) or (CH+/-)
to select the channel
Move Select Exit
MENU