49
Playback
Notes on playing DTS sound tracks on a
CD
• When playing DTS-encoded CDs, excessive
noise will be heard from the LINE OUT (R-
AUDIO-L) jacks. To avoid possible damage to
the audio system, the consumer should take
proper precautions when the LINE OUT (R-
AUDIO-L) jacks of the recorder are connected to
an amplification system. To enjoy DTS Digital
Surround™ playback, an external DTS decoder
must be connected to the DIGITAL OUT jack of
the recorder.
• Set the sound to “Stereo” using the AUDIO
button when you play DTS sound tracks on a CD
(page 48).
Notes on playing DVDs with a DTS sound
track
DTS audio signals are output only through the
DIGITAL OUT (COAXIAL) jack.
When you play a DVD with DTS sound tracks, set
“DTS” to “On” in the “Audio” setup (page 75).
* DivX video file only
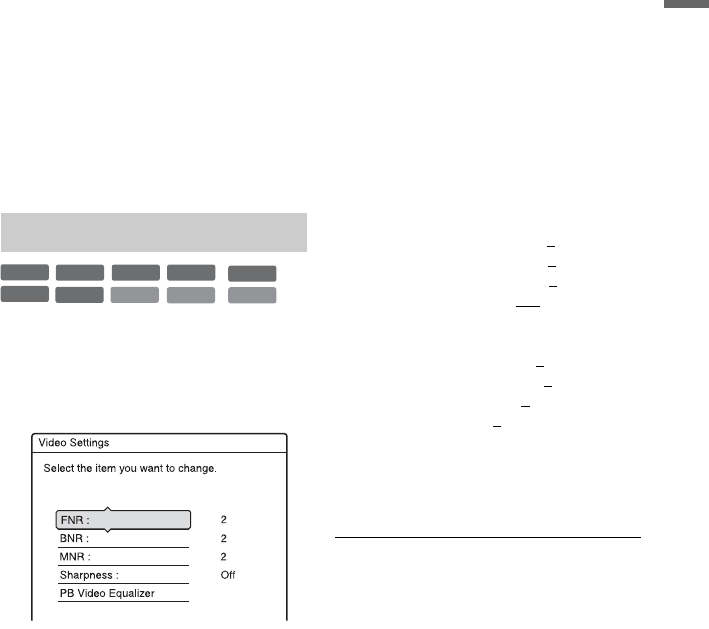
1 Press OPTIONS during playback to
select “Video Settings,” and press
ENTER.
2 Select an item, and press ENTER.
The adjustment display appears.
“FNR” (frame noise reduction):
Reduces noise contained in the
luminance element of the video signal.
“BNR” (block noise reduction):
Reduces “block noise” or mosaic like
patterns in the picture.
“MNR” (mosquito noise reduction):
Reduces the faint noise appearing around
the outlines of the images. The noise
reduction effects are automatically
adjusted within each setting range
according to the video bit rate and other
factors.
“Sharpness”:
Sharpens the outlines of the images.
“PB Video Equalizer” (Playback video
equalizer):
Adjusts the picture in greater detail.
Select an item and press ENTER.
• Contrast: changes the contrast.
• Brightness: changes the overall
brightness.
• Colour: makes the colours deeper or
lighter.
• Hue: changes the colour balance.
3 Press </, to adjust the setting, and
press ENTER.
The default settings are underlined.
“FNR”: (weak) Off 1 2
3 (strong)
“BNR”: (weak) Off 1 2 3 (strong)
“MNR”: (weak) Off 1 2
3 (strong)
“Sharpness”*: (weak) Off
1 2 3
(strong)
“PB Video Equalizer”:
• Contrast: (weak) –3 ~ 0
~ 3 (strong)
• Brightness: (dark) –3 ~ 0 ~ 3 (bright)
• Colour: (light) –3 ~ 0
~ 3 (deep)
• Hue: (red) –3 ~ 0
~ 3 (green)
Repeat steps 2 and 3 to adjust any other
items.
* “1” softens the outlines of the images. “2”
enhances the outlines and “3” enhances them
more than “2.”
b Notes
• If the outlines of the images on your screen
become blurred, set “BNR” and/or “MNR” to
“Off.”
• Depending on the disc or the scene being played,
the above BNR, MNR, or FNR effects may be
hard to discern. And, these functions may not
work with some screen sizes.
• When using the “Sharpness” function, noise
found in the title may become more apparent. In
this case, it is recommended that you use the BNR
function with the “Sharpness” function. If the
condition still does not improve, set the
“Sharpness” level to “Off.”
Adjusting the picture quality
+
R
DVD
VCD
-
RWVR
-
RW
Video
+
RW
-
RVR
-
R
Video
DATA DVD
*
DATA CD
*
,continued
