43
Timer Recording
4 Select “OK,” and press ENTER.
The “TIMER LIST” display (page 47)
appears. The TIMER REC indicator
lights up on the front panel and the
recorder is ready to start recording.
Unlike a VCR, there is no need to turn off
the recorder before the timer recording
starts.
To stop recording during timer recording
Press x REC STOP.
Note that it may take a few seconds for the
recorder to stop recording.
About the PDC/VPS function
PDC/VPS signals are transmitted with TV
programmes in some broadcast systems.
These signals ensure that timer recordings are
made regardless of any broadcast delays,
early starts, or broadcast interruptions.
To use the PDC/VPS function
Set “PDC/VPS” to “On” in step 3 above.
When you turn on this function, the recorder
starts scanning the channels before the timer
recording starts. If you are watching TV
when scanning starts, a message will appear
on the TV screen. If you want to watch TV,
switch to your TV’s tuner or turn off the
PDC/VPS channel scan function.
Note that if you turn off the PDC/VPS
channel scan function, the timer recording
will not start.
To temporarily turn off PDC/VPS channel
scan
Press OPTIONS and select “PDC/VPS Scan
Off.”
To ensure that the PDC/VPS function works
properly, turn off the recorder before the
timer recording starts. This will
automatically turn on the PDC/VPS channel
scan function while the recorder remains off.
Rec Mode Adjust
If there is not enough available disc space for
the recording, the recorder automatically
adjusts the recording mode to enable the
entire programme to be recorded. Set “Rec
Mode Adjust” of the “Timer Settings” to
“On” in the “Recording” setup (page 92).
Auto Title Erase (HDD only)
If there is not enough space for a timer
recording, the recorder automatically erases
old titles recorded on the HDD. The oldest,
played title is erased. Set “Auto Title Erase”
of the “Timer Settings” to “On” in the
“Recording” setup (page 92). Protected titles
are not erased.
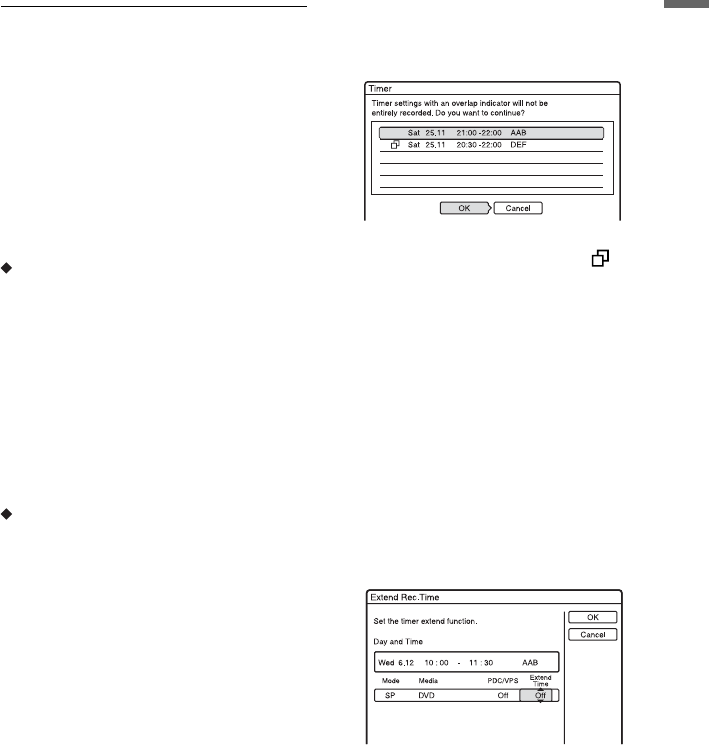
If the timer settings overlap
Overlapped timer settings are shown as
follows.
To store the setting as shown, select “OK.”
The programme that does not have a
mark next to it has priority and the
overlapped programmes start recording only
after the first programme has finished.
To cancel the overlapped setting, select
“Cancel.”
To confirm, change, or cancel a timer
recording
See “Checking/Changing/Cancelling Timer
Settings (Timer List)” on page 47.
To extend the recording duration time
while recording
1 Press OPTIONS during recording to
select “Extend Rec,” and press ENTER.
2 Press M/m to select the duration time.
You can set the duration in increments of
10 minutes, for a maximum of 60
minutes.
3 Select “OK” and press ENTER.
,continued
