30
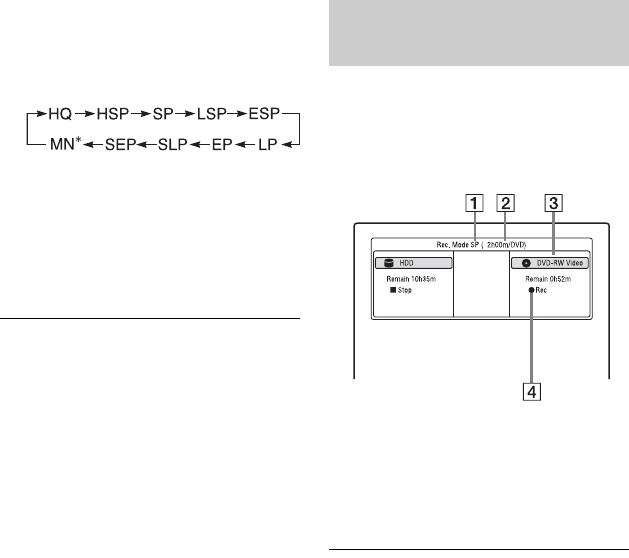
3 Press REC MODE repeatedly to select
the recording mode.
Each time you press the button, the
display on the TV screen changes as
follows:
* Available when “Manual Rec. Mode” is set
to “On (go to setup)” in the “Recording”
setup (page 107).
For more details about the recording
mode, see page 124.
4 Press z REC.
Recording starts.
To stop recording
Press x REC STOP.
To pause recording
Press X.
To resume recording, press X again.
To watch another TV programme while
recording
Set your TV to the TV input using the
TV t button (page 22).
b Notes
• If you press the [/1 button while recording, the
recorder stops recording and turns off.
• After pressing the z REC button, it may take a
short while to start recording.
• It may take a short while for recorder to stop or
pause recording.
• You cannot change the recording mode while
recording.
• Programmes are recorded in the original aspect
ratio when recording to the HDD (when “HDD
Recording Format” is set to “Video Mode Off”
in the “Recording” setup (page 108))/DVD-
RWs/DVD-Rs (VR mode).
• When recording to DVD-R DLs (Video mode),
the title is divided when the layer switches.
• If there is a power failure, the programme you
are recording may be erased.
You can check the recording information
such as recording time or disc type.
Press DISPLAY during recording.
The recording information appears.
A Recording mode
B Recording time
C Disc type/format
D Recording status
To turn off the display
Press DISPLAY repeatedly.
Checking the disc status while
recording
