41
Recording
Recording
Timer Recording
You can set the timer for a total of 32
programmes, up to 30 days in advance.
Set the date, time, and programme position
of the programme manually.
Before you start recording…
• Check that the disc has enough available
space for the recording (page 33). For the
HDD, DVD+RWs, and DVD-RWs, you
can free up disc space by erasing titles
(page 55).
• Adjust the recording picture quality if
necessary (page 93).
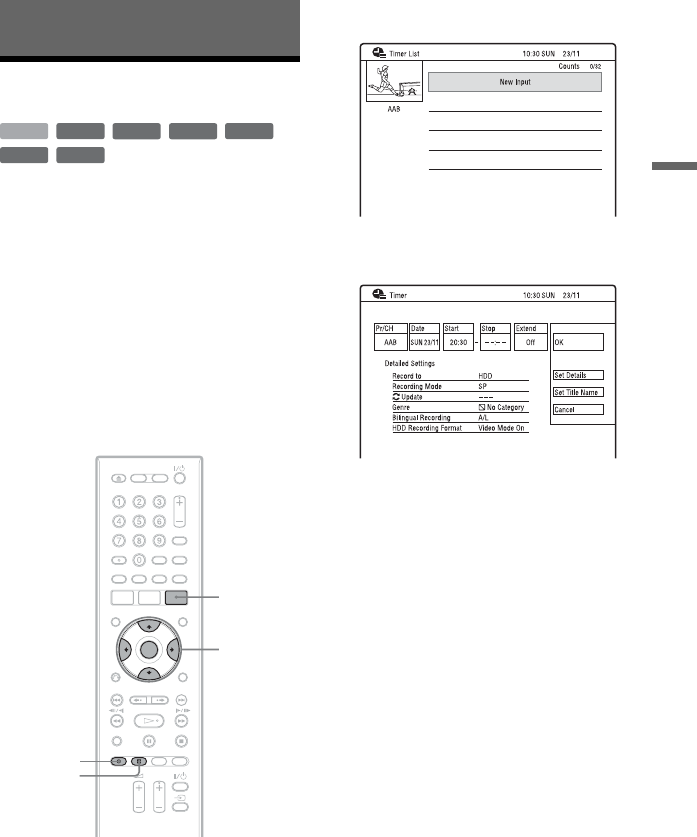
1 Press TIMER.
The “Timer List” display appears.
2 Select the “New Input” row, and
press ENTER.
3 Select an item using </, and
adjust using M/m. Then press
ENTER.
The adjustable items are listed below.
“Pr/CH”: Sets the programme position.
“Date”: Sets the date (up to 30 days
later). Select a recording pattern by
pressing
M repeatedly to set the timer
for the same daily or weekly
programmes.
“Start”: Sets the start time.
“Stop”: Sets the stop time.
“Extend”: Sets duration when a timer
recording is in progress. If the
programme set to be recorded daily or
weekly is extended, the manually
extended time set here will be added to
the subsequent timer recording times.
• If you make a mistake, select the item
and change the setting.
+
RW
-
RWVR
-
RW
Video
-
RVR
+
R
HDD
-
R
Video
</M/m/,,
ENTER
TIMER
x REC
STOP
z REC
,continued
