73
Erasing and Editing
3 Select “Select,” and press ENTER.
4 Select the title you want to include in
the Playlist title, and press ENTER.
The display for setting the start point (IN)
appears. The title starts to play.
• To return to the beginning of the title,
press X and then press ..
5 Select the IN point using m/M,
and press ENTER.
Playback pauses.
6 Press ENTER if the IN point is correct.
If the IN point is incorrect, select the IN
point using c/C, and press ENTER.
The display for setting the end point
(OUT) appears.
7 Select the OUT point using m/M,
and press ENTER.
Playback pauses.
8 Press ENTER if the OUT point is
correct.
If the OUT point is incorrect, select the
OUT point using c/C, and press
ENTER.
The selected scene is added to the scene
list.
• To add more scenes, go to step 5.
9 When you finish adding scenes, press
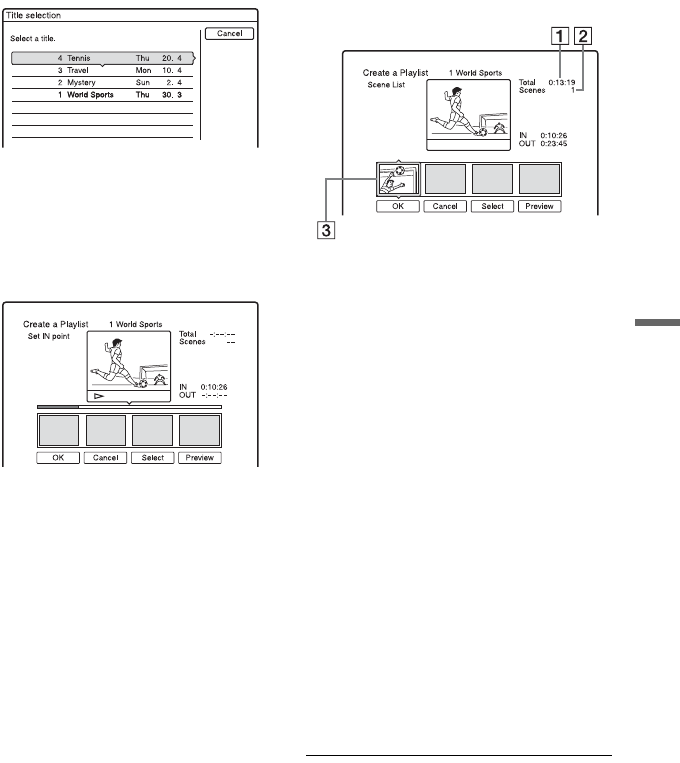
m.
A Total duration of the selected
scene
B Total number of scenes
C Selected scene
10
Select the scene you want to re-edit,
and press ENTER.
The sub-menu appears.
“Move”: Changes the scene order using
</, and press ENTER.
“Erase”: Erases the scene. When asked
for confirmation, select “OK.”
• To add more scenes, press M and go to
step 5.
• To add more scenes from another title,
select “Select” and go to step 4.
• To preview all of the captured scenes in
the listed order, select “Preview.”
11
When you finish editing the scene list,
select “OK,” and press ENTER.
The title of the created Playlist is added
to the Title List (Playlist). The title name
is the title name of the first scene.
z Hint
When a Playlist title is created, the IN and OUT
points will become chapter marks, and each scene
will become a chapter.
b Note
The picture may pause when the edited scene is
played.
,continued


