79
Dubbing (HDD y DVD)
Dubbing
1 Insert the DVD that you are going to
dub to or from.
2 Press HDD or DVD to select the
source.
3 Press TITLE LIST.
Press </, to switch the Title Lists, if
necessary.
4 Select a title, and press ENTER.
The sub-menu appears.
5 Select “Dubbing,” and press ENTER.
The display for selecting the dubbing
mode appears.
If a title with (page 78) is selected
in the title list, a confirmation display is
displayed.
To “Move,” select “OK.”
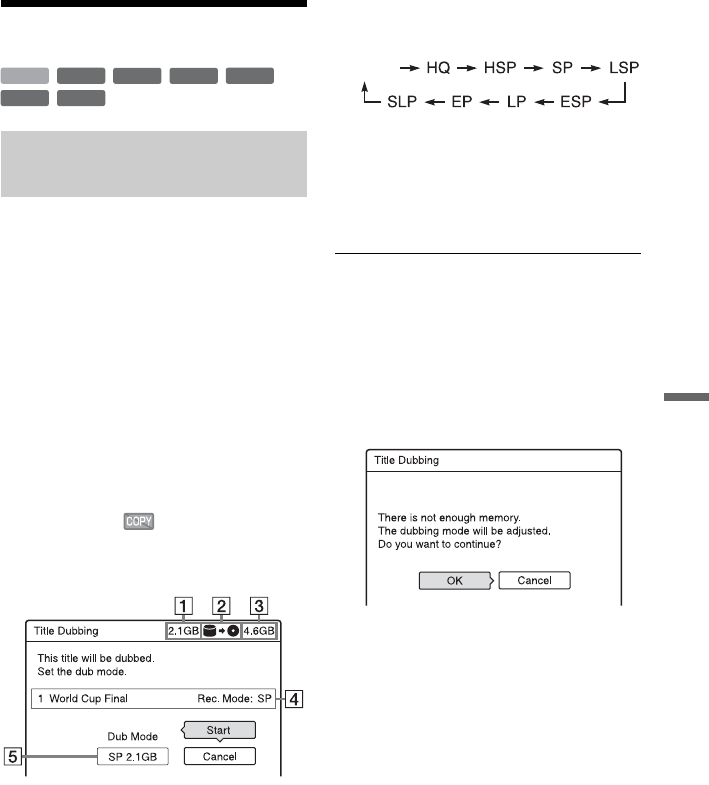
A Size of the title (approximate)
This is displayed in red when the size
exceeds the available space on the
dubbing target media.
B Direction of dubbing
C Available space on the disc to be
dubbed (approximate)
D Information about the title to be
dubbed
E Dubbing mode and the space that
remains after dubbing
(approximate)
6 Select “Dub Mode.”
7 Select a dubbing mode using M/m.
* From the HDD to a DVD only.
Appears when High-speed Dubbing is
available for the title (page 76).
8 Select “Start,” and press ENTER.
The remaining time of dubbing appears
in the front panel display.
To automatically adjust the dubbing mode
If there is not enough available space on the
target disc, the recorder automatically selects
a dubbing mode with lower picture quality
according to the available space. If there is
insufficient disc space in the selected
dubbing mode, the following display appears
after step 8.
Select “OK” and go to step 8.
To manually select another dubbing mode,
select “Cancel,” and go to step 7.
To stop dubbing
Press OPTIONS to select “Stop Dubbing,”
and press ENTER. When asked for
confirmation, select “OK,” and press
ENTER.
When dubbing (Move) is stopped partway,
no part of the title will be moved to the
dubbing target. However, note that this will
decrease the free disc space for DVD+Rs/
DVD-Rs.
z Hint
You can turn off the recorder during dubbing. The
recorder completes dubbing even after being turned
off.
Dubbing a single title (Title
Dubbing)
+
RW
-
RWVR
-
RW
Video
-
RVR
+
R
HDD
-
R
Video
Fast*
,continued


