99
Settings and Adjustments
2 Enter your four-digit password using the
number buttons, then select “OK” and
press ENTER.
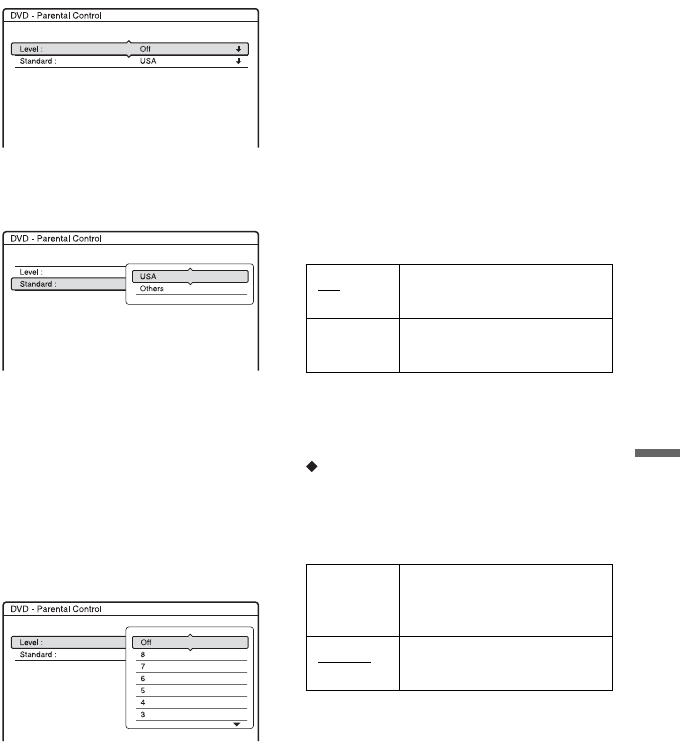
3 Select “Standard,” and press ENTER.
The selection items for “Standard” are
displayed.
4 Select a geographic area as the playback
limitation level, and press ENTER.
The area is selected.
• When you select “Others,” press the
number buttons to select and enter an
area code in the table (page 115). Then
select “OK” and press ENTER.
5 Select “Level,” and press ENTER.
The selection items for “Level” are
displayed.
The lower the value, the stricter the
limitation.
Discs rated higher than the selected level
will be restricted.
6 Select the level, and press ENTER.
The Parental Control setting is complete.
To cancel the Parental Control setting for
the disc, set “Level” to “Off” in step 6.
To change the password, reset
“Password” in the “Others” setup
(page 100).
b Notes
• If you forget your password, you will have to
reset it by selecting “Password” of “Factory
Setup” in the “Others” setup (page 101).
• When you play discs which do not have the
Parental Control function, playback cannot be
limited on this recorder.
• Depending on the disc, you may be asked to
change the Parental Control level while playing
the disc. In this case, enter your password, then
change the level.
Format DVD-RW (DVD-RW only)
The recorder automatically starts formatting
in VR mode or Video mode, whichever is
selected below, when a new, unformatted
DVD-RW is inserted.
One Touch Dubbing
Displays the following options for the One
Touch Dub function.
Finalise Disc (for all recordable discs
except DVD-RW in VR mode)
Selects whether or not to finalise the disc
automatically following One Touch Dubbing
(page 84).
VR Automatically formats the
disc in VR mode.
Video Automatically formats the
disc in Video mode.
Auto Automatically finalises the
disc following One Touch
Dubbing.
Manual
Allows you to finalise the
disc manually.


