86
8 When you finish adding scenes, press
m.
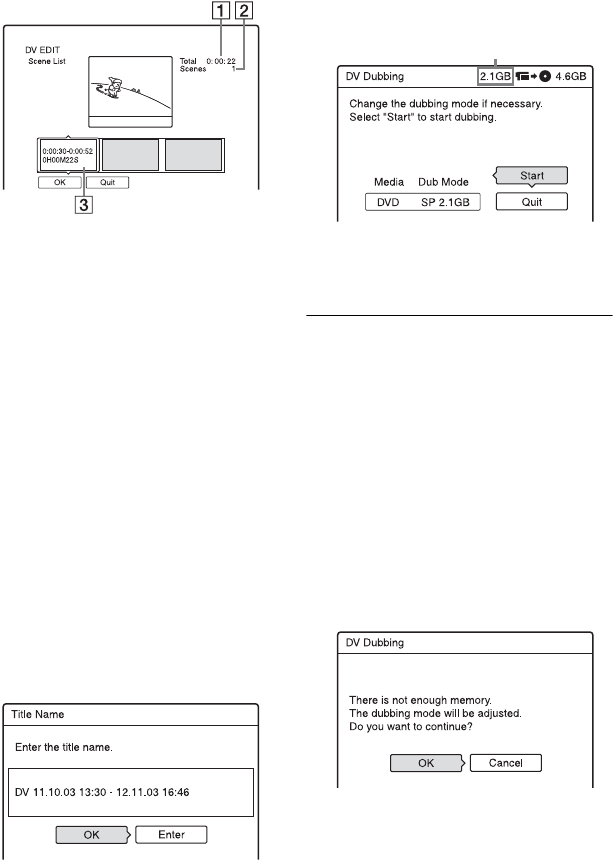
The scene list is displayed.
A Total duration of the scene
B Total number of scenes
C Scene information block
9 Select the scene information block
you want to edit using </,, and
press ENTER.
The sub-menu appears.
“Move”: Changes the scene order using
</, and ENTER.
“Erase”: Erases the scene. When asked
for confirmation, select “OK.”
“Preview”: Plays the selected scene.
• To add more scenes, press M and go to
step 4.
10
When you finish editing the scene list,
select “OK,” and press ENTER.
The display for entering the title name
appears. To enter a new name, select
“Enter,” and follow the explanations on
page 31.
11
Select “OK,” and press ENTER.
The title name is fixed, and the display
asks if you want to start recording.
To change the disc media, select “Media”
and press M/m. To change the dubbing
mode, select “Dub Mode” and press M/m.
12
Select “Start,” and press ENTER.
The recorder starts recording the tape
contents as programmed.
To stop during recording
Press x REC STOP.
Note that it may take a few seconds for the
recorder to stop recording.
To automatically adjust the dubbing mode
If there is not enough available space on the
target disc, the recorder automatically selects
a dubbing mode with lower picture quality
according to the available space. The same
dubbing mode is set for all of the titles. If disc
space is insufficient for the selected dubbing
mode, the following display appears after
step 12.
Select “OK” and go to step 12.
If you do not want to change the dubbing
mode, select “Cancel.” However, note that
dubbing will end before the title is finished.
b Notes
• If you set the beginning of the tape as the IN point
and the end point as the OUT point, the IN and
OUT points may move slightly during dubbing.
• You cannot set a scene to be shorter than one
second.
Data capacity required for the dubbing.
This is displayed in red when the size
exceeds the available space on the
dubbing target media.
