


20
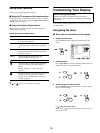
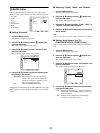
x Adjusting “Color Temp.” (for PC 1/PC 2
only)
You can select the picture’s color level for the white color field
from the default color temperature settings.
Also, if necessary, you can fine tune the color temperature.
1 Press the MENU button.
The main menu appears on the screen.
2Press the M/m buttons to select (Picture) and
press the OK button.
The “Picture” menu appears on the screen.
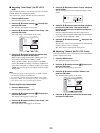
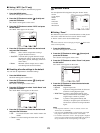
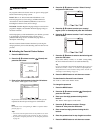
3Press the M/m buttons to select “Color Temp.” and
press the OK button.
The “Color Temp.” menu appears on the screen.
4Press the M/m buttons to select the desired color
temperature and press the OK button.
White balance changes from bluish to reddish as the color
temperature is adjusted from 9,300K to 6,500K.
When you select “sRGB,” the colors adjust to the sRGB
profile. (The sRGB color setting is an industry-standard color
space protocol designed for computer products.) If you select
“sRGB,” the color settings of your computer must be set to the
sRGB profile.
Notes
• If a connected computer or other equipment is not sRGB-compliant,
color cannot be adjusted to the sRGB profile.
• You cannot select “sRGB” when the Picture Mode is set to “Auto.”
• If you select “sRGB,” you cannot adjust “Contrast” and “Brightness”
in the “Picture” menu. Also, you cannot adjust “Gamma.”
Fine tuning the color temperature
1 Press the MENU button.
The main menu appears on the screen.
2Press the M/m buttons to select (Picture) and
press the OK button.
The “Picture” menu appears on the screen.
3Press the M/m buttons to select “Color Temp.” and
press the OK button.
The “Color Temp.” menu appears on the screen.
4 Press the M/m buttons to select “Adjust” and press
the OK button.
The fine tuning menu for color temperature appears on the
screen.
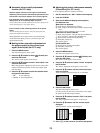
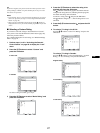
5 Press the M/m buttons to select R (Red) or B (Blue)
and press the OK button. Then press the M/m
buttons to adjust the color temperature and press
the OK button.
Since this adjustment changes the color temperature by
increasing or decreasing the R and B components with respect
to G (green), the G component is fixed.
6 Press the M/m buttons to select , then press the
OK button.
The new color setting is stored in memory and automatically
recalled whenever “User” is selected.
The “Color Temp.” menu appears on the screen.
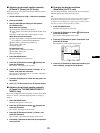
x Adjusting “Gamma” (for PC 1/PC 2 only)
You can associate the picture’s color shade on the screen with the
picture’s original color shade.
1 Press the MENU button.
The main menu appears on the screen.
2 Press the M/m buttons to select (Picture) and
press the OK button.
The “Picture” menu appears on the screen.
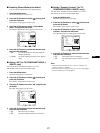
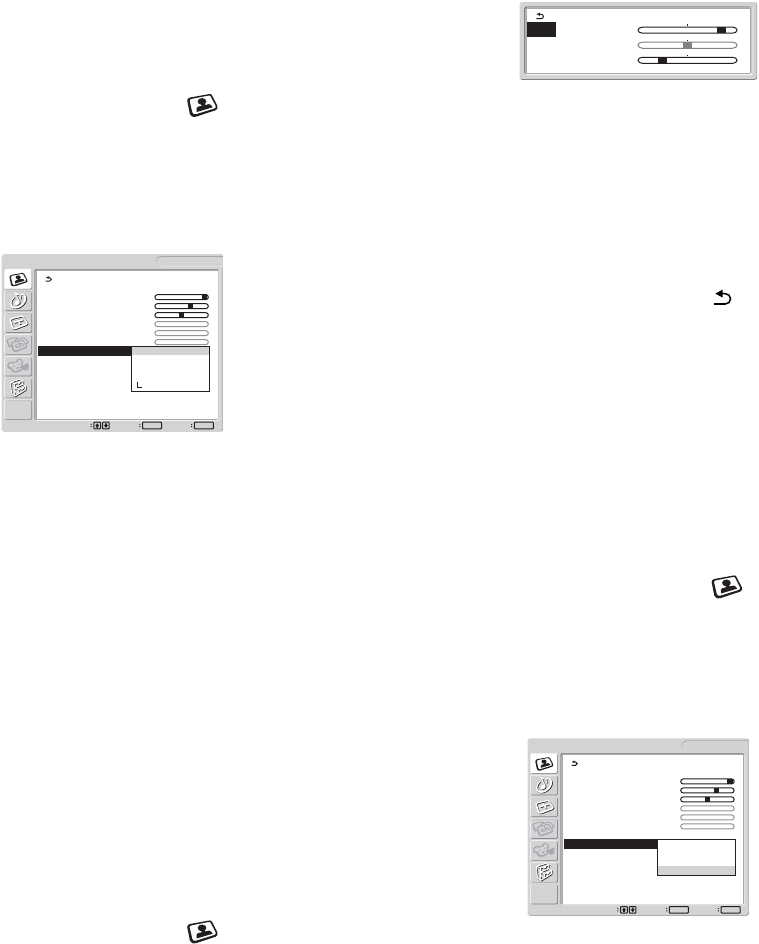
3 Press the M/m buttons to select “Gamma” and
press the OK button.
The “Gamma” menu appears on the screen.
4 Press the M/m buttons to select the desired mode
and press the OK button.
Picture
1680 × 1050/60 Hz
Set Exit
MENU
Select
OK
DVI-D: PC 1
Mode: Movie
Backlight: 100
Contrast: 70
Brightness: 50
Color:
Hue:
Sharpness:
Color Temp.: 9300K
Gamma: 6500K
Picture Mode Reset sRGB
NR: User
Dynamic Contrast: Adjust
R 160
G 128
B 75
Picture
1680 × 1050/60 Hz
Set Exit
MENU
Select
OK
Mode: Movie
Backlight: 100
Contrast: 70
Brightness: 50
Color:
Hue:
Sharpness:
Color Temp.: 9300K
Gamma: Gamma1
Picture Mode Reset Gamma2
NR: Gamma3
Dynamic Contrast: Gamma4
DVI-D: PC 1