


Input selection and
AV connections
31
Defining the INPUT and OUTPUT sockets so that the television recognises connected equipment. See page 7
for a clear view of the back connection recommendations.
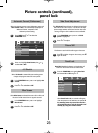
Most media recorders and decoder send a signal through
the SCART lead to switch the television to the correct Input
socket.
Alternatively press the external source selection button
B
until the picture from connected equipment is shown.
This button must be used to view equipment connected
using the COMPONENT VIDEO INPUT (EXT3C) and
VIDEO INPUT (EXT4).
An S in the display e.g.
B
2S (EXT 2S), indicates the
input is set for an S-Video signal.
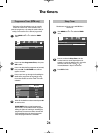
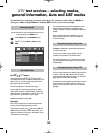
Input Selection
1
This specifies the type of signal going into SCART 2 (EXT2)
on the back of the television. Please refer to the
manufacturers instructions for the connected equipment.
In the SETUP menu press Q until
AV connection is highlighted, then press OK.
With
S
or
R
select either AV or S-VIDEO as the
required input for EXT2.
If the colour is missing try the alternative setting.
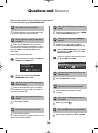
INPUT Signal Selection
1
2
At any time by pressing
B
a list will appear on
screen showing modes and all stored external
equipment. Use Qand P to highlight and OK
to select.
HDMI displays equipment connected to Input
HDMI on the back of the television.
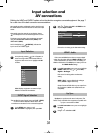
Inputs
DTV
B
1
B
2
B
3
B
4
HDMI1
HDMI2
ATV
AV Connection
HDMI1 audio Auto
EXT2 input AV
Lip Sync On
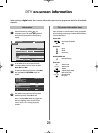
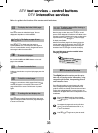
HDMI1 Audio
If the connected HDMI source does not support digital
audio, plug the audio cable into HDMI1 (Audio) on the
back of the television (as shown in the ‘Connecting an
HDMI or DVI device to the HDMI input’ section), then use
the HDMI1 Audio settings.
In the AV connection menu press Q to highlight
HDMI1 audio and using
S
or
R
select Auto,
Digital or Analogue.
If the sound is missing select an alternative
setting.
NOTE: HDMI1 supports digital and analogue
sound, HDMI2 is digital sound only.
Certain formats of DVD disk may not output from
this TV (32/44.1/48kHz and 16/20/24 bits are
acceptable).
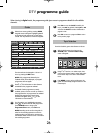
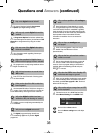
1
Lip Sync
Lip Sync can synchronize the sound and picture. This
feature is only available when equipment compatible with
Lip Sync is connected via HDMI.
In the AV connection menu press Q to highlight
Lip Sync.
Using
S
or
R
select On or Off.
2
1
gpg