


93
EN
EN
Disc
Management
Recording PlaybackIntroduction Connections Basic Setup Editing Function Setup
VCR Function
Others
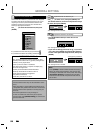
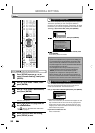
VCR FUNCTIONS
Pl
a
yb
ac
k
Recordin
g
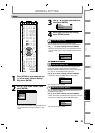
1
)
Press
[
I
I
/
yy
ON
/
STANDB
Y
]
on the remote control or
t
he front
p
anel of the unit
.
When
y
ou are pla
y
ing back a cassette tape, turn on the
T
V an
d
b
e sure to se
l
ect t
h
e in
p
ut to w
h
ic
h
t
h
e unit is
co
nn
ected.
P
ress
[
VCR
].
2) Insert a
p
rerecorded cassette ta
p
e. Press [PLAY
B
]
t
o begin pla
y
back
.
3
) During pla
y
back, press [PAUSE
F
].
Pla
y
back will pause and sound will be muted
.
4
)
Press [PLAY
B
]
to resume p
l
ay
b
ac
k
.
5
)
Press [STOP
C
]
to stop p
l
ay
b
ac
k
.
6
)
Press [OPEN/CLOSE
A
] to eject t
h
e cassette tape
.
Note
•
W
hen a cassette tape ends during playback,
f
ast
-
f
orward or normal recording, the unit will
automatically rewind to the beginning o
f
the
cassette tape. A
f
ter rewinding
f
inishes, the unit will
eject t
h
e cassette tape
.
•
W
hen a cassette ta
p
e without erase-
p
rotection tab is
inserted, the unit will start pla
y
back automaticall
y.
•
T
racking will be automaticall
y
adjusted upon
pla
y
back. To adjust the tracking manuall
y
, press
[
TRACKING
/
]
.
•
P
l
ay
b
ac
k
wi
ll
stop w
h
en you c
h
ange t
h
e output
mo
d
e
.
P
ress [VCR] first
.
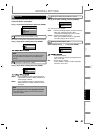
Before recordin
g
, make sure
:
•
T
h
e a
pp
ro
p
riate externa
l
in
p
ut
p
osition (L1/L2) to w
h
ic
h
y
our external tuner is connected is selected b
y
pressing
[
INPUT SELECT
]
.
•
T
h
ere is a cassette tape wit
h
an erase-protection ta
b
in
t
h
e unit
.
•
The desired recordin
g
speed is selected in SP (standard
pla
y
back) or SLP (super long pla
y
back) mode b
y
pressin
g
[
REC MODE
]
repeatedl
y
.
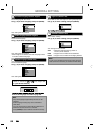
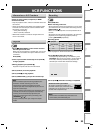
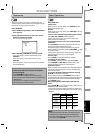
Recor
d
ing spee
d:
T
ape spee
d
R
ecor
d
ing / p
l
ay
b
ac
k
time
T
ype o
f
tap
e
T
6
0
T
12
0
T
16
0
SP
1h
ou
r
2h
our
s
2
-2/3
h
our
s
S
L
P
3h
our
s
6h
our
s
8h
our
s
•
Refer to pa
g
es 39 - 42 for instructions on timer recordin
g
.
1
)
Press [REC
I
] to be
g
in the recordin
g.
T
o temporaril
y
stop recording or to resume it, press
[
PAUSE
F
]
.
After the unit has been in
p
ause mode for
5 minutes, it will stop automaticall
y
to protect the
c
assette tape and the video head from dama
g
e
.
2)
Press [STOP
C
] when the recordin
g
is completed
.
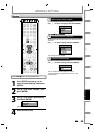
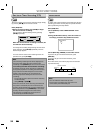
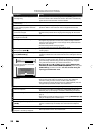
A
ccidental erasure
p
reventio
n
T
o prevent acci
d
enta
l
recor
d
in
g
on a
r
ecorded cassette ta
p
e, remove its erase
-
p
rotection tab. To record on it later, cover
t
he hole with cello
p
hane ta
p
e
.
erase-protection tab
Inf
o
rm
at
i
o
n
o
n V
C
R F
u
n
ct
i
o
n
s
Caution on usin
g
S-vi
d
eo, component, or HDMI
co
nn
ect
i
o
n
fo
r V
C
R
:
•
On
ly
t
h
e p
l
a
yb
ac
k
au
d
io / vi
d
eo are avai
l
a
bl
e wit
h
t
h
ese
co
nn
ect
i
o
n
s.
•
Un
d
er t
h
e con
d
itions
l
iste
d
b
e
l
ow, t
h
e p
l
ay
b
ac
k
image
an
d
au
d
io cannot
b
e output. Use t
h
e stan
d
ar
d
vi
d
eo
connection
,
in suc
h
case
;
-
d
uring DVD recor
d
ing
.
- when L3
(
DV-IN
)
is selected
.
•
HDMI vi
d
eo reso
l
ution cannot
b
e c
h
ange
d
w
h
en t
h
e
u
ni
t
i
s
in V
C
R m
ode.
N
ote
•
T
his
f
unction is available onl
y
when the unit is
connected b
y
the VIDEO OUT jack
.