


25
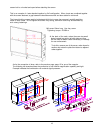
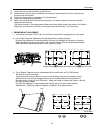
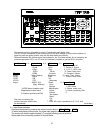
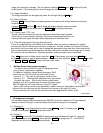
4) Picture rotation adjustment
Make loose of (J) screw and rotate the screw (A) and (B) to the same amount but the opposite
direction so that picture rotation can be changed. If rotated to the same direction Vertical
position will change. Tighten (J) after the adjustment.
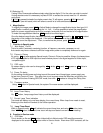
5) Vertical position adjustment
Make loose the (J) screw and rotate (A) (B) (C) screws for the same amount, vertical position
adjustment could be done. Tighten (J) after the adjustment.
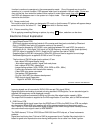
6) Horizontal position adjustment
Loosen screw (E) and adjust (D) screw for horizontal position. Tighten (E) after the adjustment.
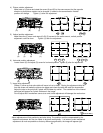
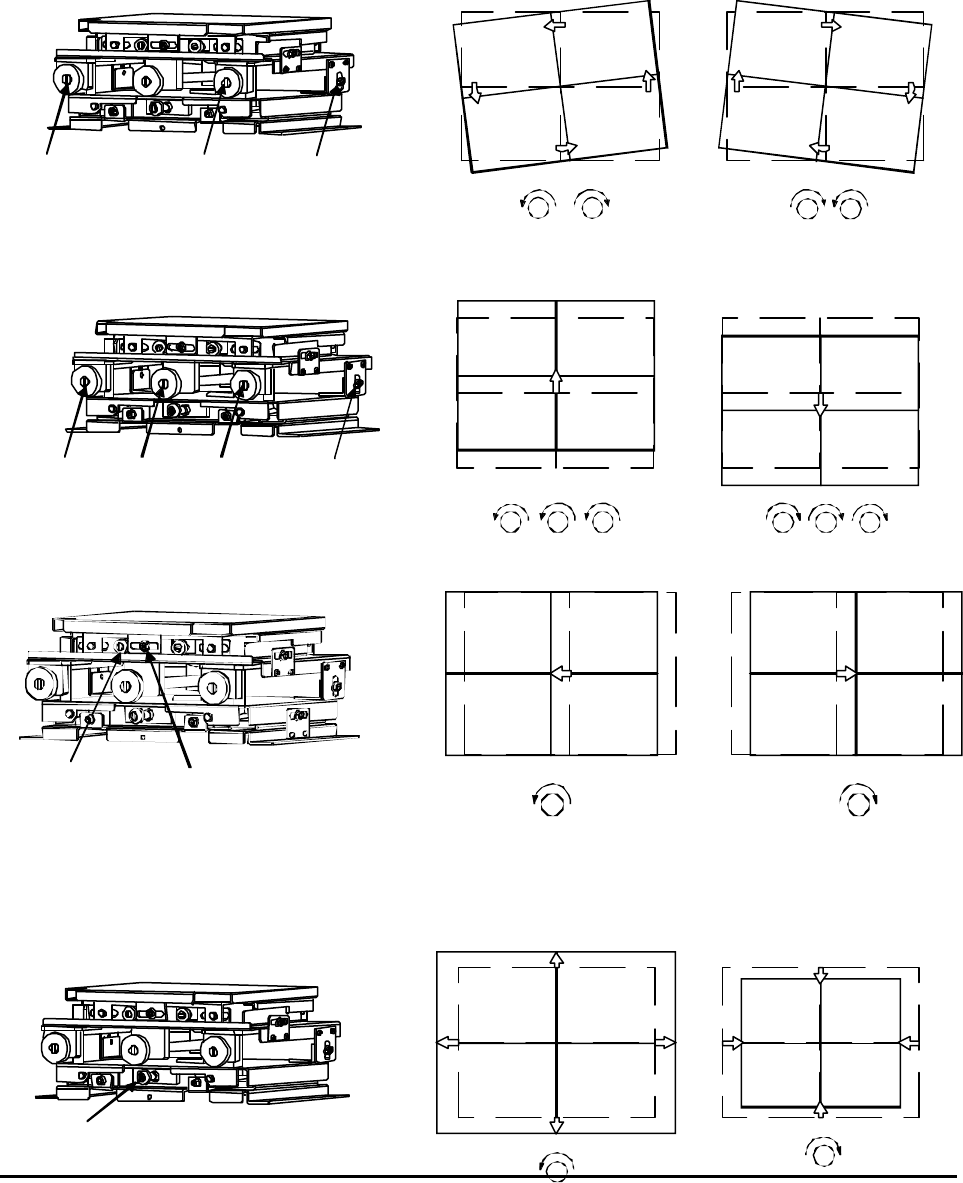
7) Image size adjustment
Rotate (F) screw so that entire table will move to front or back. Placing the adjustment table far
from the screen will make the picture size bigger and closer the table will result the size smaller.
Adjust the size to the point that 2 pixels will be hidden by mullion. The outside line of the internal
test signal will appear for 6 pixels thickness in the image.
Do not adjust this if mechanism comes to an end, further adjustment will damage the mechanism.
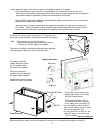
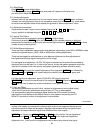
ADJUSTMENT
Above adjustments will do positioning and also sizing. The position could be compensated by the
electronic adjustment but the size needs to be done mechanically. It is better to make mechanical
adjustment as much as possible so that any different magnification, the image will appear right.
(E)
(D)
D D
A B
BA
(A) (B)
(J)
(A) (B)
(J)
(C)
A C
CA
B
B
(F)
F
F