2-1-6 Geometry Adjust
Adjust image geometry distortion caused by improper placement of projector electronically.
Note: For best video performance, it is highly recommended to correct image distortion by
physically correct the placement of the unit.
Use ▲ and ▼ to navigate the Geometry Adjust Sub-Menu Selections.
Press to confirm the Sub-Menu selection.
Press to go to previous menu.
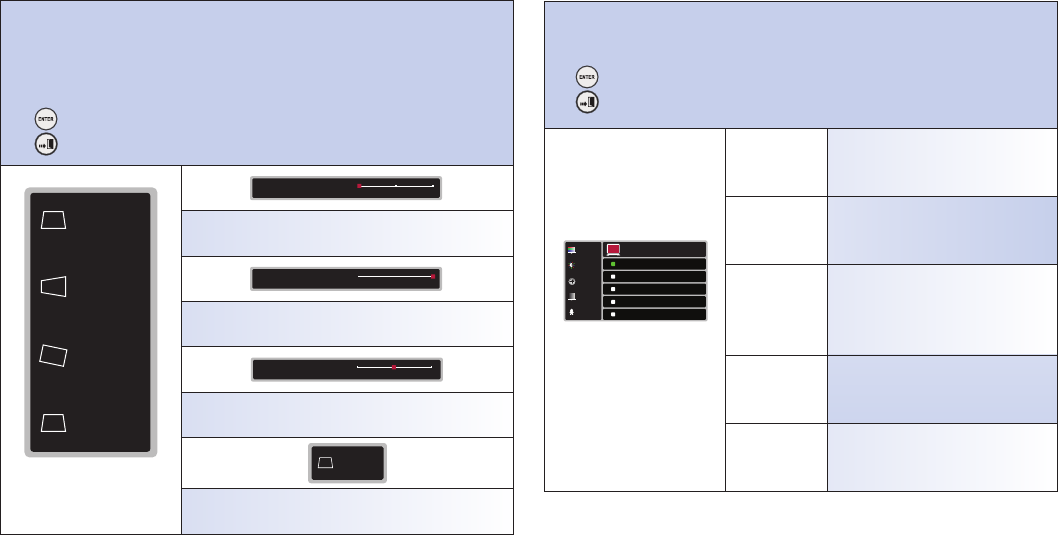
V. KEYSTONE
0
H.KEYSTONE
0
ROTATION
0
AUTO
V.KEYSTONE
OFF
AUTO
Fig. 1-6
Geometry Adjust Sub-Menu
Press ◄ and ► to set figures of vertical keystone
Press ◄ and ► to set figures of horizontal keystone
Press ◄ and ► to set figures of rotation
Press ◄ and ► to toggle auto vertical keystone on or off.
2-2. Advanced Sub-Menu
Advanced options for image quality enhancement.
Use ▲ and ▼
to navigate the Advanced features (Fig. 2-2) Selections:
Press to confirm the Sub-Menu selection.
Press to go to previous menu.
ADVANCED
HQV
NORMAL
VIVID
CINEMA
PROFESSIONAL
USER
9
BLACK LEVEL
HQV
NOISE REDUCTION
COLOR SPACE
PICTURE MODE
Fig. 2-2
Advanced Sub-Menu
PICTURE MODE
Selections of Normal, Vivid, Cinema,
Professional and User image modes.
BLACK LEVEL
Selections of Normal, Low, Mid, High and
Blacker than Black black-level.
HQV
Selections of HQV Detail Enhancement,
Advanced Film Mode detection, LTI and
CTI.
NOISE
REDUCTION
Selections of Motion adaptive HQV Noise
Reduction, TNR, MNR and BAR.
COLOR SPACE
Selections of RGB, YCbCr, YPbPr and Auto
color space.


