iPump 6420 User’s Manual
www.wegener.com 800070-01 Rev B Chapter 2, Page 26
2.3. Equipment Setup
2.3.1. iPump 6420 Rear Panel Connections
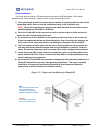
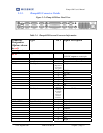
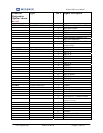
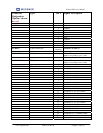
Before applying power, make the following connections, as necessary, to your iPump 6240. For
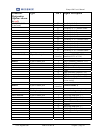
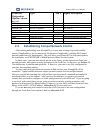
connector details, refer to Table 2-1Error! Reference source not found.. For help deciding which
connectors and signals to use, consult Chapter 3.
1) Connect the L-band output from your antenna's LNB to your
iPump 6240's input RF port, OR, if
supplied with ASI Input interface, connect a coax cable to your ASI Transport source (such as
another satellite IRD).Connect your balanced analog audio ports (1, 2, or 3 [Aux]) to your
analog audio distribution system (DA). Or connect the AES3 digital audio outputs (for 1 & 2
only) to your digital audio distribution system (DA).
2) Connect a CAT5 cable from the
iPump 6240's LAN port to the desired LAN segment in order to
access the
iPump 6240's web control screen. If that LAN segment can reach the internet, then this
may be the only adaptor needed (see next).
3) If you wish to have your iPump 6420 be able to send Return Path over internet to the uplink
control system, then the LAN segment connected to the LAN port must be allowed to make
outbound HTTP connections, and you must protect the iPump 6420 from inbound
connections from the internet. If so, then you may skip the next step.
4) Connect a CAT5 cable from the
iPump 6240's WAN port to an external broadband internet
connection. Remember, this is used only for connections unprotected by NAT router and/or
firewall.
5) Connect the Modem jack to a local analog phone line, if using Return Path, but where the
Ethernet adaptors cannot be wired to have access to the internet.
6) Connect one of more of your
iPump 6240 Cue Relays ports to the local commercial insertion
equipment (if used).
7) Connect one or more of your iPump 6420 RBDS output ports to the radio station exciter’s
RBDS input, if supporting RBDS distribution in this radio network.
8) Connect one or more of your iPump 6420 AM/FM tuner inputs to appropriate radio antenna,
if supplied and using Off-Air Recording audits. You must be using Return Path to support
return transmission of recorded OAR files.
9) Connect the local automation systems’s relay closure outputs to the PIO Input connector.
10) For diagnostics, you may connect a text-based monitor to the Serial M&C port.
11) Connect the Alarm port to downstream redundancy control or alarm monitoring system.
12) Connect the supplied ac power cord to the
iPump 6240's IEC receptacle and then to a
100-to-120 VAC or 200-to-240 VAC source. Once all of the ports are connected and power is
supplied, the iPump 6240
begins the startup process and will require about 2 ½ minutes to
complete.


