


24 25
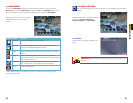
CHAPTER 4 BASIC OPERATION
BASIC OPERATION
CHAPTER 4
This chapter is intended to help you get your DVR up and running before you activate any
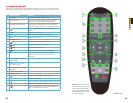
advanced features which are covered in later chapters. You can use the mouse, remote
control and the buttons on the front of the DVR to operate your system, but for convenience,
we will be discussing operations using the mouse.
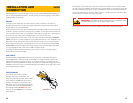
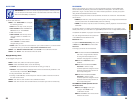
4.1 POWER ON/OFF
Connect the power cable to the DC power port on the rear panel. If your DVR has a power
switch on the rear channel you will need to flip it to the “On” position. If the DVR is not
equipped with a power switch, it will power up when connected to a power source.
At startup, the system performs a basic system check and runs an initial loading sequence.
After a few moments, the system loads a live display view.
STANDBY MODE
The system can be put into Standby Mode. Power will remain to the system but will not be
recording. You may put your system into Standby Mode by one of two methods:
To Start Standby Mode:
Press and hold the POWER button on the front panel or remote control until the prompt
closes. The system enters standby mode.
Select “Standby” in the pop-up Shortcut menu (described in the next section)
To Wake Up from Standby Mode:
Press and hold the POWER button on the front panel or remote control until the system
beeps. The system will begin powering up.
SHUTDOWN
When the DVR will not be in use for an extended period of time, it is recommended that you
shut it down completely. To do so, follow the above instructions to put the DVR into Standby
mode. Once the DVR has gone into hibernation, turn off the power switch (if present) and then
disconnect it from its power source - preferably by turning off the surge protector that it is
plugged into.
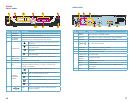
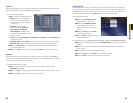
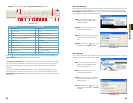
PICTURE 4-1
M A I N M E N U
K E Y L O C K
C H N S W I T C H
D I G I T A L Z O O M
V I D E O S E A R C H
P T Z
M U T E
M A N U A L R E C
S T O P R E C
R O T A T I O N
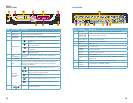
MULTIPICTURE: Choose multi-screen mode
PTZ: Opens the PTZ control menu
VIDEO SEARCH: Open the Search Menu to
view recorded video
MUTE: Mute listen-in audio on the system
START RECORD: Start manual recording
STOP RECORD: Stop manual recording
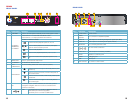
START CRUISE: Activates preset PTZ cruise
STANDBY: Click to go into standby mode
ROTATION: Start full screen cycle through
channels
To close the Shortcut menu, click anywhere on screen.
4.2 SHORTCUT MENU
The Shortcut menu gives direct access to many of the system’s functions, features and
options without having to go through a series of intermediiate steps.
Right-clicking with the mouse anywhere on the screen will bring up the Shortcut menu.
MAIN MENU: Opens the main system menu
IMPORTANT! To protect your system, you should always power down the
DVR as described above before unplugging it or using the power switch.
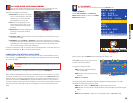
PICTURE 4-2
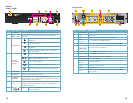
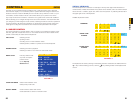
4.3 SYSTEM LOGIN
By default, passwords are disabled on the
system. You do not need to enter a password
when accessing any system menus. The
default user name is admin and the
password is blank (no password). Just click
Apply However, for security purposes, it is
highly recommended to enable passwords on
the system using the Password menu.