


34 35
CHAPTER 4 BASIC OPERATION
MUTE
31
CH1
7/25/2011 23:48:25
PICTURE 4-17
PICTURE 4-18
PICTURE 4-16
TYPE
EXIT
BACKUP
OTHER
ALL
LAST
NEXT
PRE
FIRST
ALL
CH TIME SIZE TYPE BAK
FILE LIST
00:00:00
SEARCH
01 07:55:53-07:57:17 4.7M Normal
01 07:57:19-07:59:23 6.7M Alarm
01 07:59:25-08:00:33 3.7M Alarm
01 08:00:36-08:01:47 3.8M Alarm
01 08:01:47-08:02:26 2.2M Normal
01 08:02:26-08:08:15 18.3M Alarm
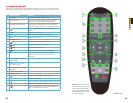
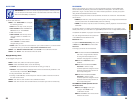
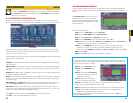
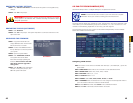
USING THE ON-SCREEN PLAYBACK CONTROLS
The DVR can play back a single channel in full screen or up to four channels in multi-view
mode.
Move the mouse slightly to display the onscreen playback controls. You can also use the
playback control buttons on the remote control or on front panel of the DVR.
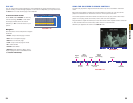
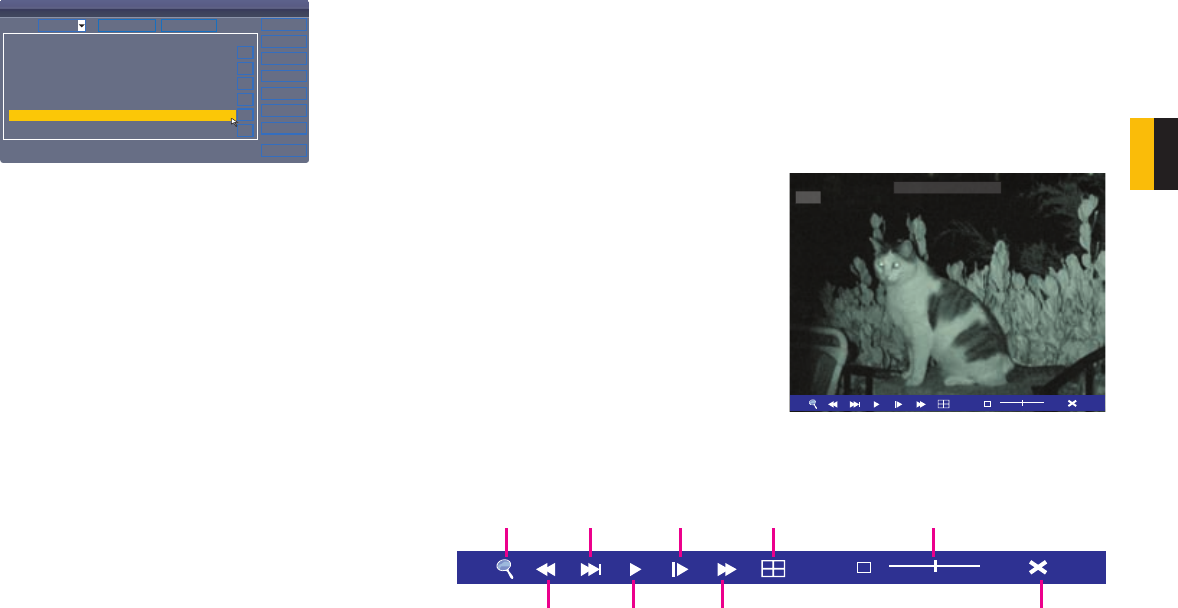
The controls operate in the same manner as those found on any VCR, DVR or other video
player. You can play, pause, fast forward, rewind, and slow down playback.
Drag the slider to adjust the volume (You must have had an audio-capable camera connected
to this channel at the time of the event). Select the box to mute the audio.
Click X to quit playback and return to the Search menu.
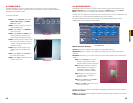
MUTE
31
Digital
Zoom
Pause
Viewing
Mode
(Click to change)
Volume
Rewind
(2x, 4x, 8x)
Play Exit
Playback
Fast Forward
(2x, 4x, 8x)
Slow
Advance
(1/2, 1/4, 1/8)
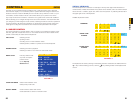
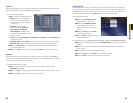
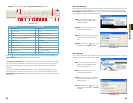
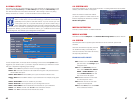
FILE LIST
You can use the File List Shortcut Menu to see a detailed list of all the recorded video on your
system. Clicking on a file will begin playback. In the case of multiple files, you may need to use
the Next button to see another page of recorded files.
To narrow search results:
Under TYPE, select NORMAL to view only
normal recordings, ALARM, to view alarm
recordings (includes alarm and motion
detection), or ALL to view all video on your
system.
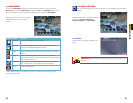
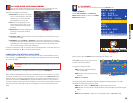
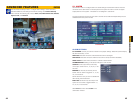
Navigation
Use the buttons on the side panel to navigate
the file list:
• FIRST: Jump to the first page of the list
• PRE: Turn to the previous page
• NEXT: Turn to the next page
• LAST: Jump to the last page of the list
• ALL: Select all files
• OTHER: Clear all files
• BACKUP: After selecting a file(s), click to
begin copying the data to a USB flash drive.
See Section 4.8 Backup.