


30 31
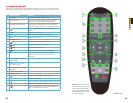
CHAPTER 4 BASIC OPERATION
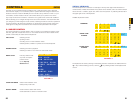
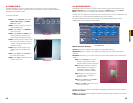
DISPLAY
Use the Display Setup menu to customize channel titles, show/hide the date and time in live
viewing and playback, and enable/disable preview channels.
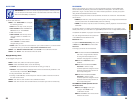
PICTURE 4-10
PICTURE 4-11
To customize Display settings:
STEP 1. Configure the following options:
• NAME: Click any of the fields and
enter a new title for the selected
channel using the Virtual Keyboard
(mouse only)
• POSITION: Reposition the
channel title; select TOPLEFT,
BOTTOMLEFT, TOPRIGHT,
BOTTOMRIGHT, or OFF. If OFF,
the title will not be displayed for the
selected channel
• COLOR: Adjust CHROMATICITY, LUMINOSITY, CONTRAST, and SATURATION for
the selected channel
• PREVIEW TIME: Select ON/OFF to show/ hide the date and time during live viewing
• RECORD TIME: Select ON/OFF to show/hide the date and time during playback.
STEP 2. Click NEXT PAGE to change the settings for the remaining channels (8 and
16-channel models only).
STEP 3. Click APPLY to save your settings. Click CLOSE in the confirmation window.
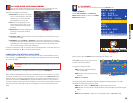
Preview
Preview channels can be very useful if your display monitor is in public view. Select OFF for
preview channel and it will appear black on the display to give the impression that no cameras
are connected and the system is not recording.
To enable/disable preview channels:
STEP 1. Choose a channel you wish to conceal. For example, channel 3. Under
PREVIEW, select OFF.
STEP 2. Click APPLY. Channel 3 will turn black. Click CLOSE in the confirmation window.
STEP 3. Click EXIT in all menus until all windows are closed.
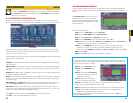
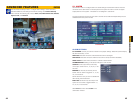
VIDEO/AUDIO
Use the Video/Audio menu to set the resolution and camera video system on the DVR. You
will need to have microphones or audio-equipped cameras connected to your DVR (through
the Audio In ports) in order to record sound. To listen to recorded audio, you must have an
external speaker connected to your Audio Out port on the back of your DVR.
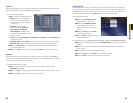
To configure video options:
STEP 1. Under VGA RESOLUTION,
select 800x600 or 1024x768.
STEP 2. Under CAMERA SYSTEM,
select NTSC (North and most of
South America) or PAL (Brazil and
Europe).
STEP 3. Click APPLY. Click CLOSE in
the confirmation window.
STEP 4. Click EXIT in all menus until all
windows are closed.
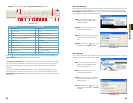
To configure audio options (Available only on Channels 1 and 2 on the QS464 and QS206):
STEP 1. From the Video/Audio menu, click VOLUME SETUP. A split-screen display view
appears.
STEP 2. Click any channel and adjust the slider to increase/decrease the volume for
listen-in audio.
STEP 3. Click X to return to the Video/Audio menu.
STEP 4. Click APPLY. Click CLOSE in the confirmation window.
STEP 5. Click EXIT in all menus until all windows are closed.