


Configuration D-Link Web Smart Switch User Manual
6
6
0
0
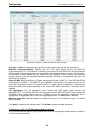
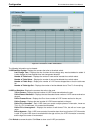
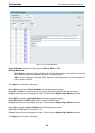
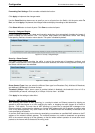
This window contains two main parts, DHCP Relay Global Settings and DHCP Relay Interface Settings.
L3 Functions > DHCP > DHCP Relay Settings
In DHCP Relay Global Settings, users can enable and configure DHCP Relay Global Settings. The relay
hops count limit allows the maximum number of hops (routers) that the DHCP messages can be relayed
through to be set. The DHCP packet will be dropped when the relay hop count in the received packet is
equal to or greater than this setting. The relay time threshold sets the minimum time (in seconds) that the
Switch will wait before forwarding a BOOTREQUEST packet. If the value in the seconds’ field of the packet
is less than the relay time threshold, the packet will be dropped.
In DHCP Relay Interface Settings, users can set up a server, by IP address, for relaying DHCP information
to the Switch. Properly configured settings will be displayed in the DHCP Relay Interface Table at the bottom
of the window, once the user clicks the Add button. The user can only add one server IP for the System
interface on the Switch. Entries may be deleted by clicking the corresponding Delete button.
Figure 4.68 – L3 Functions > DHCP > DHCP Relay Settings
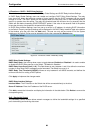
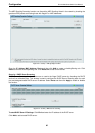
DHCP Relay Global Settings:
DHCP Relay State: Use the drop-down menu to toggle between Enabled and Disabled. It is used to enable
or disable the DHCP Relay service on the Switch. The default is Disabled.
DHCP Relay Hops Count Limit (1-16): This field allows an entry between 1 and 16 to define the maximum
number of router hops DHCP messages can be forwarded. The default hop count is 4.
DHCP Relay Time Threshold (0-65535): Allows an entry between 0 and 65535 seconds, and defines the
minimum time limit for routing a DHCP packet.
Click Apply to implement the changes made.
DHCP Relay Interface Settings:
Interface Name: The IP interface on the Switch that will be connected directly to the client.
Server IP Address: Enter the IP address of the DHCP server.
Click Add to create the information and display the information in the table below. Click Delete to remove the
corresponding entry.
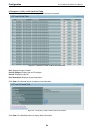
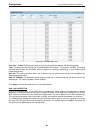
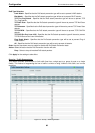
The Bandwidth Control window allows network managers to define the bandwidth settings for a specified
port’s transmitting and receiving data rates.
QoS > Bandwidth Control