


44
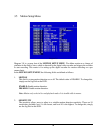
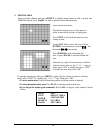
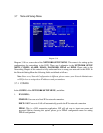
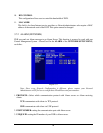
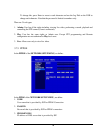
2. IP Address
This field shows the current IP Address for the DVR. A Fixed IP address does not change and
must be set manually. To change this, simply use the Jog Dial on the DVR. When DHCP is
selected, the DHCP server will assign this value automatically.
Note: The addresses in the machine are for our own testing you must apply your own addresses
to comply with your network. Refer to Networking Chapter for more details.
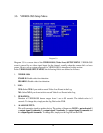
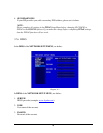
3. SUBNET MASK
This field is to set the subnet mask for your network so as the DVR will be recognized within
the network. Example: 255.255.255.000. To change this, simply use the Jog Dial on the DVR.
When DHCP is selected, the DHCP server will assign this value automatically.
4. GATEWAY
This field is to set the gateway for your network so the DVR will be recognized within the
network. To change this, simply use the Jog Dial on the DVR. When DHCP is selected, the
DHCP server will assign this value automatically.
5. DNS SERVER
This field is to set the DNS server for your network so the DVR will be recognized within the
network. To change this, simply use the Jog Dial on the DVR. When DHCP is selected, the
DHCP server will assign this value automatically.
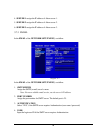
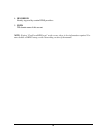
6. REMOTE RELAY CONTROL:
YES: By selecting YES, system will accept remote command of relay control.
NO: By selecting NO, system will refuse remote command of relay control.
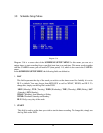
7. HTTP PORT
The default port number is 80. User can change it to different port number for HTTP/WEB
communication between DVR and client PC.
8. CONTROL PORT
The default port number is 1600. User can change it to different port number for controlling
authentication between DVR and client PC.
9. DATA PORT
The default data transmitting port number is 37260. User can change it to different port number
for data transfer between DVR and client PC.