45
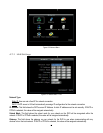
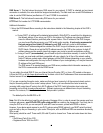
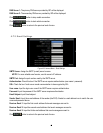
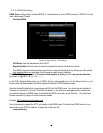
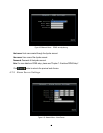
DNS Server 1: This field shows the primary DNS server for your network. If DHCP is selected and an internet
connection is available, this value should be assigned automatically. This field must have a valid DNS address in
order to use the DDNS feature (see Sections 4.7.5 and 7 DDNS for more detail).
DNS Server 2: This field shows the secondary DNS server for your network.
HTTP Port: Port number for HTTP/WEB communication.
Additional information:
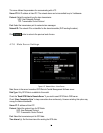
1. Set up the DVR Network Menu according to the instructions detailed in the Networking chapter of this DVR’s
manual.
a. If using DHCP, all settings will be detected automatically. While DHCP is a useful tool for determining
the network settings, if you set up your DVR in this manner its IP address may change at different
times for different reasons, particularly after a power failure. If the IP address of the DVR changes,
you may have difficulties accessing your DVR locally and/or remotely. It is strongly recommended
that you assign a fixed (static) IP address to your DVR, and that in order to avoid address
conflicts the IP address assigned be outside of the DHCP range of addresses your router issues to
DHCP clients. Please do not set the DHCP address issued to the DVR by the router as its static IP
address unless you take specific steps that program your router to prevent such address conflicts.
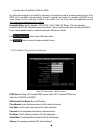
b. If using a Fixed IP (recommended), you will need to input the information manually. In order for DDNS
to work, you must enter valid data, compatible with your network, for all four of the network setting
fields: IP address, subnet mask, default gateway and the DNS Address (depending on your network
hardware and configuration this may be the IP address of your router/gateway, or it may be the actual
IP address of the local DNS server).
The DNS server IP is required because your DNS server provides critical information necessary for
the DVR to communicate with the DDNS server.
You can obtain the actual DNS IP from your Internet Service Provider (ISP); or, from a PC located on the same
LAN as the DVR, go to http://www.dnsserverlist.org/ to obtain a list of the IP addresses of their recommendation of
the best servers to use for your location.
2. If you are connecting through a router, make sure that you have ‘opened up’ all the required network ports in
the port forwarding section of your router’s setup options. That is, you have directed the router to send any
incoming traffic using those IP ports to the LAN IP address of the DVR. Useful information about router port
forwarding can be found at www.portforward.com . Different routers may use different terms for port forwarding
function. For instance, D-Link calls it virtual server, Netopia calls it pinholes.
The default port for the EMV200 is: 80
Note: Port 80 is the default port used for web browsing. Because of this, in order to prevent the average user from
hosting a web server, most ISPs BLOCK traffic using port 80 from reaching the average site. If you only plan to
view your DVR on a LAN, you can use port 80, and don’t have to concern yourself with DDNS or routers.
However, if you desire remote access to your DVR, perhaps using DDNS (optional), you MUST select functional
ports and set up the port forwarding in your router. Other ports, such as 8080 and 8000 are sometimes blocked by
ISPs as well.
What port(s) should be used? There are 65,535 valid IP ports to choose from. These are broken down into three
groups:
• Well Known Ports 0 thru 1023
• Registered Ports 1024 thru 49151


