7
Getting Started
To install the batteries for your keyboard
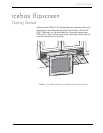
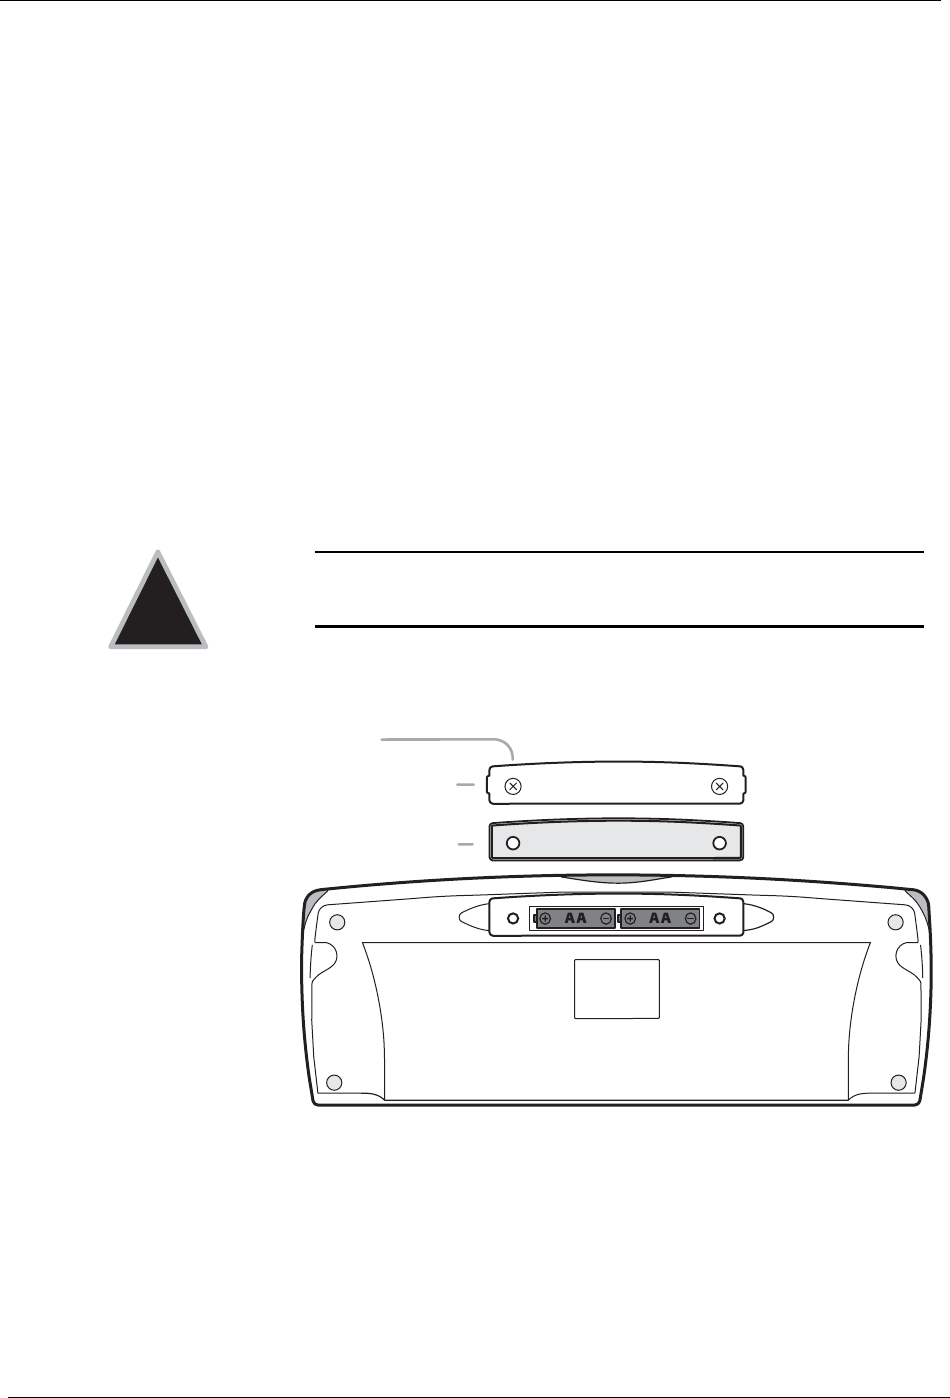
1. On the back of the keyboard, remove the battery cover by loosening
both large screws on either end of the battery panel (fig. 3). Keep the
attached washers with each screw.
2. Remove the rubber gasket.
3. Install two AA batteries, ensuring that the polarity (+ and –) on the bat-
teries matches the + and – markings in the battery compartment.
4. Reattach the rubber gasket, ensuring that the four nubs on the under-
side of the gasket are pressed firmly into the holes in the battery
compartment. This is important to keep the keyboard washable.
5. Reattach the battery cover, ensuring that it is seated properly.
6. Insert the screws, with the washers still attached, and tighten the screws
until they are snug.
Note: If the screws won't tighten all the way, or the battery cover isn't
flush with the keyboard bottom, make sure the rubber gasket is
firmly inserted into the battery compartment.
FIGURE 3. Keyboard Battery Installation
Caution: Do not overtighten the screws. You may damage the
washers and the keyboard will no longer be washable.
!
Rubber Gasket
Battery Cover
Screw


