PRJ-WALLKIT-11 Installation Instructions
10 Visit the InFocus support site at www.infocus.com/support
Projector Installation to Mount
WARNING: IMPROPER INSTALLATION CAN LEAD TO
PROJECTOR FALLING RESULTING IN SERIOUS
PERSONAL INJURY OR DAMAGE TO EQUIPMENT. DO
NOT substitute hardware. Use only the hardware provided by
the manufacturer.
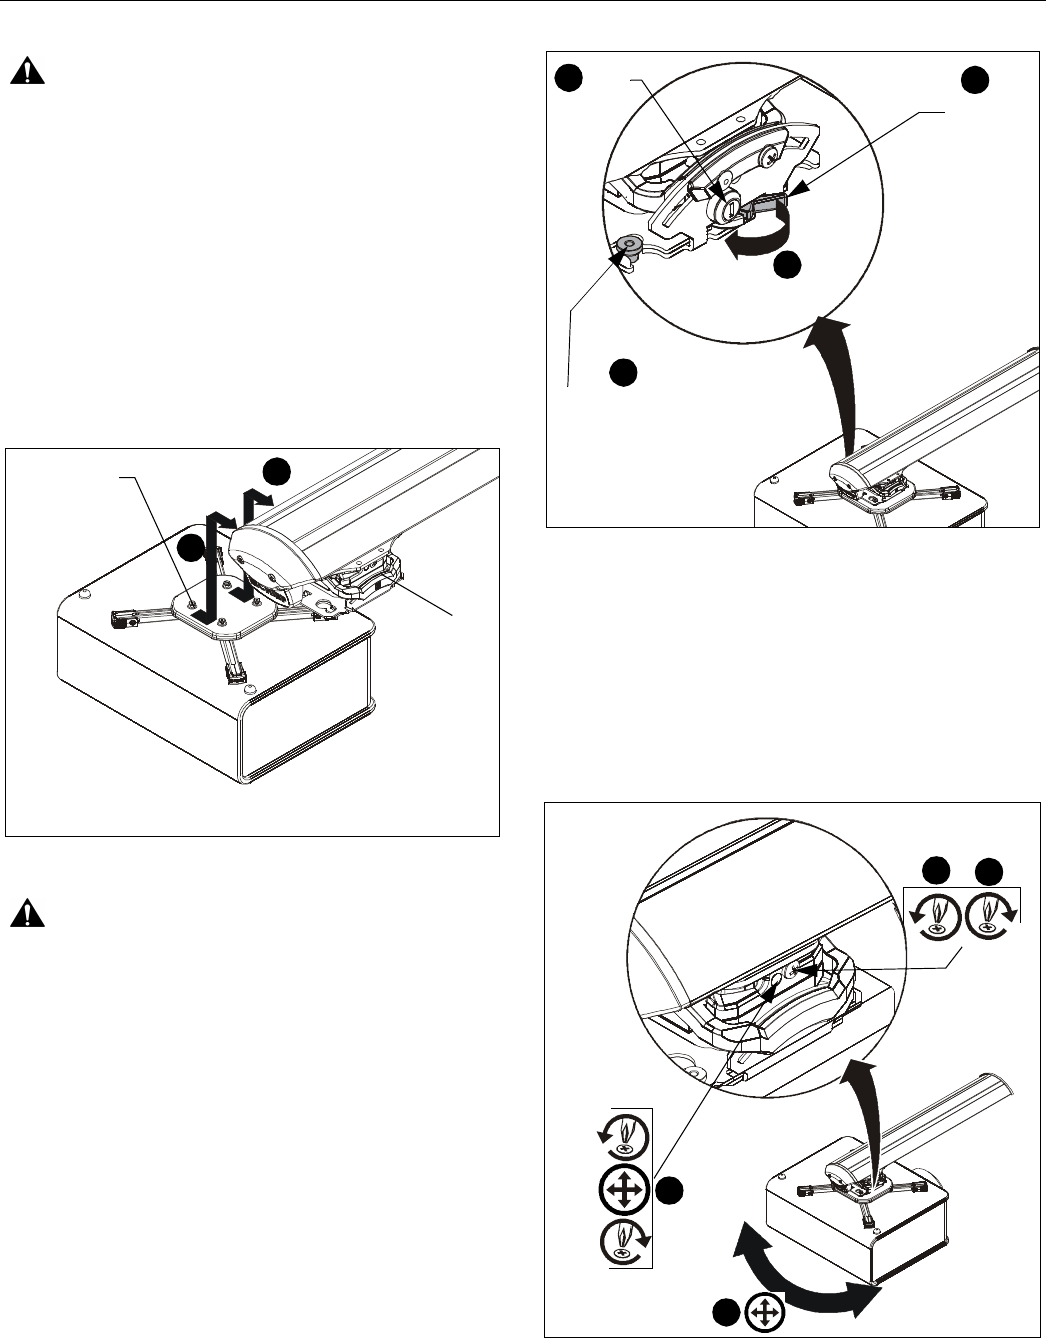
1. Secure interface bracket (AA) to top of InFocus projector
(not included) using hardware and instructions included with
the interface bracket.
2. Orient projector with attached interface bracket as shown.
(See Figure 16)
3. Lift projector so that screws with thumb nuts are aligned
with mounting slots in mount base. (See Figure 16)
4. Slide projector with interface bracket onto mounting slots in
projector mount (F) until screws are seated against the back
of mounting slots. (See Figure 16)
Figure 16
WARNING: IMPROPER INSTALLATION CAN LEAD TO
PROJECTOR FALLING RESULTING IN SERIOUS
PERSONAL INJURY OR DAMAGE TO EQUIPMENT. Make
certain mounting slots in projector mount slide under thumb
screws and that screws are seated in the back of slots.
5. Verify mounting screws are properly seated in mounting
slots in projector mount. (See Figure 17)
6. Move locking lever to "locked" position. (See Figure 17)
7. Insert key into lock and turn to secure projector to mount.
(See Figure 17)
Figure 17
Projector Mount Adjustments
Yaw Adjustment
1. Loosen yaw adjustment locking screw using a #2 Phillips
screwdriver. (See Figure )
2. Turn Yaw micro-adjustment screw right or left using a #2
Phillips screwdriver until image is properly aligned on target.
(See Figure )
3. Tighten Yaw adjustment locking screw using a #2 Phillips
screwdriver. (See Figure )
Figure 18
3
4
(E)
Thumb nuts
(Interface appearance is example only.
Appearance may vary.)
6
7
(reverse view)
Mounting screw
with thumb nut
seated in
mounting slot
Locking
lever
5
Lock
6
2
1
3
2


