Installation Instructions PRJ-WALLKIT-11
Visit the InFocus support site at www.infocus.com/support 11
Pitch Adjustment
NOTE: Pitch can be adjusted using the projector mount or the
pitch of the entire arm can be adjusted. See Pitch
Adjustment - Entire Arm section for details.
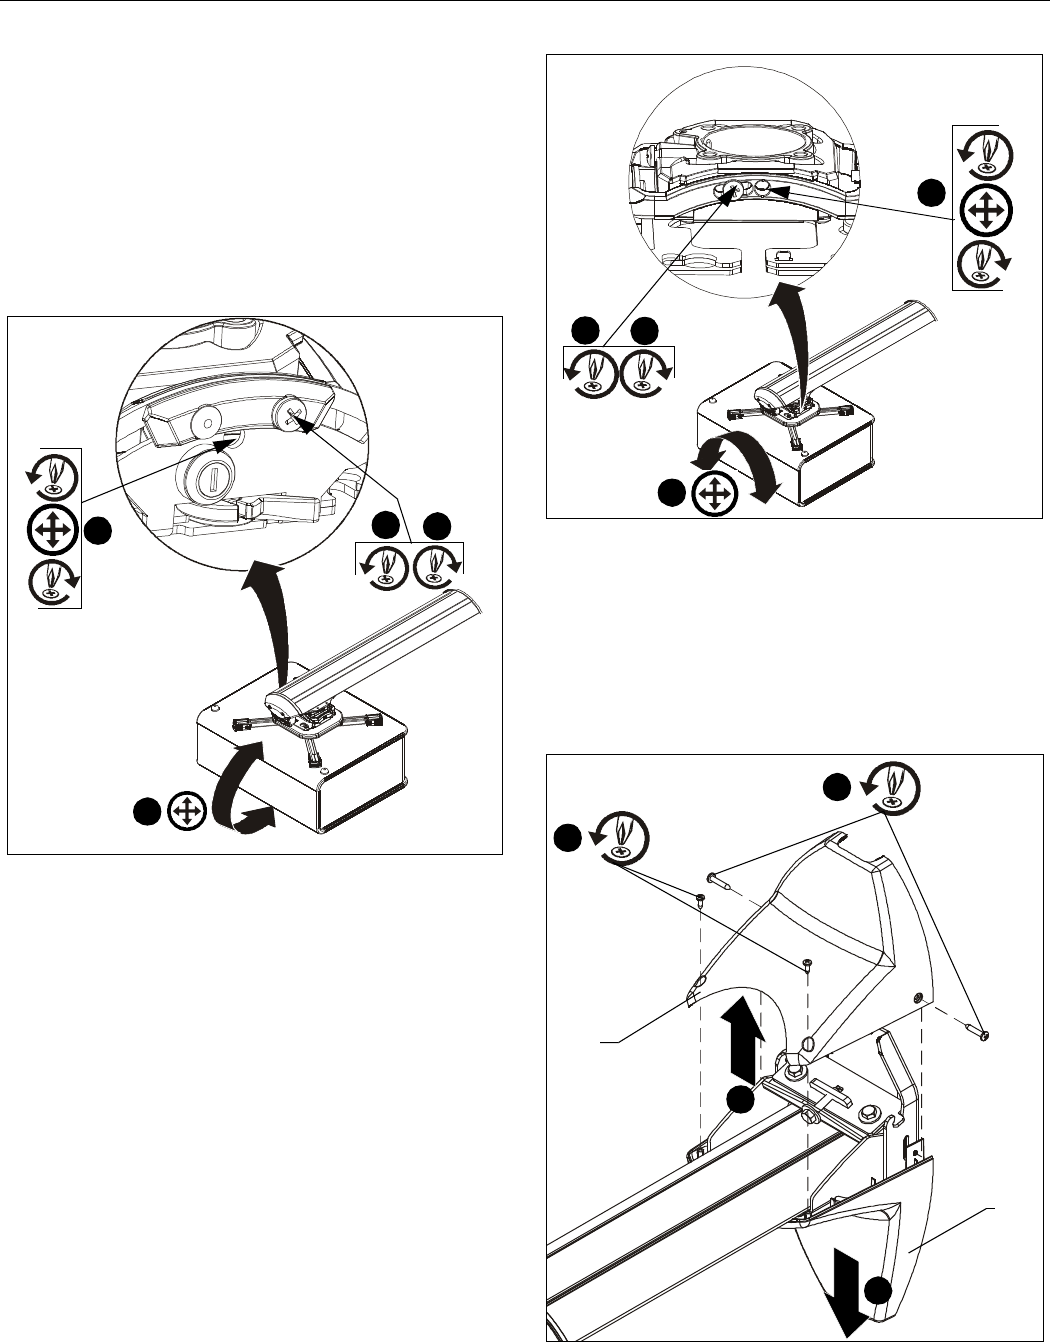
1. Loosen Pitch adjustment locking screw using a #2 Phillips
screwdriver. (See Figure 19)
2. Turn Pitch micro-adjustment screw right or left using a #2
Phillips screwdriver until image is properly aligned on target.
(See Figure 19)
3. Tighten Pitch adjustment locking screw using a #2 Phillips
screwdriver. (See Figure 19)
Figure 19
Roll Adjustment
1. Loosen ROLL adjustment locking screw using a #2 Phillips
screwdriver. (See Figure 20)
2. Turn ROLL micro-adjustment screw right or left using a #2
Phillips screwdriver until image is properly aligned on target.
(See Figure 20)
3. Tighten ROLL adjustment locking screw using a #2 Phillips
screwdriver. (See Figure 20)
Figure 20
Removing Mount Covers
1. Remove two #8 x 1/2" Phillips pan tapping screws (U) and
two #10 x 1" Phillips pan tapping screws (V) to free top cover
(C) and expose pitch adjustment screw. (See Figure 21)
2. Remove lower cover (D) from PRJ-WALLKIT-11. (See
Figure 21)
Figure 21
1
3
2
2
1
3
2
2
(V) x 2
1
1
1
(U) x 2
2
(C)
(D)
