PRJ-WALLKIT-11 Installation Instructions
14 Visit the InFocus support site at www.infocus.com/support
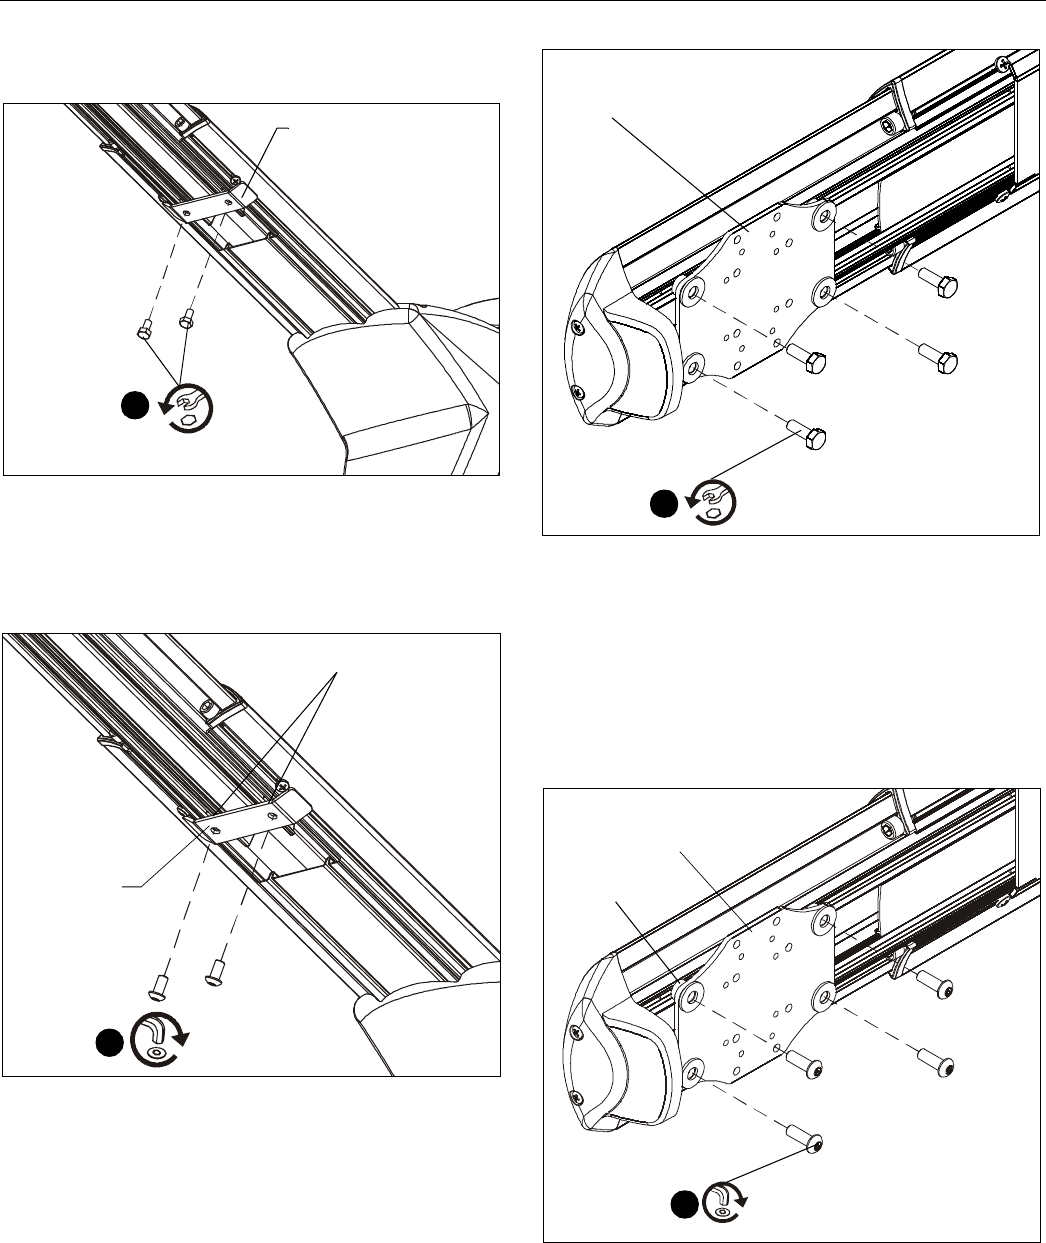
3. Remove two bolts holding stop bracket in place on
underside of short throw projector mount. (See Figure 29)
Figure 29
4. Install two 1/4-20 x 1/2" button head security screws (K)
through holes in stop bracket and into holes in sliding nuts.
(See Figure 30)
Figure 30
5. (Optional) Remove projector from short throw projector
mount according to projector interface instructions.
NOTE: For most projectors, it will be necessary to remove
projector prior to install four security screws to projector
bracket. For ease of installation, it is recommended to
remove projector prior to performing the following
steps.
6. Remove one of four bolts from adapter plate. (See Figure 31)
Figure 31
7. Install one 1/4-20 x 3/4" button head security screw (L) into
hole vacated by removing bolt in Step 6 and into plastic
spacer. (See Figure 32)
8. Repeat Steps 6-7 for remaining three bolts one bolt at a
time.
9. It is important to replace adapter plate bolts ONE AT A TIME
or adapter plate could fall from mount during installation!
Figure 32
10. Reinstall projector to mount. Refer to Projector Installation
section for details.
x 2
3
Stop bracket
4
Stop bracket
Sliding nuts
(K) x 2
Adapter plate
6
x 4 (one at a time)
Plastic spacer
Adapter plate
(L) x 4 (one at a time)
7


