PRJ-WALLKIT-11 Installation Instructions
12 Visit the InFocus support site at www.infocus.com/support
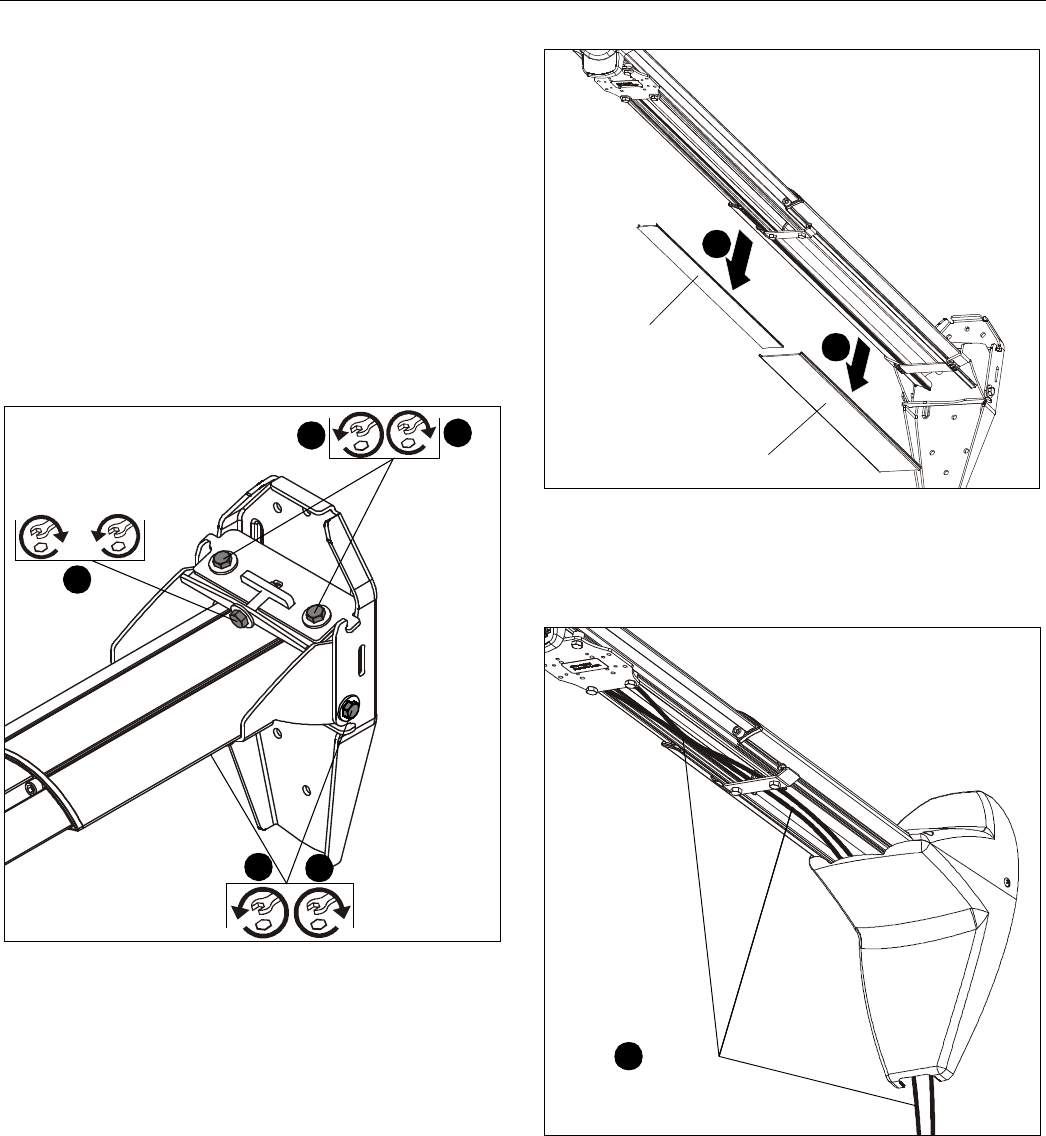
Pitch Adjustment - Entire Arm
1. Loosen two 5/16-18 x 1/2" hex head screws (T) (one on
each side of wall bracket). (See Figure 22)
2. Loosen two bolts (one on each side of pitch adjustment
screw). (See Figure 22)
3. Adjust pitch adjustment screw until mount is at desired pitch
level.
• Turn clockwise to raise mounting level.
• Turn counterclockwise to lower mounting level. (See
Figure 22)
4. Tighten two bolts (one bolt on either side of pitch adjustment
screw). (See Figure 22)
5. Tighten two 5/16-18 x 1/2" hex head screws (T) (one on
each side of mounting bracket). (See Figure 22)
Figure 22
6. Return mount covers to the mount following instructions in
Installing Mount Covers section.
Cable Management (Optional)
NOTE: In most cases, the cable management cover will NOT
need to be removed in order to route cables from
projector to the wall mount. But for some thick cables,
removing the cover may be necessary.
NOTE: Remove mount covers from the mount following
instructions in Removing Mount Covers section.
1. Remove cable management covers (if necessary) from
short throw projector arm. (See Figure 23)
Figure 23
2. Route projector cable(s) under mount cover and through
short throw projector arm tunnel. (See Figure 24)
Figure 24
1
5
2
4
or
3
Raise
Lower
(T) x 2
[Small cable cover]
[Large cable cover]
1
1
(projector not shown)
Cable(s)
(projector not shown)
2


