


EN 15
PLAYBACK
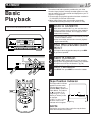
Basic
Playback
The easiest, most basic operation possible with your video
recorder is tape playback. Already-recorded signals on a video
tape are read by your video recorder and displayed on your TV
just like a TV programme.
● This recorder can play back tapes that have been recorded in
D-VHS (MTP), S-VHS and VHS formats.
● When playing back a tape, this recorder automatically
identifies the recording format (D-VHS, S-VHS, or VHS).
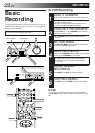
LOAD A CASSETTE
1
Make sure the window side is up, the rear label side is
facing you and the arrow on the front of the cassette is
pointed toward the recorder. Do not apply too much
pressure when inserting.
● The recorder power comes on automatically and the
counter is reset to 0:00:00.
● If the record safety tab has been removed, playback
begins automatically.
FIND PROGRAMME START
POINT
2
If the tape is advanced past the start point, press REW.
To go forward, press FF.
START PLAYBACK
3
Press PLAY. "BEST" appears blinking in the recorder's
display panel during automatic tracking (only cassettes
recorded in the S-VHS or VHS mode ੬ pg. 28).
STOP PLAYBACK
4
Press STOP. Then press EJECT to remove the cassette.
1
2
3
FF
PLAY
REW
STOP
Turn on the TV and select the AV mode.
STOP
EJECT
REW
PLAY
FF
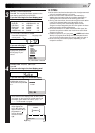
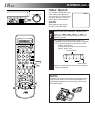
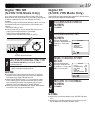
Tape Position Indicator
The tape position indicator
appears on screen when,
from the Stop mode, you
press FF, REW or perform an
Index Search. The position
of "5" in relation to "0"
(beginning) or "+" (end)
shows you where you are
on the tape.
"O.S.D." (੬ pg. 11) must
be set to "ON", or the
indicator will not appear.
NOTE:
Depending on the type of tape used, there may be times
when the indication is not correct.
3
1:23:45
REMAIN 2:35
0
+++
Beginning End