


24
25
Calculate the effect and create a scene from it
that should appear in the scene bin.
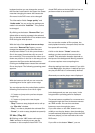
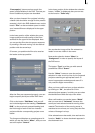
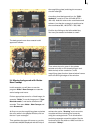
Start “DVD-Arabesk 2” and enter the function
“Edit Menu”.
Select the menu item “Background” and under
“Type” set the option “Scene”. Clicking on the
button “Select” below opens project selection.
Conrm the active project so that the desired
scene bin appears. Call up the menu image
previously created with Liquid Images and
conrm with “Ok”.
Finally, set the option “Animated” under
“Mode”.
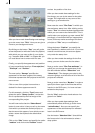
5.3 Moving background with Particle
Magic
In this example you will use the supplementary
program Particle Magic to learn how to create a
nice background menu with little effort.
Create a black scene that lasts 30 seconds, insert
it in the storyboard and give it a nice title.
Enter the menu “Titling”, select the titling effect
“Horizontal Scroller” and insert it into the
storyboard. Set the effect duration to 30 seconds
and click on the button “Enter/edit text”.
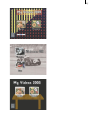
In text entry mode delete the existing panel and
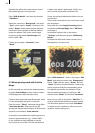
enter an appropriate title, e.g. “Videos 2003”.
In our example we have decided to use the
font Lynn at a size of 200. The text should have
a white color with an alpha value of 50%, and
show a white frame with a thickness of 4.
Center the text and calculate the effect over the
entire scene.
Then create a new scene from it and insert it into
the storyboard.
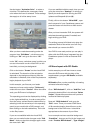
Now enter the menu Image Processing effects
and select the Particle Magic effect “PM Draw”
and insert it.
In the effect options click on the button
“Archives” and select the project “DR Burning
Border”.
Calculate the effect and create a scene from it
that appears in the scene bin.
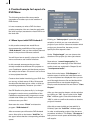
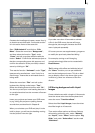
Start “DVD-Arabesk 2”. Click on the button “Edit
Menu” and select the menu item “Background”.
Under “Type” pick the option “Scene” and use
“Select” to call up project selection. Conrm the
active project so that the corresponding scene
bin appears and conrm the selection of the
scene created previously by clicking on “Ok”.
Activate unter “Mode” the function “Animated”.
Now you can click on the button “Add Film” in
order to pick the desired lms one after another.
The lms then appear in the mode “Edit Menu”,
in which you can continue to rene your work
(position, frames, titling, etc.).