


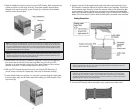
10. Chances are that your computer may already have an IDE cable with a spare connector.
If so, you may skip to step 14. If not, please proceed to step 11.
11. It is now time to replace your computer’s original IDE ribbon cable with the three con-
nector E-IDE ribbon cable provided in the package. On most computers, the connectors
are keyed in such a way that it is impossible to install this cable incorrectly. However,
this may not be the case in your computer. CSEL will not work with the supplied cables.
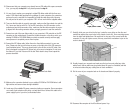
12. To ensure that the cable is correctly connected, make sure that the colored wire and the
Pin 1 arrow are lined up with Pin 1 of the IDE controller or the IDE connector on the
motherboard and drive connectors. Also, make sure that the cable connector is proper-
ly aligned with the mating connector before you apply pressure to seat the connector.
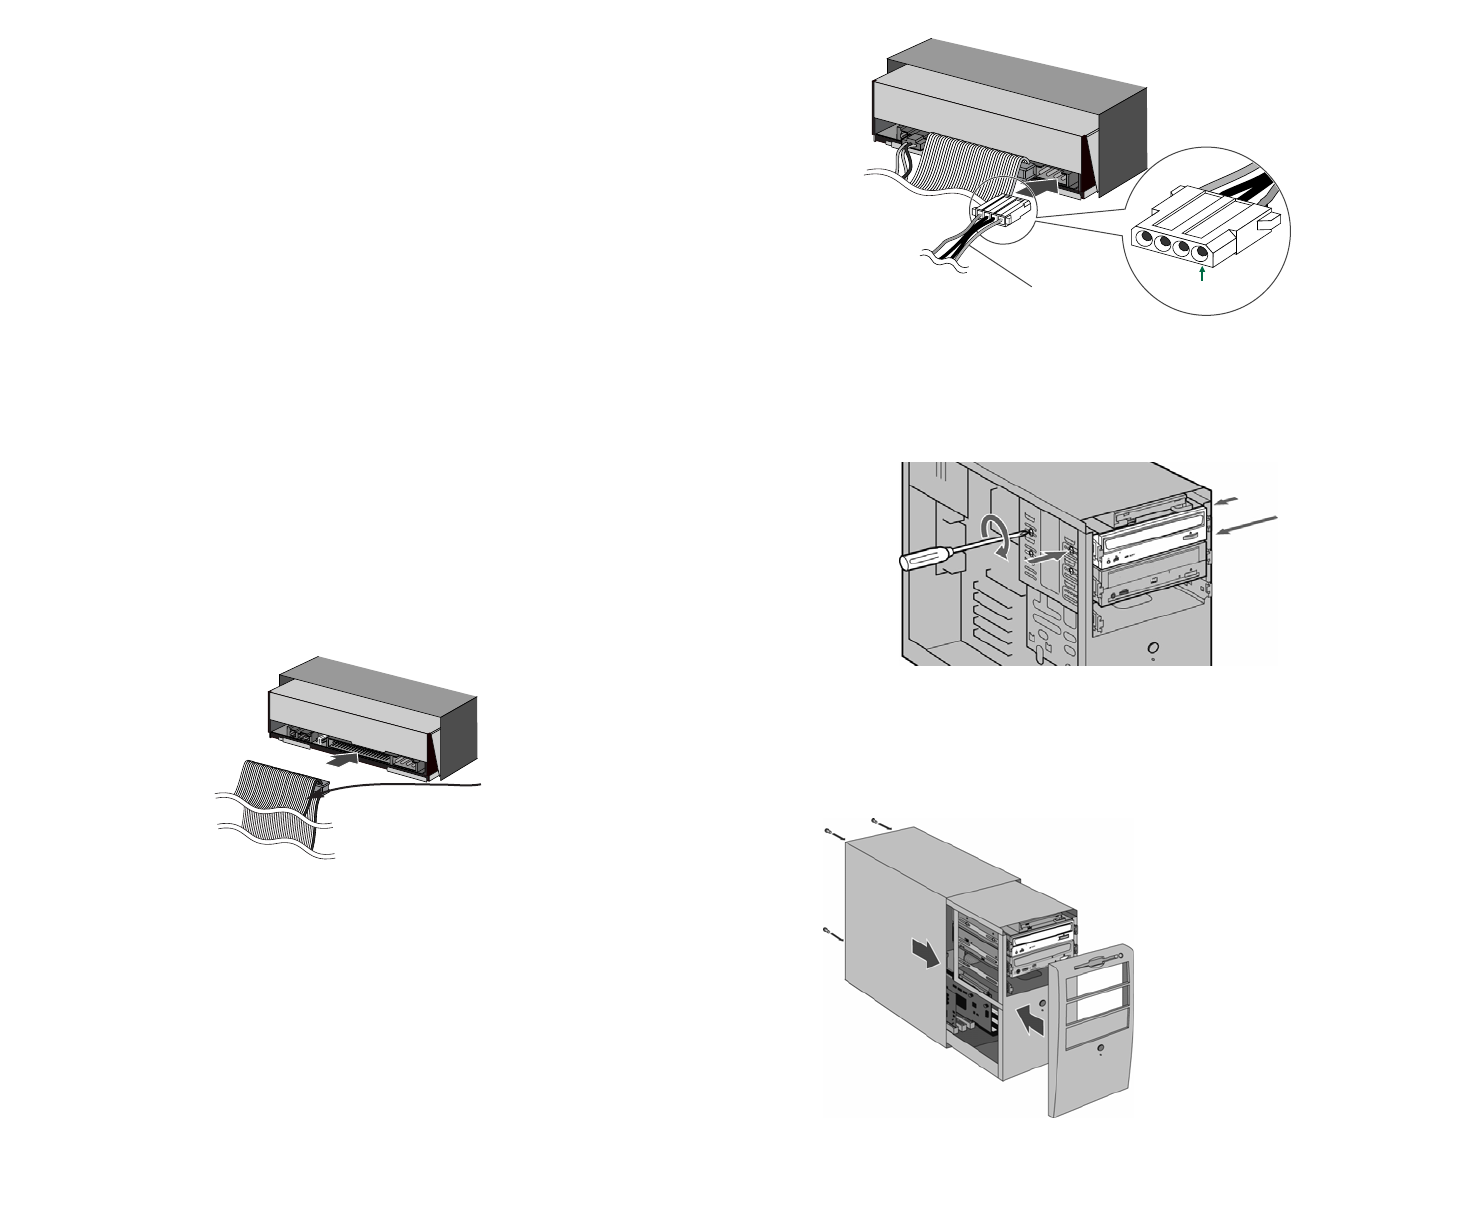
13. Connect one end of the new ribbon cable to your computer's IDE controller or the IDE
connector on the motherboard. Connect the middle connector or the other end to your
existing CD-ROM or DVD-ROM. Make sure both are seated correctly and then apply
some pressure to completely secure them in place.
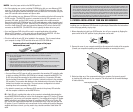
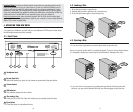
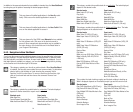
14. Connect the IDE ribbon cable (either the end or the middle connector) to your new
drive. Please note that your drive has an arrow on the right side of the IDE connector
(see illustration below). This arrow should point to the red line on the IDE cable. Your
drive is designed to accept the IDE ribbon only at its correct orientation. Do not force
the ribbon in if you feel it does not fit the slot. Refer back to step 10 and repeat the
process described.
15
IDE cable
Color Mark
TopTop
Bottom
4-pin power cable
14
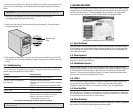
15. Make sure the connector attached to your existing CD-ROM or DVD-ROM drive is still
tight and has not become loose during installation.
16. Locate one of the available DC power connectors inside your computer. Power connectors
are usually 4-pin extension with yellow. red and black wires. Connect this cable to the
power supply input of your drive, as illustrated below.
17. Carefully slide your new drive into the bay. Locate the screw holes on the drive and
match them against the screw holes in the chassis. Insert all 4, 3mm mounting screws
from the sides and tighten them. Be careful not to drop any of the screws inside the
computer. Do not over tighten screws; this may cause drive mechanism to jam or the
screw to break off.
18. Visually inspect your computer and make sure that you have not pulled any other
cables loose, that no cables may be pinched when the case is re-installed, and that
no wires are obstructing any cooling fans or block ventilation.
19. Put the cover of your computer back on its chassis and fasten it properly.
20. Reconnect the computer to the AC outlet and power it up.