


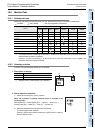

16 Display Module (FX3S-5DM)
153
FX3S Series Programmable Controllers
User's Manual - Hardware Edition
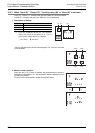
11
Built-in Analog
12
Output Wiring
13
Wiring for
Various Uses
14
Test Run,
Maintenance,
Troubleshooting
15
Other Extension
Units and
Options
16
Display Module
(FX
3S
-5DM)
17
Memory
Cassette
A
Special Devices
(M8000-, D8000-)
B
Instruction List
C
Discontinued
models
16.2 Installation and Removal
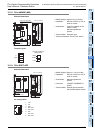
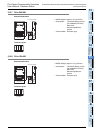
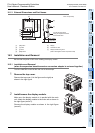
16.1.3 External Dimensions and Part Names
16.2 Installation and Removal
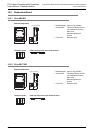
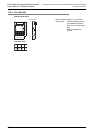
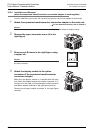
Be sure that the power is OFF when installing the display module.
16.2.1 Installation and Removal
(when the expansion board/connector conversion adapter is not used together)
The FX3S-30MT/ES is used as the main unit in this example.
1 Remove the top cover.
Remove the top cover (A in the figure on the right) as
shown in the right figure.
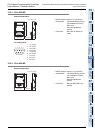
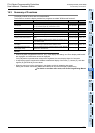
2 Install/remove the display module.
Make sure the display module is in parallel with the main
unit. Attach the display module to the main unit as shown in
the right figure (arrow 2).
Remove the display module as shown in the right figure
(arrow 2').
[1] [OK] button [5] Display
[2] [+] button [6] Connector for PLC
[3] [-] button [7] Display module fixing hook
[4] [ESC] button (When used together with an expansion board)
Unit: mm (inches)
34.4 (1.36")
51.2 (2.02")
35 (1.38")
9.6 (0.38")
12 (0.48")
[4]
[5]
[3]
[2]
[1]
[6]
[7]
Cut off this part when
using an expansion board
at the same time.
A
1
2'
2