EN-17
ENGLISH
Setting the aspect ratio
You can change the aspect ratio of the input video signal (or the ratio of width to height of the image). Change the
setting according to the type of the input video signal.
How to change the settings:
With the remote control:
1. Press the ASPECT button.
• Every time the ASPECT button is pressed, the aspect mode changes from AUTO to 4:3, to 16:9, to EX-
PAND, and back to AUTO.
With the FEATURE menu:
(See Page 21 for menu setting.)
1. Display the FEATURE menu.
2. Select ASPECT by pressing the { or } button.
3. Select your desired aspect ratio by pressing the $ or % button.
To cancel the menu:
4. Press the MENU button.
Important :
• When a 4:3 image is kept displayed for a long time before displaying 16:9 image, the afterimages of the black
bars may appear on the 16:9 image screen. Consult your dealer in this case.
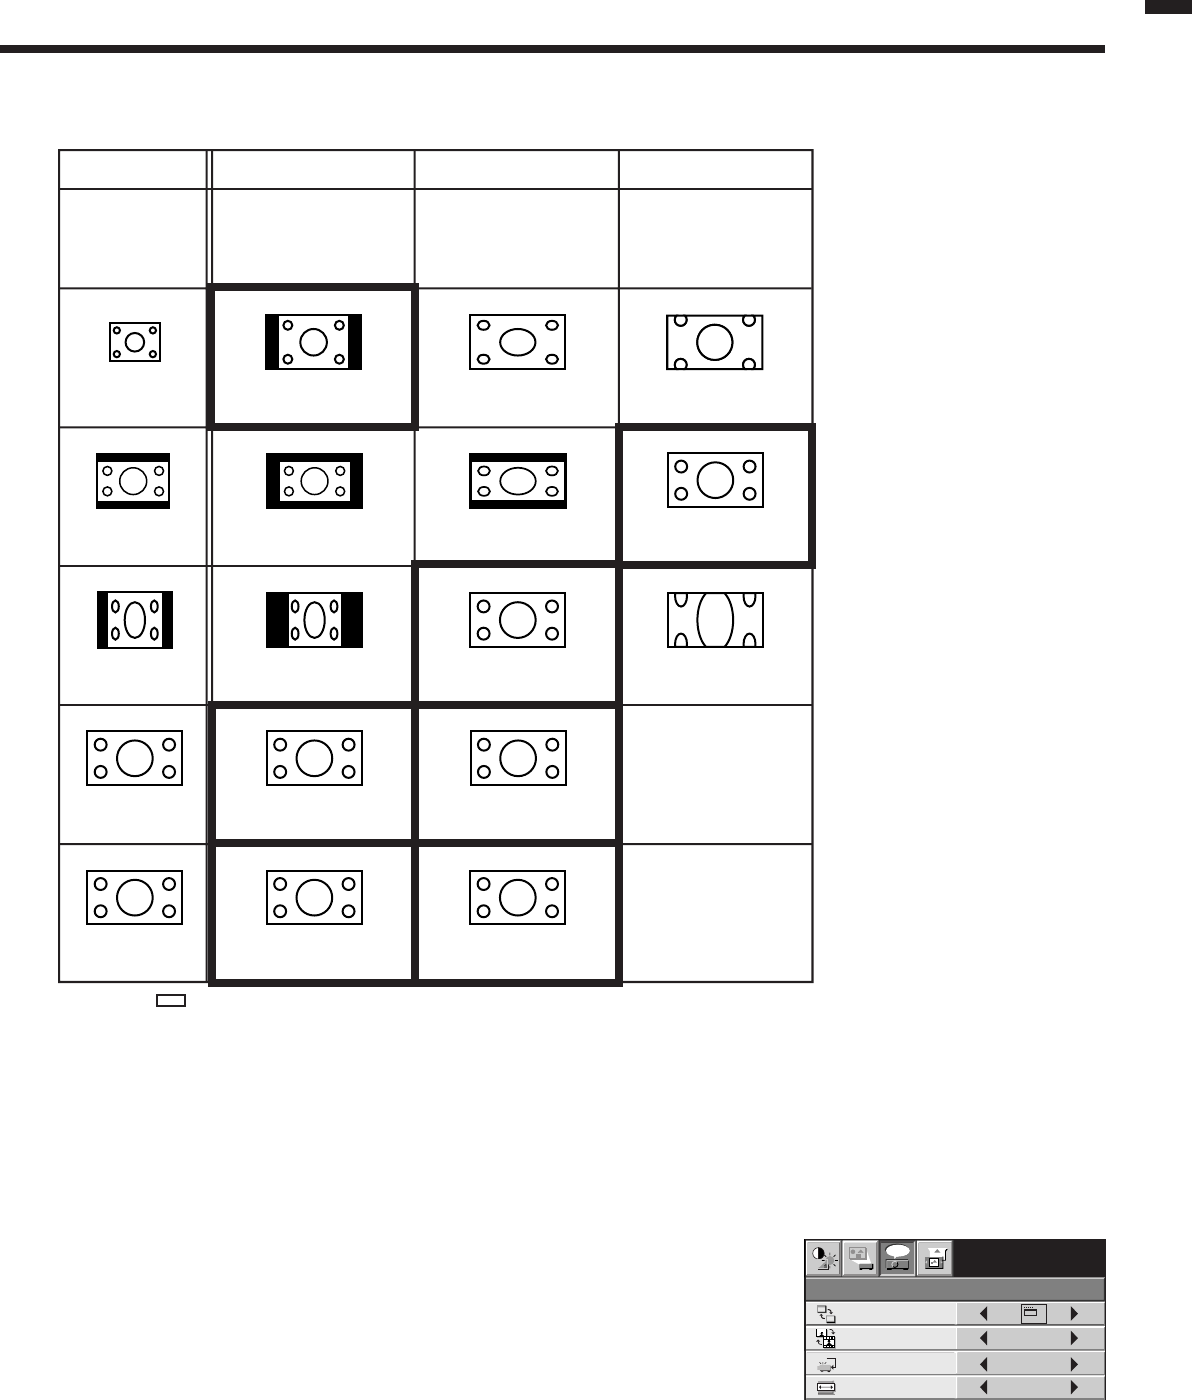
Original image
size
4:3 image (480i,
576i, 480p, 576p,
and PC)
4:3 CinemaScope
and Vista image
Squeezed 4:3
(480i, 576i, 480p,
576p)
16:9 image (1080i)
16:9 image (720p)
4 : 3
Projects images
with an aspect
ratio of 4:3 when
the input signal is
4:3 image.
EXPAND
Projects images in
the CinemaScope
size or Vista size
together with
subtitles.
Available only when
the input signal is
480i or 576i
.
Available only when
the input signal is
480i or 576i
.
Not available.
16 : 9
Projects images
with an aspect
ratio of 16:9.
Available only when
the input signal is
480i or 576i
.
Not available.
Bold frames are recommended modes.
• DVDs are usually labeled either FULLSCREEN or WIDESCREEN. FULLSCREEN DVDs produce a 4:3 image as shown above, and
WIDESCREEN DVDs produce a 16:9 image as shown above, sometimes with or without thin black bars on the top or bottom of the picture.
If you are purchasing DVDs for enjoyment with your projector, WIDESCREEN versions of DVDs will fill most of the screen and produce the
best viewing results.
FEATURE
AUTO
SVGA60
AUTO
AUTO
opt.
MENU POSITION
CINEMA MODE
VIDEO SIGNAL
?
ASPECT
1.


