


EN-26
This projector automatically and properly projects video signals supplied from the computer. However, some
video signals may not be projected, depending on the type of the computer. In such a case, press the AUTO
POSITION button. (See Page 20.) When the signal is still not projected properly, adjust the projected image using
the SIGNAL menu.
How to adjust the image supplied from the computer using the menu:
Carry out the following procedures according to the symptoms.
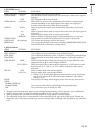
Wide strips appear. ................................................ Adjust TRACKING in the SIGNAL menu.
The projected image flickers.
The projected image is blurred. ............................ Adjust FINE SYNC. in the SIGNAL menu.
The projected image is displaced horizontally...... Adjust HORIZ.POSITION in the SIGNAL menu. Every time the
$ button is pressed, the image moves to the right. Every time
the % button is pressed, the image moves to the left.
The projected image is displaced vertically. ......... Adjust VERT.POSITION in the SIGNAL menu. Every time the
$ button is pressed, the image moves down. Every time the %
button is pressed, the image moves up.
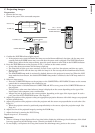
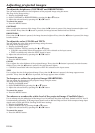
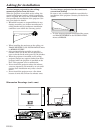
1. Display the SIGNAL menu.
2. Press the { or } button to select an item to adjust.
3. Adjust the selected item by pressing the $ or % button.
To cancel the menu:
4. Press the MENU button.
• Do not change the settings of the SIGNAL menu in normal use.
Simple method to adjust the image position
To adjust the horizontal position:
1. Align the left edge of the image with the left side of the screen by adjusting HORIZ.POSITION. Then, align
the right edge of the image with the right side of the screen by adjusting TRACKING.
2. Repeat step 1 above to complete the adjustment of the horizontal position.
To adjust the vertical position:
3. Align the upper edge of the image with the upper side of the screen by adjusting VERT.POSITION.
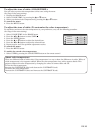
LPF (Progressive filter)
You can select whether or not to enable the LPF. This item is set to OFF normally.
Vertical or horizontal streak noise may appear on the projected image, depending on the type of the DVD player
you use. In such a case, you can reduce such streak noise by enabling the LPF. However, projected images become
softened slightly.
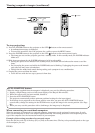
1. Display the SIGNAL menu.
2. Press the { or } button to select USER.
3. Press the ENTER button.
4. Press the { or } button to select LPF.
5. Press the $ or % button to choose ON or OFF.
To cancel the menu:
6. Press the MENU button.
Adjusting projected images (continued)
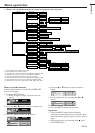
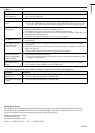
CLAMP
POSITION
USER
0
CLAMP WIDTH 1
LPF OFF