


4. TV Menus 41
In the U.S. call 1(877) 675-2224 for assistance.
Adjust, continued
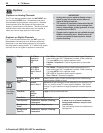
Picture+
PerfectColor
PerfectColor Sliders
Adjusts the saturation (intensity) of six colors for the
current image source.
PerfectTint Sliders
Adjusts six hues for the current image source
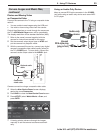
Using PerfectColor:
Highlight the PerfectColor™ icon and press
ENTER
to display the PerfectColor menu. Settings are retained
independently for each TV input.
Using PerfecTint
•
To switch between PerfectColor™ and PerfecTint™ adjustments, highlight
Adjust Mode and press
.
• Press to move from one color bar to the next.
• Press to change settings.
• Press
CANCEL
to restore default settings.
• Press
MENU
to return to the main menu.
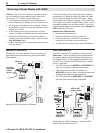
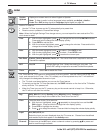
Advanced
Picture
Advanced Picture allows you to save highly customized picture adjust-
ments for each input. Mitsubishi recommends a professional
installer make these adjustments.
Press 1.
MENU
. Under Picture+, highlight the Advanced Picture icon and press
ENTER
.
With 2. Picture Mode highlighted, press
ENTER
to change
from blank (undefined)
to
ADV
.
L75-A91: Choose
ADV1 (daytime settings) or ADV2 (nighttime settings).
Use 3.
to
highlight an option you wish to change and press
ENTER
to see the adjustment display.
Press 4.
to change settings.
Use 5.
to
navigate to additional options and press
to change settings
.
Press 6.
MENU
to return to the Advanced Picture menu
.
Press
MENU
again to close the menu and save
settings
. The
Advanced Picture adjustments will be in effect for the current input.
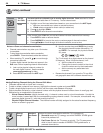
To use the custom Picture Mode at a later time
Press
MENU
and go to Adjust > Picture > Picture Mode and:
L75-A81 L75-A91
Select •
SPECIAL if settings were saved by
your professional installer.
Otherwise select • ADV.
Sele•
ct ISF Day or ISF Night if settings were
saved by your professional installer.
Otherwise select • ADV1 or ADV2.
To return to the default values for Advanced Picture
Display the Picture+ > Advanced Picture menu and:
L75-A81 L75-A91
Highlight RESET Pic Mode and press
ENTER
.
Highlight the 1. Advanced Picture mode to change.
H2. ighlight RESET Pic Mode and press
ENTER
.
Repeat this separately for both ADV1 and ADV2.
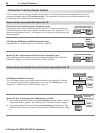
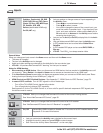
3D Mode
3D Mode
On, Off
Use the
On
setting for video games and movies that require 3-D glasses.
This setting applies only to the current input.
Note: 3D options are available only for 1080p 60-Hz video sources
connected to an HDMI input.
Source
Format
Checkerboard,
Top/Bottom
Selects the source format.
Glasses L-R Standard,
Reverse
Synchronizes the 3D glasses with the image on screen to provide the
best 3D effect. Try
Reverse
if
Standard
seems incorrect.
Glasses
Control
IR Emitter,
DLP Link
Selects the control type for your 3D glasses.