


Page 13
MODELS: WD-60C9 / WD-65C9 / WD-73C9 / WD-60737 / WD-65737 / WD-73737 / WD-82737
WD-65837 / WD-73837 / WD-82837
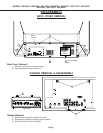
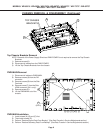
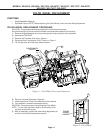
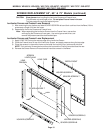
Figure 4: Lower Duct Rear Mounting Screw
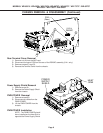
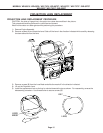
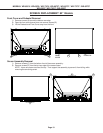
Figure 5: Lower Duct Front Mounting Screw
LOWER DUCT REMOVAL
1) Remove Upper Duct, Fans, Fan Holders, Thermal Sensor and Lamp Cartridge. See previous page.
2) Remove the 2 screws (C) one in front and one in the rear of the lower duct, refer to Figures 4 and 5.
3) Carefully remove the lower duct from the Engine.
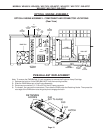
ENGINE Replacement (Reverse the Removal Procedure)
1) Install Duct Assembly on the new Engine.
2) Remove the Protective Lens Cover from the face of the Lens and place it on the old Engine.
3) Install the Engine Assembly in the cabinet.
4) After a new Engine is installed, perform the “Restore Index Delay” and “Save Engine and Geometry Setting
to Backup” procedures as described in the Data Transfer section of the Service Adjustments.
5) If needed. perform the Horizontal and Vertical Centering Adjustment and Manual Geometry Alignment
described in Service Adjustments.
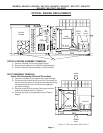
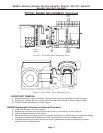
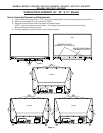
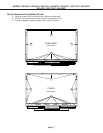
OPTICAL ENGINE REPLACEMENT (Continued)
C
DUCT
UPPER
OPTICAL
ENGINE
C
DUCT
LOWER