


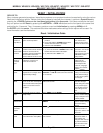


Page 34
MODELS: WD-60C9 / WD-65C9 / WD-73C9 / WD-60737 / WD-65737 / WD-73737 / WD-82827
WD-65837 / WD-73837 / WD-82837
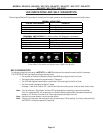
Phase 2 - 4:3 and 16:9 Alignment
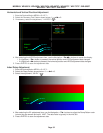
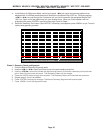
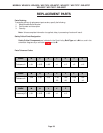
1. With the Manual Geometry Alignment activated, press < > to enter the 4:3 Alignment Mode. The pattern
below will be displayed.
Note: Pressing < > will toggle between the 4:3,16:9 (top & bottom) and 16 Point Geometry Alignment modes.
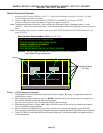
2. In the 4:3 Alignment Mode, continuing to press <XX> will cause the geometry pattern to be displayed with
11 different preset amounts of correction. Continue pressing <WW> or <XX> to cycle through the 11 patterns
until you find the one with the straightest Blue 4:3 Lines. It may help to count the patterns as you cycle
through them. When you find the pattern with the straightest Blue 4:3 Lines, press < >. The Top 16:9
Alignment Mode will then be activated as indicated by the Top Red 16:9 Line displayed in the pattern.
4:3 MODE
Select Straightest Blue Lines
4:3 MODE
Select Straightest Red Line (Top)
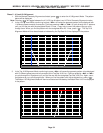
3. In the Top 16:9 Alignment Mode, continuing to press <XX> will cause the geometry pattern to be displayed
with 15 different preset amounts of correction to the Top Red 16:9 Line. Continue pressing <WW> or <XX>
to cycle through the 15 patterns until you find the one with the straightest Top Red 16:9 Line. Again, count
the patterns as you cycle through them. When you find the pattern with the straightest line, press < >.
The Bottom 16:9 Alignment Mode will then be activated as indicated by the Bottom Red 16:9 Line displayed
in the pattern.