11
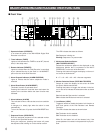
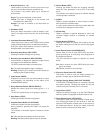
&6 Electronic Zoom Button (EL-ZOOM)
Use this button to enter or exit the electronic zoom
mode.
In the EL-ZOOM mode an image presently displayed in
single spot can be enlarged and compressed on the
Multiscreen Monitor.
&7 Group Selection Button (GROUP SELECT)
Selects the camera group from among group 1, 2, 3
and 4.
The LED will light while any of the groups is selected.
&8 Index Button (INDEX)
Displays the all record list (list and thumbnail) or alarm
and emergency list depending on the status of the
ALARM SEARCH button.
&9 Alarm Search Button (ALARM SEARCH)
Selects either the list of alarm and emergency record-
ings or all recordings to be displayed on the
Multiscreen Monitor.
The LED indicates the status of selection as shown
below.
On: Search records for alarm and emergency record-
ings.
Off: Search records for all recordings.
Pressing this button in combination with the STOP but-
ton will reset the activated alarm.
*0 Display Button (DISPLAY)
Toggles the all title displays on the Multiscreen Monitor
on and off, such as camera and group titles, operating
status and so forth.
Pressing this button will also display the record list with
the search editing area to find the record to be played
back.
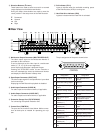
*1 Link Indicator (LINK)
Is lit while the connection is established with the WJ-
HD500A Disk Recorder.
*2 Copy Button (COPY)
Copies the selected images on to the DVD-RAM disk
when the system is equipped the DVD Extension Unit.
*3 Numeric Buttons (1 - 16)
Use these buttons to select the desired camera number
while recording and playing back.
Entering the preset password with these buttons will
release the button lock function.
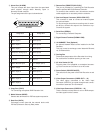
*4 Set Button (SET)
Use this button to select multiple records in the list for
coping to the DVD-RAM disk.
*5 Increment/Decrement Button (+, -)
Use these buttons to zoom in and out an image while
the zoom mode is selected.
*6 Direction Buttons (CDAB)
Use these buttons to select the desired area to be
zoomed on the Multiscreen Monitor.
C: Downward
D: Upward
A: Left
B: Right
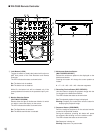
*7 Stop Button (STOP)
Stops playback.
*8 Record Button (RECORD)
Starts recording manually if applicable. The LED turns
on to indicate that the recording mode is selected.
*9 Playback/Pause Button (PLAY/PAUSE)
Pressing this button will start playback.
During playback, pressing this button will pause the
playback.
The LED indicates the status as shown below.
On: Playback mode
Blinking: Pause mode
(0 JogDial
Rotate in the pause mode to advance forward or
reverse to the next recorded image.
Rotating the dial also selects the record number when
the recorded list is displayed on the monitor.
(1 Shuttle Ring
Rotate in the playback or the pause mode to search for-
ward or reverse the recorded images at variable speed.
(2 Recording Stop Button (REC STOP)
Pressing this button will stop the recording.
(3 Remote Port (REMOTE)
Connect with the supplied modular cable to the WJ-
HD500A Disk Recorder.


