


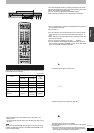

RQT8009
10
Getting started
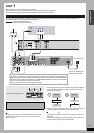
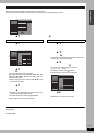
STEP 2 Plug-in Auto Tuning
After plugging the unit into your household AC outlet and pressing
[^ DVD POWER] to turn the unit on for the first time, the unit assists
you to set the on-screen language, and automatically tunes in all
the channels it can receive and sets the clock.
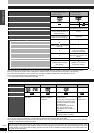
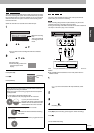
The unit automatically determines the type of transmission
(airwaves or cable) and puts them into channels as follows.
Preparation
•Turn on the television and select the appropriate video input to suit
the connections to this unit.
•If you connect the unit through a cable TV box or satellite receiver
(➔ page 8), tune to your local PBS for Auto Clock Setting to work.
If there is no local PBS, set the clock manually (➔ page 34, Set
Clock Manually).
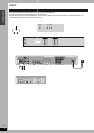
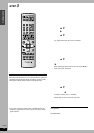
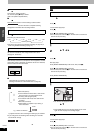
1 Press [^ DVD POWER].
2 Press [e, r] to select the language
and press [ENTER].
3 Press [ENTER] to start Plug-in Auto
Tuning.
The unit then proceeds with Auto Clock Setting. The time is
displayed when finished.
•DST, Daylight Saving Time, shows the summertime setting.
•Time Zone shows the time difference from Greenwich
Mean Time (GMT).
EST (Eastern Standard Time) = GMT –5
CST (Central Standard Time) = GMT –6
MST (Mountain Standard Time) = GMT –7
PST (Pacific Standard Time) = GMT –8
AST (Alaska Standard Time) = GMT –9
HST (Hawaii Standard Time) = GMT –10
For other areas: xx hr
4 Press [ENTER].
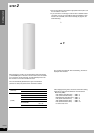
Band Channel
Antenna Mode
(Airwaves)
VHF 2–13
UHF 14–69
CableTV Mode
(Cable)
VHF 2–13
CATV LOW BAND 95–99
CATV MID/SUPER BAND 14–36
CATV HYPER BAND 37–65
ULTRA BAND
66–94
100–125
SPECIAL CATV CHANNEL 1