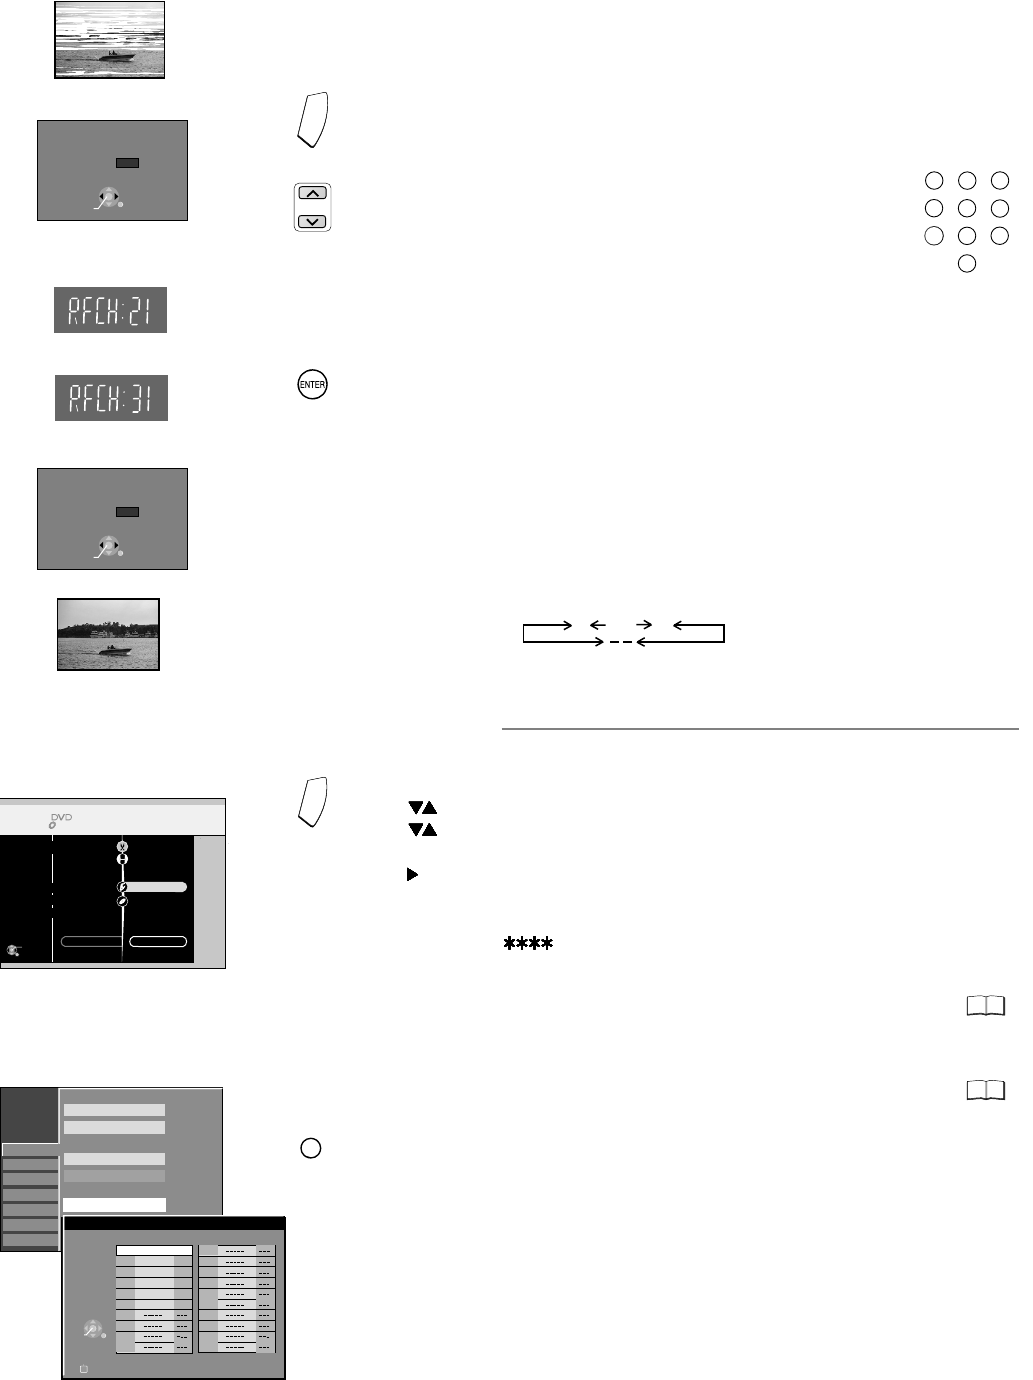
Removing Interference /
Changing RF output channel
In some cases, interference (lines or patterning) or a very poor picture may appear
on the TV when the DVD Recorder is connected. If this happens, follow the steps
below to change the RF output channel to remove the interference.
!
Press the FUNCTIONS button for more than 5 seconds. The RF output channel
number is displayed on the DVD display.
!
Press ENTER to finish this setting.
!
Press the Numeric buttons or use the Channel (CH) button to select
a channel number, which differs at least by 2 or 3 from the present
channel number. (For example, if the original channel number was
28, enter 31.)
21
68
(RF OFF)
...
!
Retune your TV until you receive the Test pattern. It may be necessary to
repeat steps above until you can see the Test pattern clearly.
If using a Scart cable please see the note below.
!
Press for about 5 seconds. The preset channel will be displayed on
the DVD display.
!
Press channel select buttons CH or 0 to invoke [- -].
!
Confirm with ENTER.
FUNCTIONS
Set the RF output channel of the DVD Recorder to [- -] (RF OFF) if the DVD
Recorder is connected to the TV via the 21-pin Scart cable.
TV screen
The picture with interference
On-Screen Display
Test pattern indication
The clear picture
DVD display
Indication when the RF output
channel is 21 (example)
Indication after changing the RF
output channel to 31 (example)
Test pattern indication
SELECT
ENTER
RETURN
RF OUTPUT CHANNEL
CH:
21
DVD
SELECT
ENTER
RETURN
RF OUTPUT CHANNEL
CH:
31
DVD
1
2
3
4
5
6
7
8
9
0
PAGE
CH
F
U
N
C
T
I
O
N
S
SETUP
Disc
Picture
Sound
Display
Connection
Others
Edit Profiles
Auto-Setup Restart
Add New DVB Service
Tuning
Manual
Download from TV
Digital
Analogue
Signal Quality
Manual Tuning
Pos
Name
Ch
Pos
Name
Ch
901
BBC1
22
906
* * * *
30
914
915
913
912
911
905
CH5 26
903
ITV 24
904
CH4 25
902
BBC2
23
916
Delete
907
909
910
908
RETURN
SELECT
ENTER
917
919
920
918
!
Press FUNCTIONS to display the FUNCTIONS Menu.
!
Press to select [To Others] and then press ENTER.
!
Press to select and then press ENTER.SETUP
!
Press to select Manual and then press ENTER to display the list of tuned TV
stations and confirm that all available TV stations have been set correctly.
[]
!
Press RETURN to exit the On Screen Display.
When the station names have not been set correctly, see page 44 for details.
When no station has been found, confirm all connections of the DVD Recorder
again and restart the Auto-Setup. See page 43 for details.
Checking the Settings after Auto-Setup
TV Reception Channels
If station name is [ ]:
The asterisks indicate that a station was found during Auto-Setup but has not been
named (due to weak signal).
The stations in the list with asterisk will need to be named manually.
If station name is [- - - -]:
The dashes represent unused channel positions.
You can set stations manually if you want to.
FUNCTIONS
DVD-RAM
Disc Protection Off
To Others
ENTER
RETURN
Return
DISC MANAGEMENT
PLAYLISTS
FLEXIBLE REC
DIRECT NAVIGATOR
TIMER RECORDING
VIDEO Plus+
SETUP
TV Guide
RETURN
F
U
N
C
T
I
O
N
S
!
Check and sort your digital channel in the Setup menu under [Edit Profiles].
See page 42 for details.
15
44
44


