


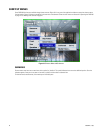
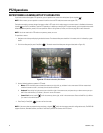
28 C1696M-B (11/08)
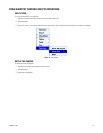
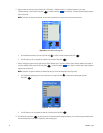
To activate a PTZ preset using the keyboard/mouse, or the DVR5100 control pad:
1. While in live view mode, select a video pane that is displaying video from a camera with PTZ capabilities.
2. From the Main menu, click Actions. [Or, navigate to Actions and press Enter/Shift .] The Actions menu appears.
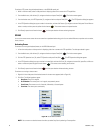
3. From the Actions menu, click PTZ Operations. [Or, navigate to Actions and press Enter/Shift ] The PTZ Operations dialog box appears.
4. In the PTZ Operations dialog box, type a number in the text box, and then click Presets. [Or, navigate to the text field, press Plus or Minus to
select a number, and then press the yellow function button ]. The camera moves to the preset location.
5. Click Close [or press the red function button ] to close your selection without activating the preset.
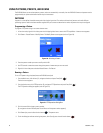
SCANS
In a scan, the camera moves across the current scene from a predetermined starting point. You can select different scan options such as random,
frame, and auto.
Activating Scans
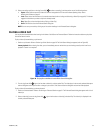
To activate a scan using the keyboard/mouse, or the DVR5100 control pad:
1. In live view mode, select a video pane that is displaying video from a camera with PTZ capabilities. The video pane border is green.
2. From the Main menu, click Actions. [Or, navigate to Actions and press Enter/Shift .] The Actions menu appears.
3. Click the PTZ Operations icon. [Or, select PTZ Operations and press Enter/Shift .] The PTZ Operations dialog box appears.
4. In the PTZ Operations dialog box, type a number in the text field, and then click Scan. [Or, navigate to the text field, press Plus or Minus to
select a number and press the green function button ]. The camera scans according to the actions.
5. Click Close [or press the red function button ] to close your selection without activating the scan.
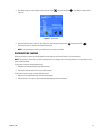
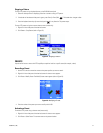
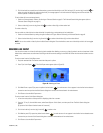
To activate a scan using a shortcut menu:
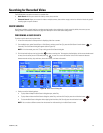
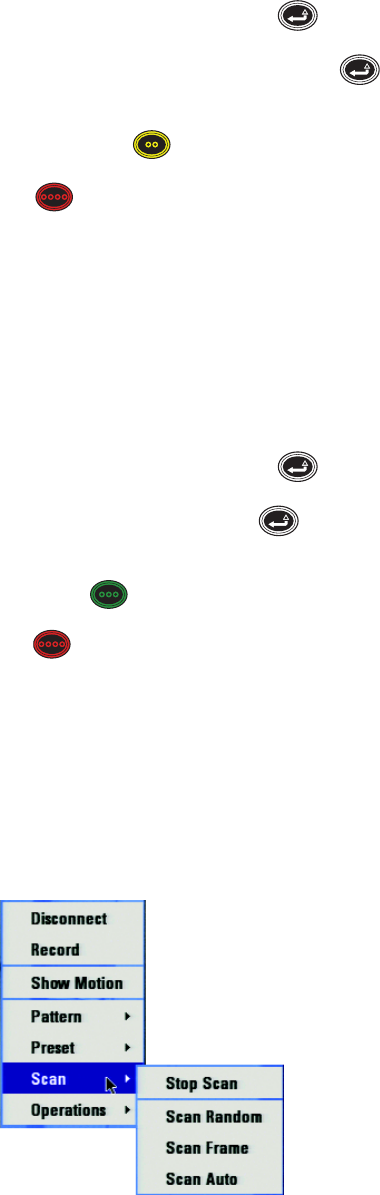
1. Right-click in the video pane of the desired camera. A shortcut menu appears (refer to Figure 24).
2. Click Scan. The following options appear:
a. Stop Scan: The scan is stopped.
b. Scan Random: The camera pans in an irregular, unsystematic pattern.
c. Scan Frame: The camera scans for 3 seconds, followed by a 3-second pause.
d. Scan Auto: The camera pans continuously.
Figure 24. Scan Shortcut Menu
NOTE: You can return to a desired camera view after you select Stop Scan by selecting a Preset position.