


18 C2673M-D (8/10)
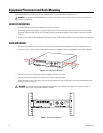
Equipment Placement and Rack Mounting
The DX4500/DX4600 can be placed on any flat surface (desk or table), or it can be mounted in an equipment rack.
DESKTOP MOUNTING
1. To prevent surface damage, install the rubber feet on the bottom of the unit.
2. Do not install the two chassis brackets. If already installed, remove the two chassis brackets from the sides of the unit. Using a Phillips
screwdriver, remove the eight 10-32 x 0.25-inch Phillips pan head screws (three per bracket). Save the brackets and screws for possible
future use.
3. Position the unit to allow for cable and power cord clearance at the rear of the unit. Be sure that the air flow around the unit is not obstructed.
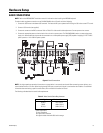
RACK MOUNTING
1. Remove the four rubber feet from the bottom of the unit (if already attached). Save the rubber feet and screws for possible future use.
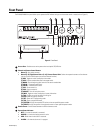
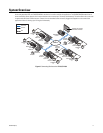
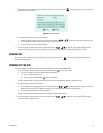
2. Using the six 10-32 x 0.375-inch Phillips screws, attach the two chassis brackets to the left and right sides of the unit (refer to Figure 6).
Figure 6. Attaching Chassis Brackets
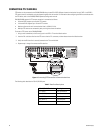
3. Place the unit into the rack. This step may require two people to hold the unit in place.
4. Fasten the rack brackets to the rack using the four 10-32 x 0.750-inch pan head screws.
Allow at least one rack unit (1.75 inches or 4.44 cm) of spacing between units. Slots and openings in the cabinet provide ventilation and
prevent the unit from overheating.
Figure 7. Rack Mount Installation
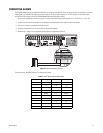
WARNING: Do not place the DX4500/DX4600 unit on its side. In this position, the unit is likely to fall over and may cause equipment
damage or personal injury.
WARNING: Do not block these openings. Never place the DVR near or over a radiator or heat register. Do not place it in a built-in
installation, such as a rack, unless proper ventilation is provided.