


Playing and recording from a DV camcorder
85
En
09
1 Make sure your DV camcorder is
connected to the front panel DV IN jack.
Also, set the camcorder to VTR mode.
2 Set the recording quality.
• See
Setting the picture quality/recording
time
on page 63 for detailed information.
3 From the Initial Setup menu, check
that the DV audio input is setup as you
would like.
See
DV Input
on page 128 for more on this.
• Check also that the
Audio In
settings for
External Audio
and
Bilingual
Recording
are as you want them (see
Audio In
on page 127).
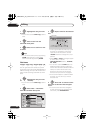
4 Select ‘DV’, then ‘Copy from a
DV Source’ from the Home Menu.
• DV recording only works when the DV
camcorder is in VTR mode with a tape
loaded.
5 Select ‘Record to Hard Disk
Drive’ or ‘Record to DVD’.
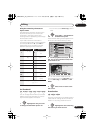
6 Find the place on the camcorder tape
that you want to start recording from.
For best results, pause playback at the point
from which you want to record.
• Depending on your camcorder, you can
use this recorder’s remote to control the
camcorder using the
,
,
,
,
,
and
buttons.
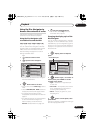
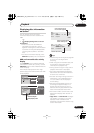
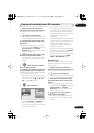
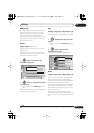
7 Select ‘Start Rec’.
• You can pause or stop the recording by
selecting
Pause Rec
or
Stop Rec
from
the on-screen display. You cannot
control the camcorder from this remote
control during recording.
• If you restart recording after stopping the
camcorder, the first few seconds of the
camcorder tape will not be recorded.
Use the pause button on your camcorder
instead and recording will start
immediately.
•
HDD, DVD (VR Mode) and DVD-RAM only:
A chapter marker is inserted every time
there is a break in the timecode on the
DV tape. This happens when the
recording is stopped or paused then
restarted, for example.
• If you don’t want to see the DV recording
screen during recording, press
DISPLAY
to hide it (press again to display).
• While recording, you cannot exit the DV
recording screen using the
HOME
MENU
or
RETURN/EXIT
button.
DV Auto Copy
DV Auto Copy allows you to make an exact
copy of the contents of a DV source to the
HDD or a DVD.
1 Make sure your DV camcorder is
connected to the front panel DV IN jack.
Also, set the camcorder to VTR mode.
2 Set the recording quality.
• See
Setting the picture quality/recording
time
on page 63 for detailed information.
3 From the Initial Setup menu, check
that the DV audio input is setup as you
require.
See
DV Input
on page 128 for more on this.
• Check also that the
Audio In
settings for
External Audio
and
Bilingual
Recording
are as you want them (see
Audio In
on page 127).
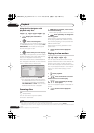
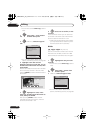
4 Select ‘DV’, then ‘DV Auto
Copy’ from the Home Menu.
• DV recording only works when the DV
camcorder is in VTR mode with a tape
loaded.
REC MODE
HOME MENU
ENTER
ENTER
Start Rec
Pause Rec
Stop Rec
SP (2h00m/DVD)
32h45m
Stop Stop
1.02.22
Control with these
buttons
Rem.
HDD
REC MODE
HOME MENU
DVR550HXS_WV_EN.book 85 ページ 2007年3月30日 金曜日 午前10時48分