


Recording
05
47
En
Recording from a DV camcorder
You can record from a DV camcorder connected to the
DV IN
jack on the front panel of this recorder. Using the
recorder’s remote, you can control both the camcorder
and this recorder.
Before recording, make sure that the audio input for the
DV IN
jack is setup (see
DV Input
on page 94).
Important
• The source signal must be DVC-SD format
• Some camcorders cannot be controlled using this
recorder’s remote.
• If you connect a second recorder using a DV cable,
you cannot control the second unit from this one.
• You can’t control this unit remotely from a
component connected to the
DV IN
jack.
• You can’t record date and time information from DV
cassette.
• During DV recording, if a part of the tape is blank, or
has copy-protected material on it, this recorder will
pause recording. Recording will restart automatically
when there is a recordable signal. However, if there is
more than 10 seconds of blank tape, this recorder will
stop recording and the camcorder should stop
(depending on the camcorder).
• For best results when recording from a DV
camcorder to this recorder, we recommend cueing
the camcorder to the place you want to start
recording from and setting the camcorder to play-
pause.
1 Make sure your digital camcorder is connected to
the front panel DV IN jack.
Also, set the camcorder to VTR mode.
2 Set up the recorder.
• Use
REC MODE
to set the recording quality. See
Setting the picture quality/recording time
on page 37
for detailed information.
• Make sure a recordable disc is loaded if you want to
record to DVD.
3 From the Initial Settings menu, check that the DV
audio input is setup as you require.
See
DV Input
on page 94 for more on this.
• Check also that the
Audio In
settings for
External
Audio
and
Bilingual Recording
are as you want
them (see
Audio In Settings
on page 93).
4 Press HOME MENU, select ‘Copy’, then ‘DV
Record’ from the menu.
• DV recording only works when the digital camcorder
is in VTR mode with a tape loaded.
5 Select ‘Record to Hard Disk Drive’ or ‘Record to
DVD’ to record to the hard disk drive or a recordable
DVD respectively.
6 Find the place on the camcorder tape that you
want to start recording from.
For best results, pause playback at the point from which
you want to record.
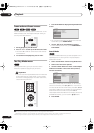
• Depending on your camcorder, you can use this
recorder’s remote to control the camcorder using the
,
,
,
,
,
and
buttons.
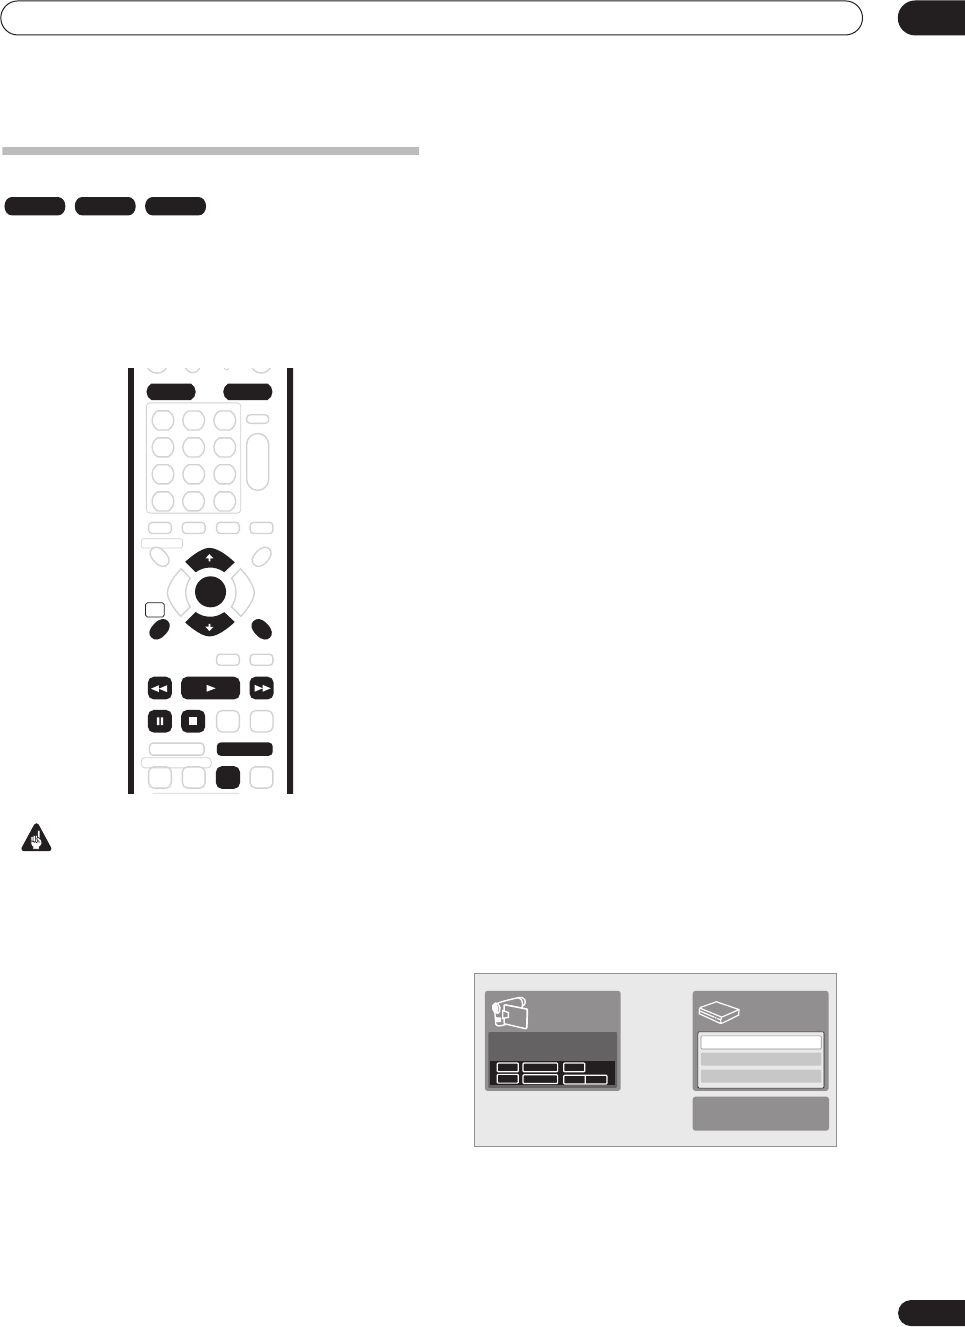
7 Use the
/
buttons to select ‘Start Rec’ and
press ENTER.
• Recording is automatically paused if the recorder
detects no signal, or a copy-protected signal.
Recording restarts when there is a non-copy-
protected signal.
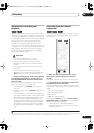
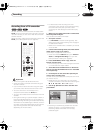
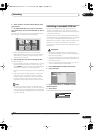
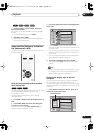
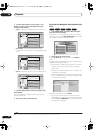
VR mode Video mode HDD
RETURN
HOME
MENU
AUDIO
HDD DVD
ENTER
CLEAR
PAUSE STOP
REV SCAN PLAY FWD SCAN
STEP/SLOW
REC MODE
ì
Start Rec
Pause Rec
Stop Rec
SP (2h00m)
1h59m
Stop Stop
1.02.22
Control with these
buttons
Rem.
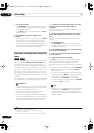
DVD
Start Rec
Pause Rec
Stop Rec
SP (2h00m/DVD)
32h45m
Stop Stop
1.02.22
Control with these
buttons
Rem.
HDD
DVR630HS_RL.book 47 ページ 2005年3月18日 金曜日 午前9時49分