


System Overview
D-73d Series Installation/Operation Manual 15
PRE
L
IMINAR
Y
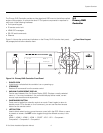
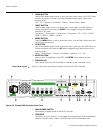
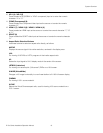
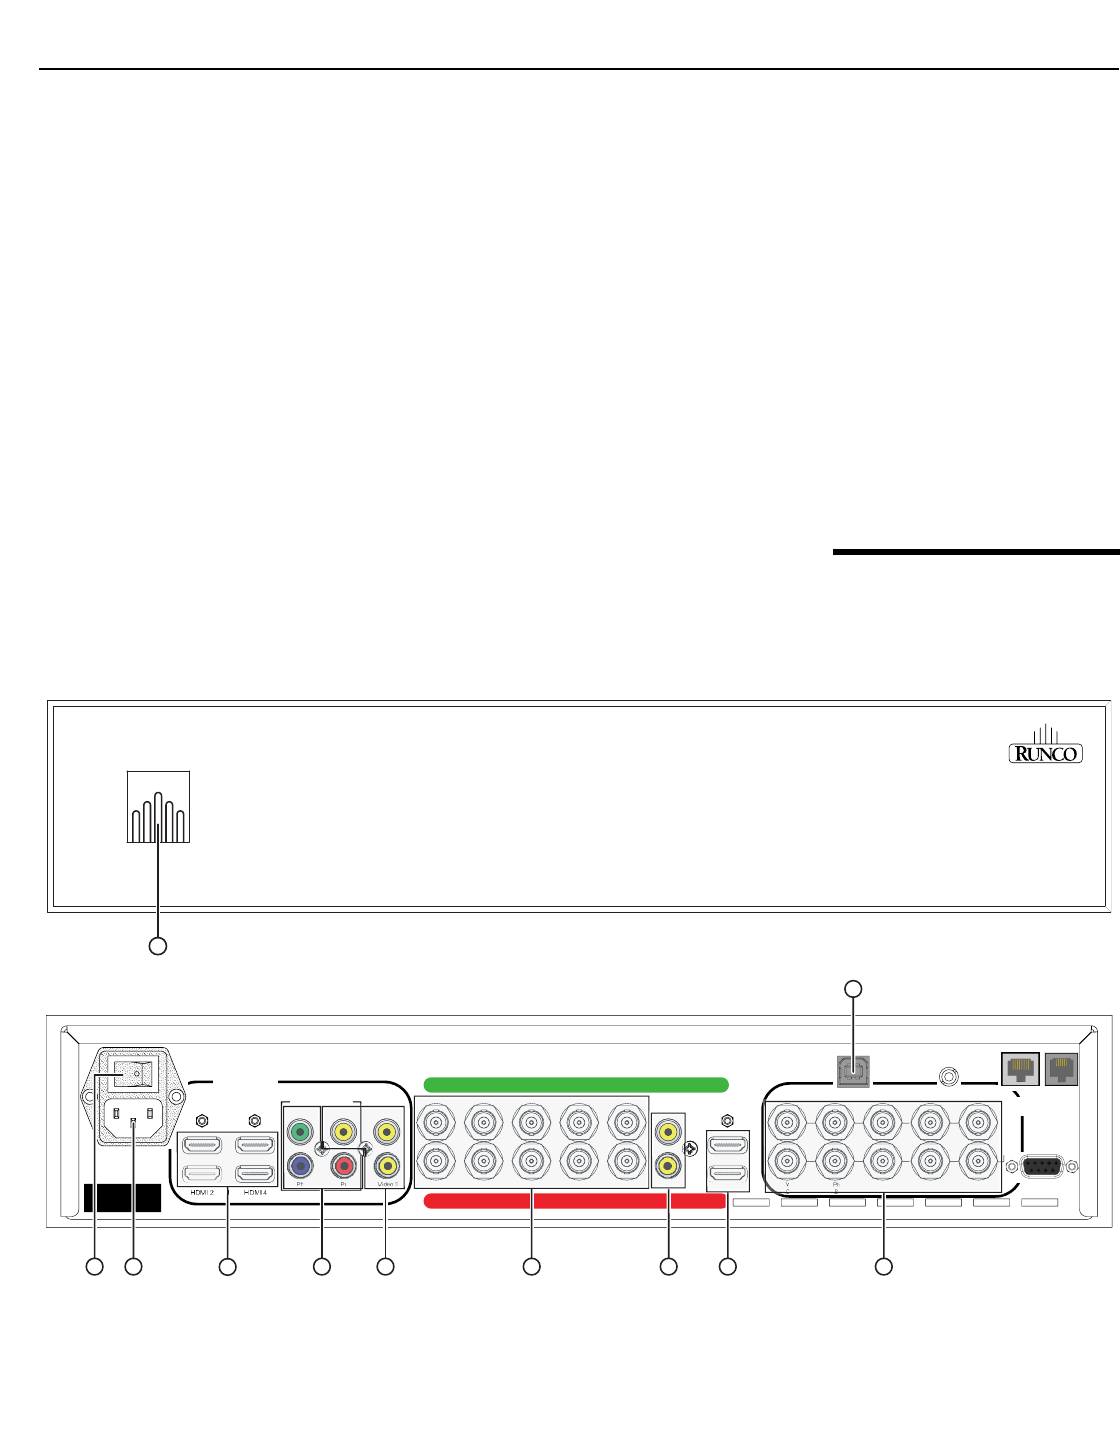
7. HD2 Input (5 x Analog BNCs)
Connect the HD 2 input to the Right Analog output on the 3Dimension Processor.
The HD 1 input is not used with the D-73d. Connect your Component/RGBHV
sources to the 3Dimension Processor.
8. Video 1 Input
Connect the Video 1 input to the Right Composite video output on the 3Dimension
Processor.
The Video 2 and Video 3 inputs are not used with the D-73d. Connect your
Composite video sources to the 3Dimension Processor.
9. HDMI 1 (Digital)
Connect the HDMI 1 input to the Right HDMI output on the 3Dimension Processor.
The HDMI 2, HDMI 3 and HDMI 4 inputs are not used with the D-73d. Connect
your HDMI sources to the 3Dimension Processor.
10. HDMI Out (To Display)
Connect this to the HDMI input on the “right eye” (bottom) optical engine on the
D-73d projector.
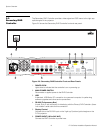
2.4
3Dimension Processor
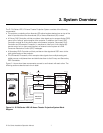
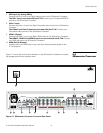
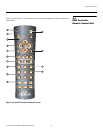
Figure 2-7 shows the controls and indicators on the 3Dimension Processor front panel;
the paragraphs that follow describe them.
Figure 2-7. 3Dimension Processor Front and Rear Panel
1
HD1
HD2
Y
G
Pb
B
Pr
R
HV
Pr
R
HV
INPUTS
INPUTS
RS-232
ABCDEFG
3Dimension
Processor
Component/SCART
Video 1 Video 2
Y
HDMI 1 HDMI 3
ABCDEFG
USB
IR
Vide
o1
Vide
o2
7
32
85 6
Pr
R
HV
H
H
G
B
R
HV
R
10
11
9
4
Y
p