


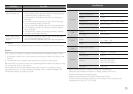

During Playlist playback, press the
button.
"
c
'
+
? \
><'
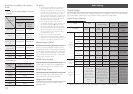
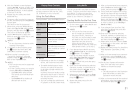
Press the ◀▶ buttons to select ,
, , or .
Press the
v
button.
Songs are played in the
order in which they
were recorded.
(
)
The current song is
repeated.
(
)
All songs are repeated.
(
)
Shuffle plays songs in
random order.
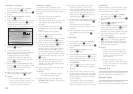
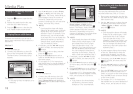
To move to the Music List, press the
5
or button.
The Music List screen appears.
c ( )'
a
Press the ▲▼
◀▶
buttons to move
to a desired track, and then press the
button. A check appears
on the track.
Repeat this procedure to select
additional tracks.
To remove a track from the list, move
to the track, and then press the
button again.
The check on the track is cancelled.
When done, press the
v
button.
The tracks you selected are displayed
on the right side of the screen. The
player plays the first track.
To change the play list, press the
@
button or button to return to
the Music List. Repeat Steps 2, 3, and 4.
To cancel the play list and return to
the Home screen, press the or
button.
✎
■
You can create a playlist with up to
99 tracks on Audio CDs (CD-DA).
■
If you remove all the tracks from
a play list and then press the
v
button, the player lists and plays all
the tracks on the disc.
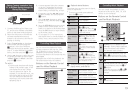
Lets you copy audio files from a data disc
to a USB/HDD device.
Open the disc tray. Place the audio
(CDDA) disc on the tray, and close the
tray. Insert a USB device into the USB
jack on the front of the product.
In Stop mode,
press the
▲▼◀▶
buttons to move to a desired track, and
then press the button. A
check appears on the track.
Repeat this procedure to select
additional tracks.
To remove a track from the list, move
to the track, and then press the
button again.
The check on the track is cancelled.
When done, press the button
and then select using the ▲▼
buttons, and then press the
v
button. The Rip pop-up appears.
Use the ▲▼ buttons to select the
device to store the ripped files to, and
then press the
v
button.
✎
■
Do not disconnect the device while
ripping is in progress.
If you want to cancel ripping, press the
v
button and then select . Select
to continue ripping.
When ripping is complete, the "Ripping
is completed." message appears.
Press the
v
button to go back to the
Playback screen.
✎
■
This function may not be supported
by some discs.
■
On the Ripping screen, you can also
choose and .
-
Use to select all tracks.
This cancels your individual track
selections.
-
Use l to deselect all
selected tracks at once.
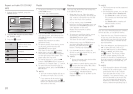
Lets you copy video/photo/music contents
from a data disc to a USB/HDD device.
Open the disc tray. Place the data disc
on the tray, and close the tray. Insert
a USB device into the USB jack on the
front of the product. The new device
pop-up appears.
Press the ▲ button, and then press the
◀▶ to select Blu-ray, DVD or CD.
Use the ▲▼ buttons to select ,
, or , and then press
the
v
button. The Photos, Videos
& Music screen appears listing the
content of the device. Depending on
how the contents is arranged, you will
see either folders, individual files, or
both.
✎
■
Even though the player will display
folders for all content types, it will
only display files of the Content
Type you selected in Step 3. For
example, if you selected music, you
will only be able to see music files.
You can change this selection by
returning to the Photos, Videos &
Music screen and repeating Step 3.