


E-12
Setup & Connections
Connecting other compatible computers
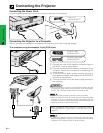
Connecting the Projector
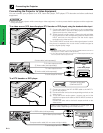
When connecting the projector to a compatible computer other than an IBM-PC (VGA/SVGA/XGA/SXGA/UXGA)
or Macintosh (i.e. Workstation), a separate cable may be needed. Please contact your dealer for more information.
When connecting this projector to a computer, select “Computer/RGB” for “Signal Type” on the GUI menu. (See page 40.)
• Connecting computers other than the recommended types may result in damage to the projector, the computer, or both.
• AUDIO INPUT accepts INPUT 1 or 2 port input.
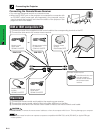
“Plug and Play” function
• This projector is compatible with VESA-standard DDC 1/DDC 2B when connecting to a 15-pin analog terminal
and VESA-standard DDC 2B when connecting to a 20-pin digital terminal. The projector and a VESA DDC
compatible computer will communicate their setting requirements, allowing for quick and easy setup.
• Before using the “Plug and Play” function, be sure to turn on the projector first and the connected computer last.
• The DDC, Plug and Play function of this projector operates only when used in conjunction with a VESA DDC compatible
computer.
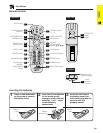
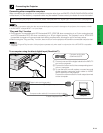
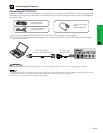
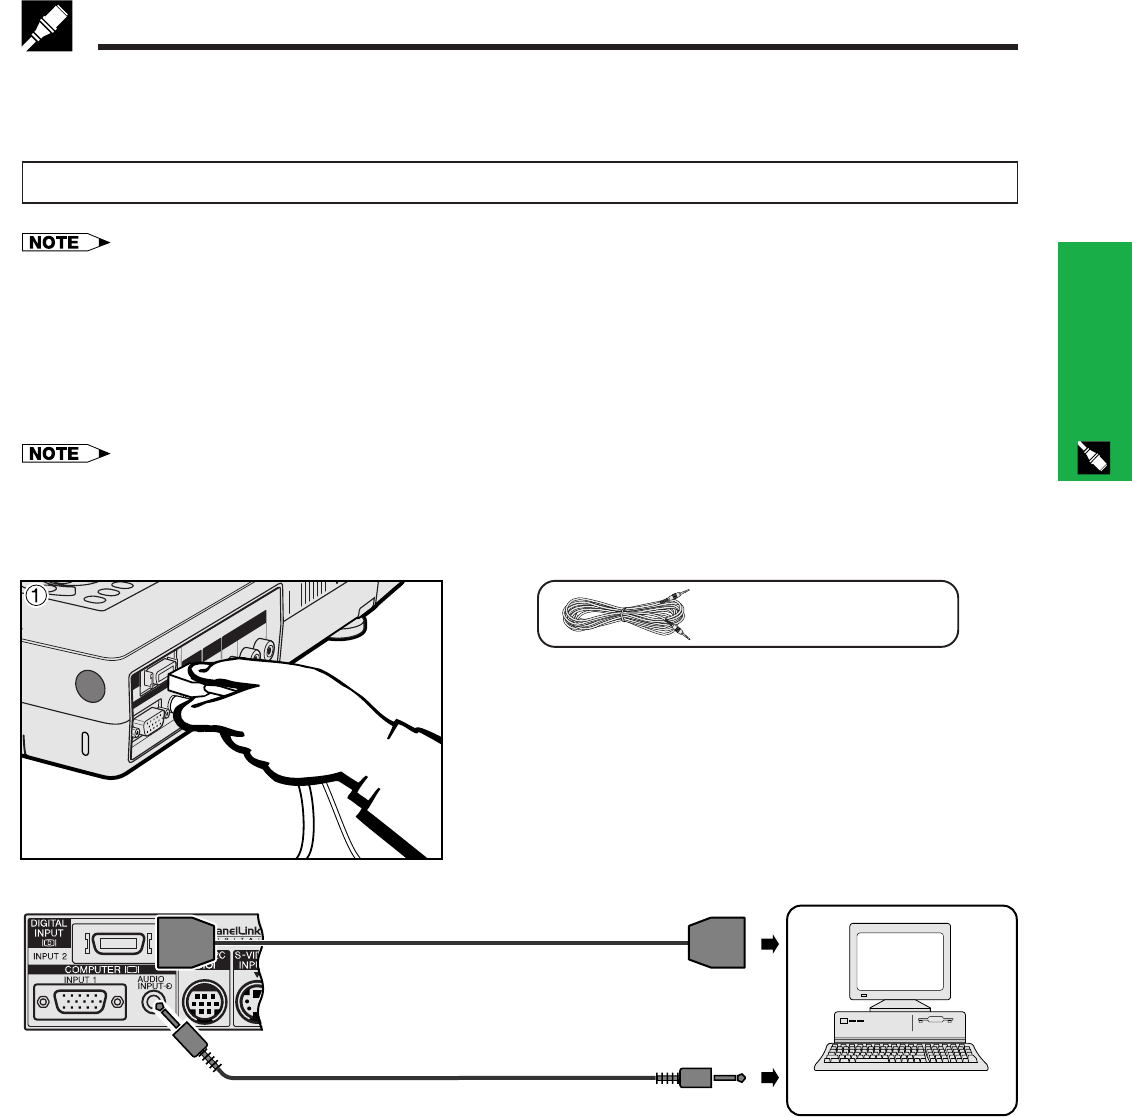
To a computer using the direct digital input (PanelLink™)
Computer audio cable
QCNW-4870CEZZ
1 Connect one end of the digital cable to the INPUT 2
port on the projector.
2 Connect the other end to the corresponding termi-
nal on a computer.
3 To use the built-in audio system, connect one and
of the supplied computer audio cable to AUDIO
INPUT terminal on the projector.
Connect the other end to the Audio output terminal
on the computer.
Digital cable (sold separately)
2 To digital output terminal
Computer audio cable (3.5 mm stereo minijack cable)
Computer
To audio output terminal