


35EN
Recording Disc Playback EditingBefore you start Connections Getting started
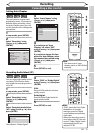
Changing the
Setup menu
OthersVCR functions
Recording
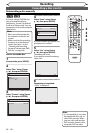
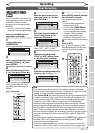
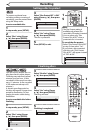
Satellite Link (cont’d)
Note
• If you have not set the clock, the clock setting window will appear at step 3. Follow to step 4 in “Clock
Setting” on page 22.
• You cannot set the End time for the Satellite Link Timer Recording on this unit.
• Recording picture will be distorted if the copy protection signal is being detected during Satellite Link
Timer Recording.
• When a regular Timer Recording and the Satellite Link Timer Recording are overlapped, those
recordings are recorded as illustrated below.
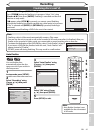
Example 2
Actual
Recording
Timer
Recording
Satellite Link
Example 3
Actual
Recording
Timer
Recording
Satellite Link
Example 1
Timer
Recording
Actual
Recording
Satellite Link
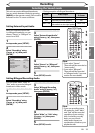
Settings for external equipment
Recording from external equipment
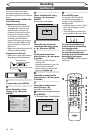
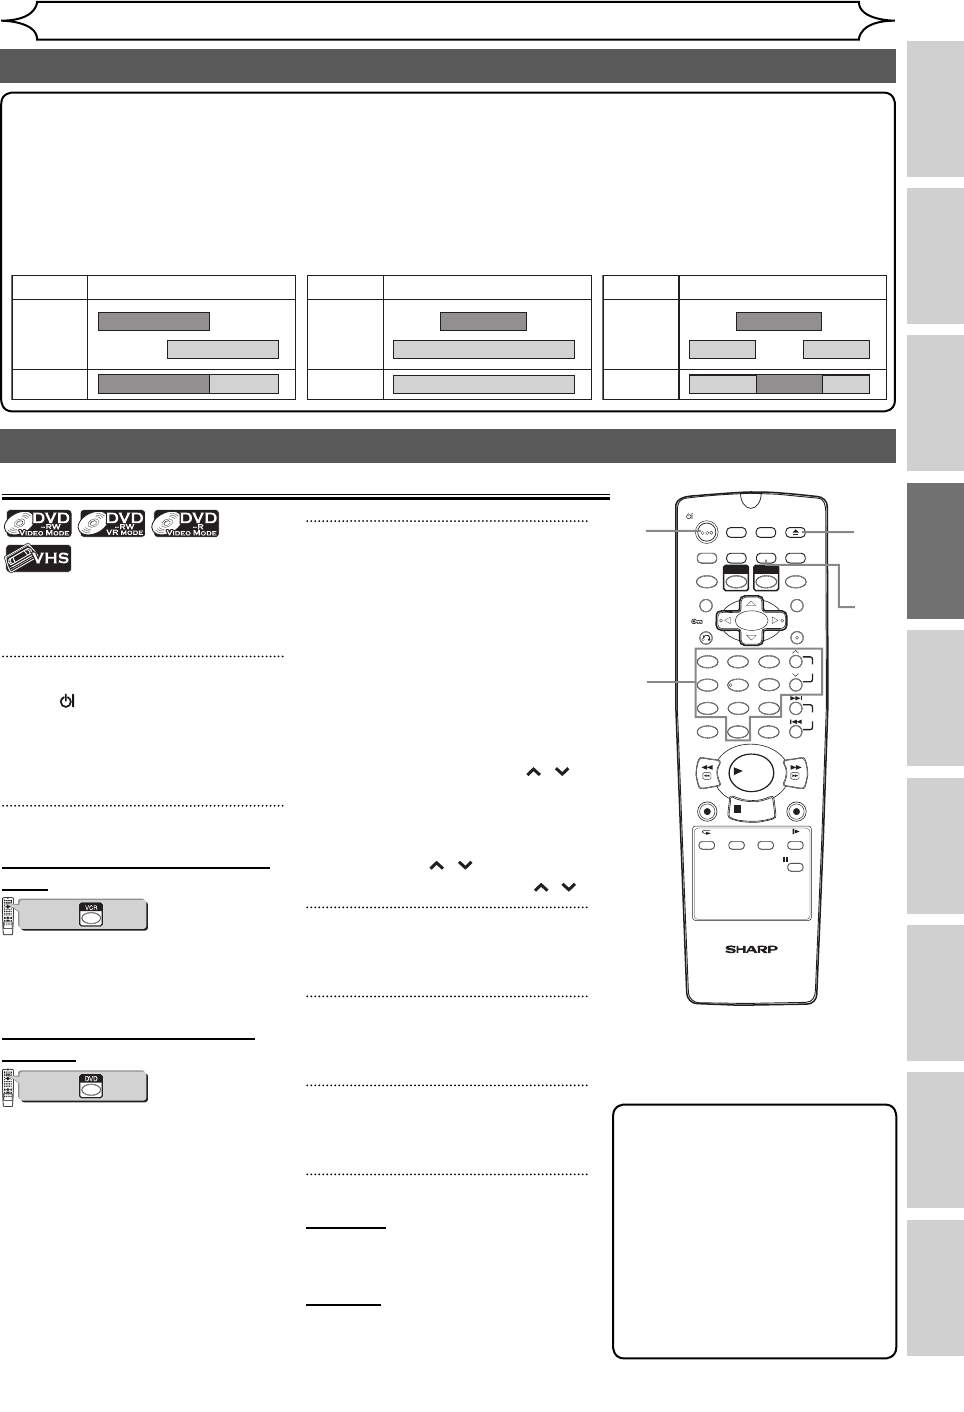
1 2 3
6
54
7
0
8 9
AUDIOREPEAT
PAUSE
SEARCH
SLOW
MENU LISTTOP MENU
STOP
PLAY
FWD
REV
SKIP
PROG.
CLEAR/C-RESET
VCR
REC/OTR
DVD
REC/OTR
PQRS TUV WXYZ
GHI JKL MNO
.@/: ABC DEF
SPACE DISPLAY
ENTER
ZOOM
REC MODE
VCR
RAPID PLAY
DVD
CM SKIP
SETUP
T-SET
OPEN/CLOSE
EJECT
TIMER PROG.
DUBBING
VCR/DVD RECORDER
COMBINATION
NB203ED
RETURN
OPERATE
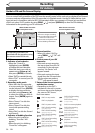
2
Before recording from external
equipment, see page 15 for
connection instructions.
1
Press [ OPERATE] to turn on
the unit.
Turn on the TV and be sure to
select the input to which the unit
is connected.
2
When you want to record to a
tape:
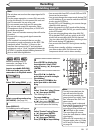
VCR/DVD COMBINATION
NA527AD
123
6
54
7
0
+10
89
STOP
PLAY
VCR
DVD
Press first.
Insert the tape with a record
tab into the cassette compart-
ment.
When you want to record to
the disc:
VCR/DVD COMBINATION
NA527AD
123
6
54
7
0
+10
89
STOP
PLAY
VCR
DVD
Press first.
Press [OPEN/CLOSE EJECT A] to
open the disc tray, then place
the disc to record on.
Press [OPEN/CLOSE EJECT A]
again to close the disc tray.
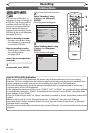
3
Select the external input mode
to which the external equip-
ment is connected. (AV1, AV2,
AV3 or AV4)
To use the Scart terminal or
input jacks on the rear of this
unit;
To select the “AV1”, or “AV2”,
press [0], [0], [1] or [0], [0], [2]
accordingly or use [PROG. / ].
To use the input jacks on the
front of this unit;
To select “AV3”, press [0], [0], [3]
or use [PROG. / ].
To select “AV4”, use [PROG. / ].
4
Select a recording mode using
[REC MODE]. (See page 24.)
5
Press [REC/OTR] (VCR or DVD)
on the unit to start recording.
6
Press the PLAY button on the
external recording component.
7
For tape:
Press [STOP C/EJECT A] on the
unit to stop recording.
For disc:
Press [STOP C] on the unit to
stop recording.
3
1
Note
• During recording, if a signal
other than PAL is detected
(such as NTSC), recording is
paused.
• If you want to monitor the
programme that you are
recording, make sure the
device such as Satellite
Box is turned off when it is
connected to AV2.
4