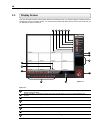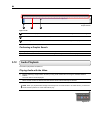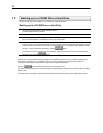
55
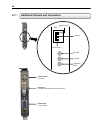
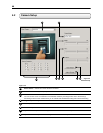
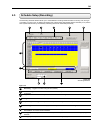
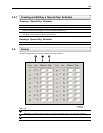
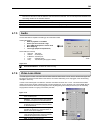
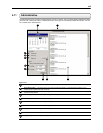
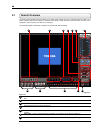
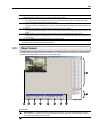
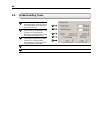
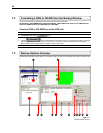
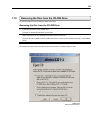
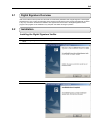
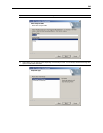
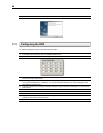
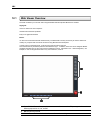
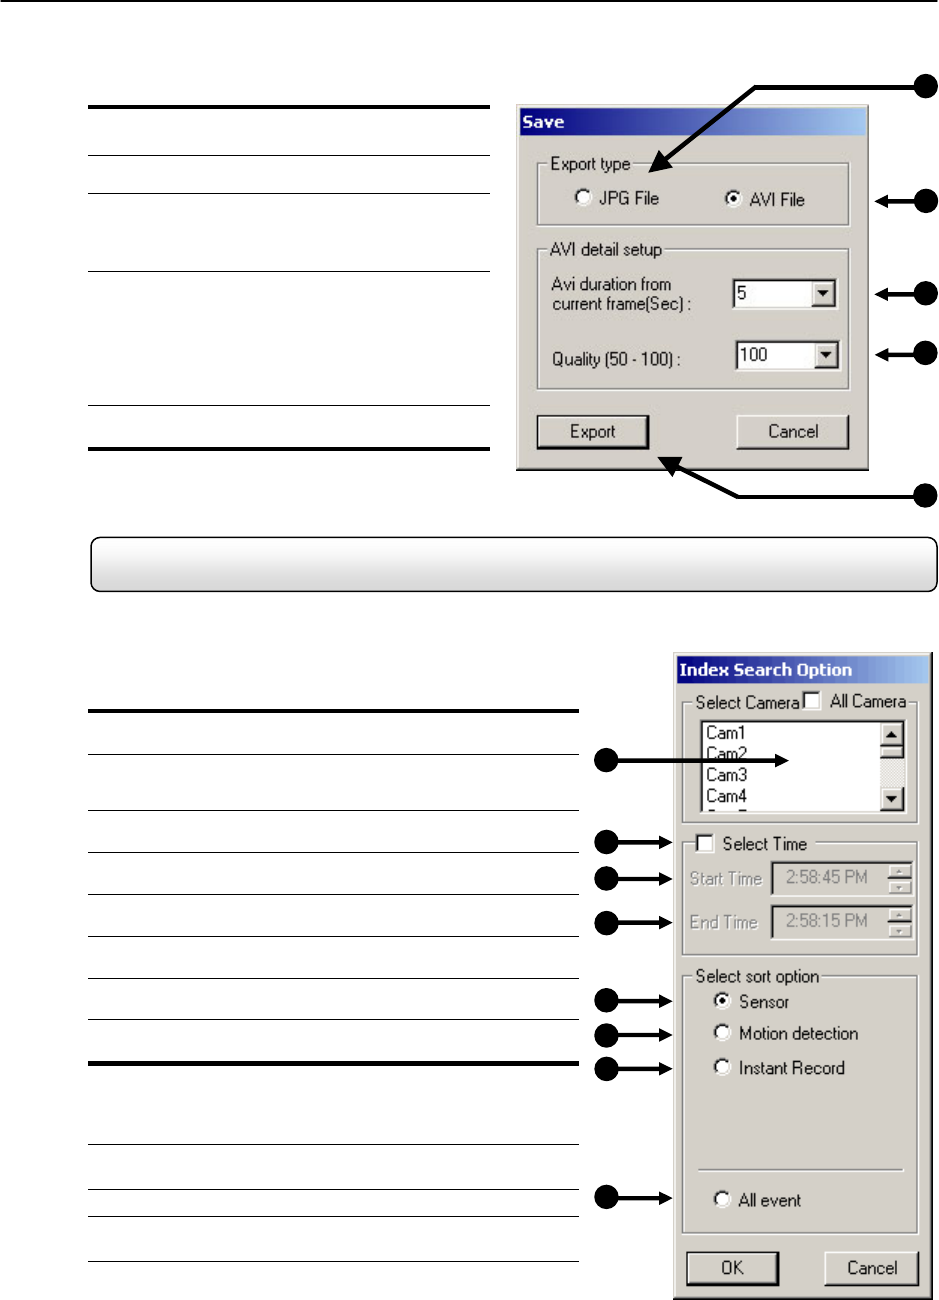
1 JPG File – Saving to a JPG File allows you to
export a single image (or frame).
2. AVI File– Saving to an AVI File allows you to save
a video clip.
3.
AVI Duration – Allows you to enter a duration to
record the AVI for (in seconds). Although 100
Seconds is the longest displayed, you can
manually enter a longer time.
4.
Image Quality – Often times it is necessary to
reduce the overall size of an AVI file (When you
wish to email it to someone for example). You can
do this by reducing the image quality. By reducing
the image quality, the AVI video appears more
Pixilated. When size is not an issue setting the
quality to 100 is highly recommended.
5.
Export – The Export button begins the saving
process.
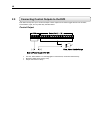
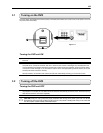
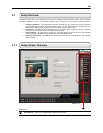
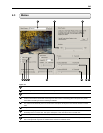
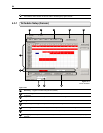
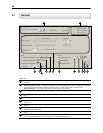
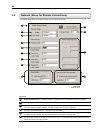
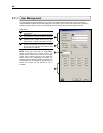
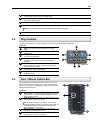
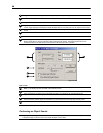
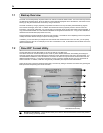
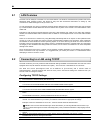
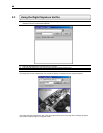
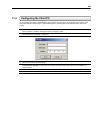
5.8 Index Search
Using the Index Search can greatly decrease the amount of time spent searching through saved video. The Index
Search allows you to perform a search based on criteria such as Sensor, Motion and Instant Record events.
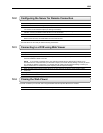
1. Select Camera – Allow you to either select a single camera to
search or select all the cameras at once.
2. Select Time – The default search time is 24 Hours. If this
option is select then a Start Time and End Time must be
entered.
3.
Start Time – Specifies the Start Time for the Index Search.
4.
End Time – Specifies the End Time for the Index search.
5.
Sensor – Searches by all sensor events on the selected
camera(s).
6.
Motion Detection – Searches by all Motion events on the
selected camera(s).
7.
Instant Record – Searches by all Instant Recording events on
the selected camera(s).
8.
All Event – Searches on all events for the selected camera(s)
(Sensor, Motion, and Instant Recording.
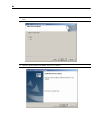
Performing an Index Search
1) Begin by Selecting the Index Search Button. The Index Search
Option Box should open.
2) Select a single camera or select the ALL cameras option.
3) Select the SELECT TIME option to specify a specific time to
search or leave it unchecked to default to the current day.
4) Select an Event to search on. (Sensor, Motion, Instant Record,
or ATM/POS). If you select ATM/POS you have the option to
enter a specific transaction number. If no transaction number is
entered all transaction will be displayed.
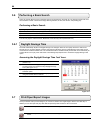
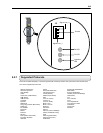
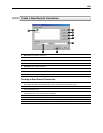
Figure 5.7.2
1
2
3
4
5
Figure 5.7.2
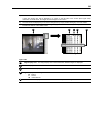
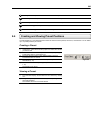
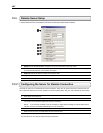
Figure 5.8a
1
Figure 5.8a
2
3
4
5
6
7
8