


116 EN
TROUBLESHOOTING
Symptom Remedy
D
V
D
The unit starts playing back the disc
automatically.
• The DVD-video features an auto playback function.
Some functions such as stop, search,
or slow-motion playback cannot be
performed.
• Depending on the disc, you may not be able to do some of the
operations. Refer to the instruction manual supplied with the disc.
The language for the sound track
cannot be changed.
• The title does not have the multilingual audio tracks.
• The DVD-video prohibits the changing of the language for the sound
track.
The subtitle language cannot be
changed or turned off.
• Multilingual subtitle are not recorded on the DVD-video.
The angles cannot be changed. • Multi-angles are not recorded on the DVD-video being played back.
• The angle-change operation is whenever possible as long as the disc
contains a multi-angle portion. Actual change will be performed when
the portion has come up.
• The DVD-video prohibits changing angles.
• Try changing the angle using the DVD-video’s menu.
Recording does not stop immediately
after you press [STOP C].
• It may take a few seconds for the unit to input disc data before
recording stops.
The disc tray does not open when you
press [OPEN/CLOSE A].
• It may take a few seconds for the disc tray to open after you have recorded
or edited a disc. This is because the unit is adding disc data to the disc.
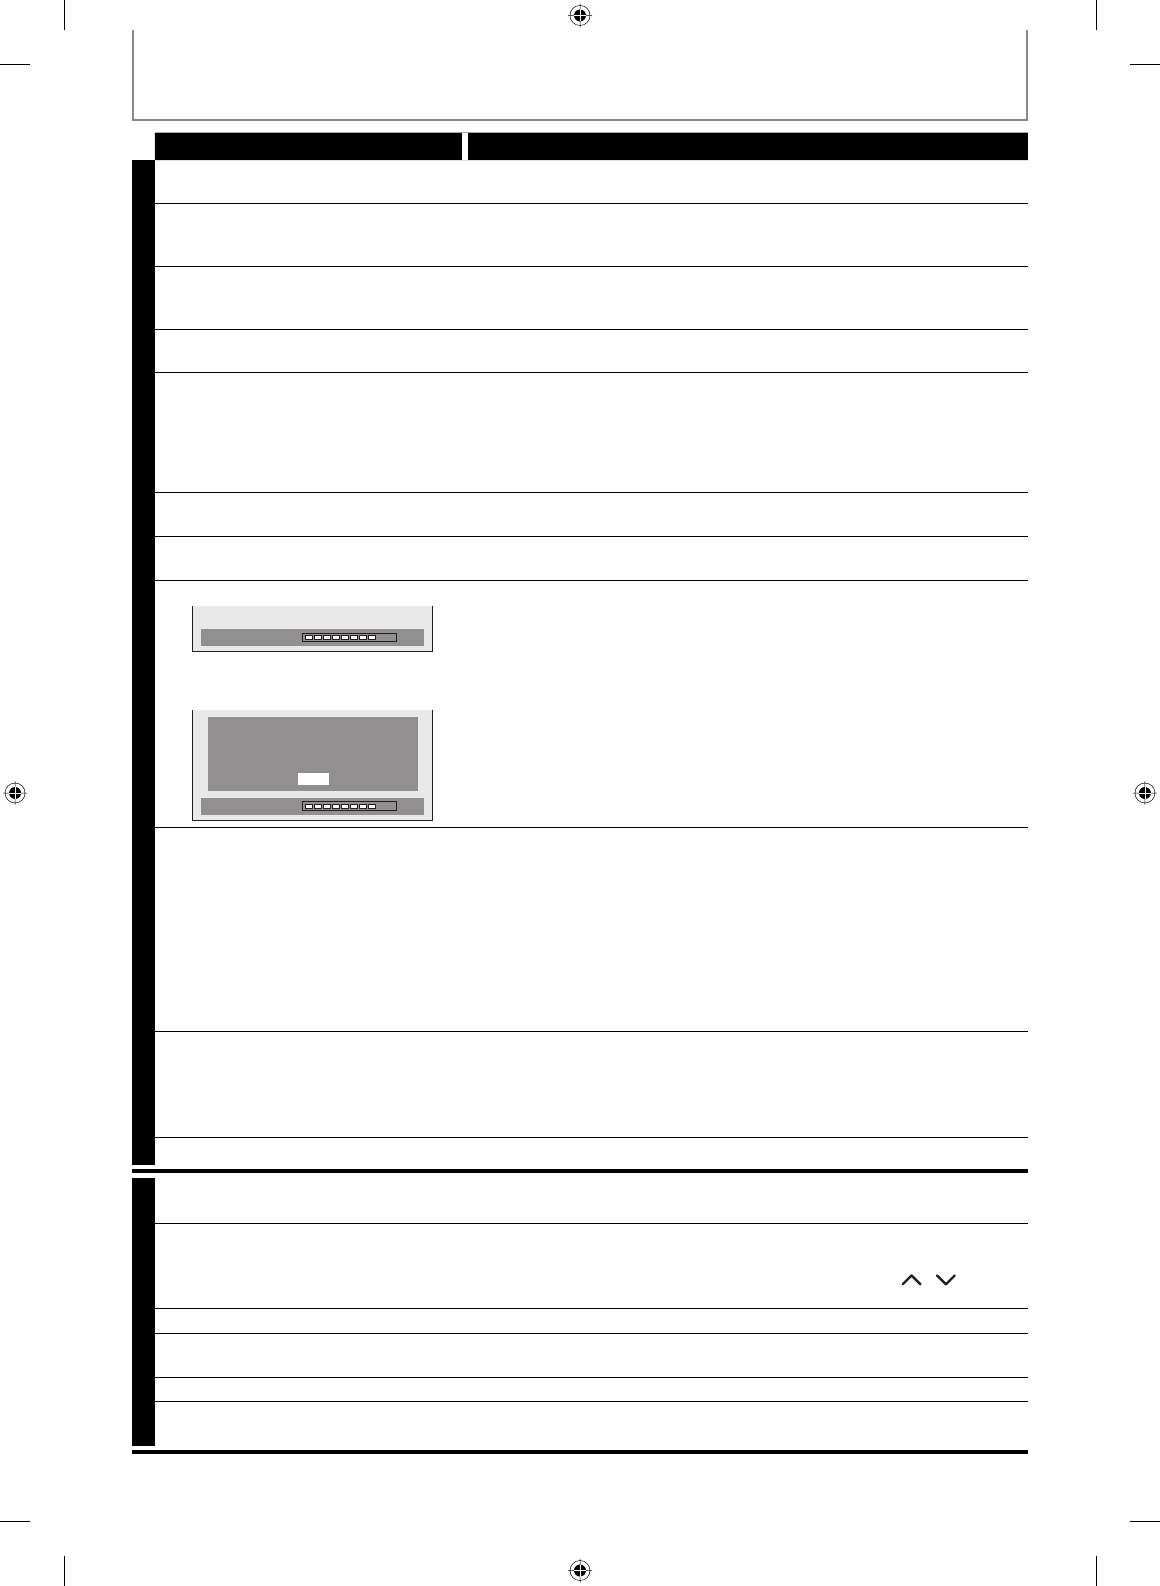
“Repairing” appears on the TV screen.
Repairing
• If there is a power failure or unplugging during recording, finalizing,
formatting or editing (even after “Repairing” disappears), a repairing
process will begin automatically just after turning the unit on again.
It may take several minutes up to about several hours.
In a case you intend to cancel the
repairing process.
Repairing
Do you want to cancel a repairing
process ? When selecting “Yes”,
the disc may not be usable.
Yes
No
• If you intend to cancel the repairing process, press [A OPEN/CLOSE]
on the front panel, then select “Yes” and press [ENTER]. After that, press
[OPEN/CLOSE A] to take out the disc. The disc canceled during the
repairing process MAY NOT work.
No image from HDMI connection.
• Check the HDMI connection. (Check the status of the HDMI related indications.)
• Check whether the connected monitor device or other device supports
HDCP. (This unit will not output a video signal unless the other device
supports HDCP.)
• Check the setting of HDMI.
• Check whether the output format of this unit (HDMI FORMAT) matches
the supported input format of other connected device.
• If the unit is connected to the unauthorized display device with an
HDMI cable, the audio/video signal may not be output when playing
back a commercial DVD-video.
There is no sound or the sound is
distorted.
• The HDMI sound is not output when “HDMI Audio” is set to “OFF”.
• Check the RCA audio cable connection. If you are using HDMI-DVI
conversion cable, you must connect the RCA audio cable, too.
• Check whether the output format of this unit (HDMI FORMAT) matches
the supported input format of other connected device.
Setup menu cannot be called up. • Setup menus cannot be called up during DVD recording and playback.
V
C
R
There is no picture. • If you connect the cable to S-VIDEO OUT/ COMPONENT VIDEO OUT /
HDMI OUT jack, connect it to AUDIO / VIDEO OUT jack instead.
Picture noise appears. • Head cleaning for VCR may be necessary. Refer to “Auto head cleaning”
(page 5).
• Adjust tracking control for better picture by pressing [CH
/ ] while
you are playing back a cassette tape.
The cassette tape does not play back. • No cassette tape is inserted.
The tape ejected after you press
[REC I].
• Make sure the cassette tape has an erase-protection tab when you record
to a cassette tape. If needed, cover the hole with cellophane tape.
The remote control does not function. • Check if a cassette tape is in this unit.
The motor rotates even when
playback / recording is stopped.
• The motor may rotate for the duration of approximately 5 minutes for
efficient operation. This is not a malfunction.