108 Chapter 11
Routine Maintenance
(2) If the problem remains, make sure that ink remains in the ink tank. Then turn off the
machine’s power for at least 24 hours, and perform deep cleaning of the Print Head
again.
(3) If the problem still remains, the Print Head may be damaged. Contact the Canon
Customer Care Center
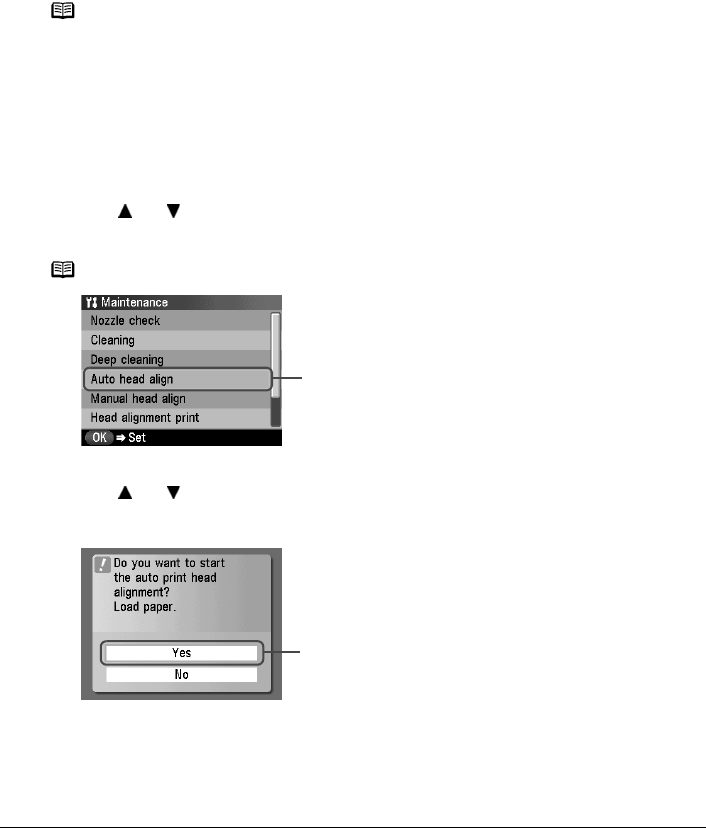
Aligning Print Head automatically
If the ruled lines are shifted after running the Print Head maintenance, align the Print Head.
There are two ways to align the Print Head, automatic or manual. First, try adjusting the Print
Head automatically. If the automatic Print Head alignment does not work or if you wish, you can
adjust the Print Head manually. See “Adjusting the Print Head Manually” on page 117.
1 Press [ON/OFF] to turn on the machine.
See “Turning on the Machine” on page 17.
2 Execute automatic Print Head alignment.
(1) Display the Maintenance screen.
See “Performing Maintenance” on page 103.
(2) Use [ ] or [ ]
to select <Auto head align> and then press [OK].
The confirmation screen is displayed.
(3) Load two sheets of A4- or Letter-sized plain paper in the Auto Sheet Feeder.
(4) Use [ ] or [ ]
to select <Yes> and then press [OK].
A pattern is printed and the Print Head is automatically aligned. It takes about five
minutes until printing completes.
Note
z The Cassette does not feed paper for aligning the Print Head. Load
paper in the Auto Sheet Feeder.
z Ensure that the Inner Cover is closed.
Note
Select <Head alignment print> to print the current adjustment values.
(2)
(4)


